Compare commits
246 Commits
| Author | SHA1 | Date | |
|---|---|---|---|
 Deshraj Yadav Deshraj Yadav
|
c77a75dfb5 | ||
|
Deshraj Yadav
|
6518c0c06b | ||
|
Deshraj Yadav
|
09cdaff9a2 | ||
|
Deshraj Yadav
|
56bf33ab7f | ||
|
Deshraj Yadav
|
752f638cfc | ||
|
Deshraj Yadav
|
92dd7edb57 | ||
|
Deshraj Yadav
|
b4bb4cf053 | ||
|
Deshraj Yadav
|
f0400e928a | ||
|
Deshraj Yadav
|
aa5ad625af | ||
|
Deshraj Yadav
|
f8f69eab03 | ||
|
João Moura
|
2b2263acaa | ||
|
Deshraj Yadav
|
5e2e7fb639 | ||
|
Deshraj Yadav
|
6c12bc9044 | ||
|
Saurabh Misra
|
9a11683003 | ||
|
Deshraj Yadav
|
38b4e06963 | ||
|
Deshraj Yadav
|
0766a44ccf | ||
|
Deshraj Yadav
|
036bf3a161 | ||
|
UnMonsieur
|
41bd258b93 | ||
|
Deshraj Yadav
|
38e212c721 | ||
|
Deshraj Yadav
|
2f285ea00a | ||
|
Dhravya Shah
|
d38120c839 | ||
|
Michael
|
d94aee812b | ||
|
Rishiraj2594
|
68d650ec40 | ||
|
Rishiraj2594
|
769d926f5a | ||
|
Oskar
|
9478bab04e | ||
|
Deshraj Yadav
|
7ad4af250f | ||
|
Deshraj Yadav
|
9fa368b114 | ||
|
Deshraj Yadav
|
4afef04f26 | ||
|
Thomas T
|
8fe2c3effc | ||
|
Deshraj Yadav
|
fa78c972be | ||
|
Deshraj Yadav
|
0e66261644 | ||
|
Juanan Pereira
|
819650a254 | ||
|
Taranjeet Singh
|
34c41c87dc | ||
|
Deshraj Yadav
|
2985b667b0 | ||
|
Taranjeet Singh
|
31bb0e7f0f | ||
|
Taranjeet Singh
|
8f28264aec | ||
|
Taranjeet Singh
|
ec4fb11aa5 | ||
|
Deven Patel
|
b210723de1 | ||
|
Deven Patel
|
433f99dd78 | ||
|
Deven Patel
|
e75c05112e | ||
|
Taranjeet Singh
|
d2a5b50ff8 | ||
|
Deven Patel
|
120690afd4 | ||
|
Deven Patel
|
344dbeee42 | ||
|
Taranjeet Singh
|
3fe3b0320a | ||
|
Deven Patel
|
75896b647f | ||
|
Peter Jausovec
|
446d0975aa | ||
|
Deven Patel
|
b7d365119c | ||
|
Deven Patel
|
2d9fbd4e49 | ||
|
Deven Patel
|
22e14b5e65 | ||
|
Deven Patel
|
1a654beea4 | ||
|
Deven Patel
|
f50f8a444a | ||
|
Deven Patel
|
3cc3a0058d | ||
|
Taranjeet Singh
|
ae473b5e3c | ||
|
Deven Patel
|
efb7e31565 | ||
|
Deven Patel
|
069d265338 | ||
|
Taranjeet Singh
|
751a3a4bd1 | ||
|
Deven Patel
|
cb0499407e | ||
|
Deven Patel
|
9afc6878c8 | ||
|
Deven Patel
|
0b5b12575a | ||
|
aryankhanna475
|
d79d30bf0c | ||
|
Deven Patel
|
59600e2a5b | ||
|
Deven Patel
|
e572b5a3dc | ||
|
Juanan Pereira
|
5b46daaee4 | ||
|
Deven Patel
|
2784bae772 | ||
|
Deshraj Yadav
|
325e11f0de | ||
|
Deven Patel
|
7444f59e3c | ||
|
Deshraj Yadav
|
affe319460 | ||
|
Deshraj Yadav
|
862ff6cca6 | ||
|
Deven Patel
|
c020e65a50 | ||
|
Deven Patel
|
f582c1fe25 | ||
|
Deshraj Yadav
|
785929c502 | ||
|
Deshraj Yadav
|
68ec6615b1 | ||
|
Deven Patel
|
e2cca61cd3 | ||
|
Deshraj Yadav
|
69e83adae0 | ||
|
Deshraj Yadav
|
9e24aee40d | ||
|
Christian Clauss
|
3cff5e9898 | ||
|
Deshraj Yadav
|
f3553040bc | ||
|
Christian Clauss
|
2b13984e11 | ||
|
Sandra Serrano
|
0de9491c61 | ||
|
Deshraj Yadav
|
c9df7a2020 | ||
|
Deshraj Yadav
|
a7222e8c50 | ||
|
Deshraj Yadav
|
0373fa231c | ||
|
Deshraj Yadav
|
5f653e69ae | ||
|
Sandra Serrano
|
2496ed133e | ||
|
Madison Ebersole
|
62c0c52e31 | ||
|
Deven Patel
|
e36198dcc2 | ||
|
Deshraj Yadav
|
5fa6221f91 | ||
|
YusukeJustinNakajima
|
f7696d1dc1 | ||
|
Christian Clauss
|
1878f8d4fc | ||
|
Deshraj Yadav
|
6c69ddef9b | ||
|
Deshraj Yadav
|
0c45020d81 | ||
|
Deven Patel
|
4dfce44c1a | ||
|
Deven Patel
|
1b661bb2fd | ||
|
Deven Patel
|
73e726f6e3 | ||
|
Deven Patel
|
f58bbeffce | ||
|
Deven Patel
|
99261e5fb5 | ||
|
Deshraj Yadav
|
b4a59d1bd5 | ||
|
Deshraj Yadav
|
5c1f78879f | ||
|
Sandra Serrano
|
94ba82f2a2 | ||
|
Joe Sleiman
|
b4ec14382b | ||
|
Ikko Eltociear Ashimine
|
38ad57a22c | ||
|
Deshraj Yadav
|
60bbc180ba | ||
|
Taranjeet Singh
|
a67d902b85 | ||
|
Deven Patel
|
ae2e9cb890 | ||
|
Deven Patel
|
1976d38b25 | ||
|
Deshraj Yadav
|
f5e3410e9a | ||
|
Taranjeet Singh
|
2f6ba642c7 | ||
|
Taranjeet Singh
|
dd9b72dc62 | ||
|
Taranjeet Singh
|
dd258c14b5 | ||
|
Deven Patel
|
295cd3fac6 | ||
|
Sidharth Mohanty
|
c62663f2e4 | ||
|
Taranjeet Singh
|
367d6b70e2 | ||
|
Taranjeet Singh
|
27236bd1b2 | ||
|
Deven Patel
|
6a82eb4287 | ||
|
Logie
|
bd88fe3980 | ||
|
Deven Patel
|
4f70fea6df | ||
|
Sidharth Mohanty
|
aee5bbb44b | ||
|
Deven Patel
|
a304ded500 | ||
|
Deshraj Yadav
|
a54dde0509 | ||
|
Taranjeet Singh
|
52b4577d3b | ||
|
Taranjeet Singh
|
e199f57279 | ||
|
Taranjeet Singh
|
dec12b33a6 | ||
|
Deven Patel
|
04daa1b206 | ||
|
Deven Patel
|
a7e1520d08 | ||
|
Deshraj Yadav
|
9e2b232c13 | ||
|
Sidharth Mohanty
|
404e73af77 | ||
|
Sidharth Mohanty
|
a544b4d3ff | ||
|
Sidharth Mohanty
|
6df63d9ca7 | ||
|
Deshraj Yadav
|
904baac153 | ||
|
Deven Patel
|
a926bcc640 | ||
|
Deven Patel
|
c0aafd38c9 | ||
|
Deven Patel
|
19d80914df | ||
|
Sidharth Mohanty
|
d9d529987e | ||
|
Deven Patel
|
12e6eaf802 | ||
|
Taranjeet Singh
|
7a026ea282 | ||
|
Taranjeet Singh
|
97dc90169b | ||
|
Sidharth Mohanty
|
64c02f374a | ||
|
Sukkrit Sharma
|
6c1ea7799e | ||
|
Deshraj Yadav
|
6be29f5bed | ||
|
Deven Patel
|
68737da7a2 | ||
|
Deven Patel
|
da388b679f | ||
|
Sidharth Mohanty
|
11f0d719f5 | ||
|
Deshraj Yadav
|
e90673ae5b | ||
|
Deven Patel
|
f055028c6b | ||
|
Prikshit
|
106a338371 | ||
|
Deven Patel
|
9fe80c5cca | ||
|
Deshraj Yadav
|
050706e95e | ||
|
Sidharth Mohanty
|
6d2389de1c | ||
|
Dhravya Shah
|
dd97fad5a4 | ||
|
Sukkrit Sharma
|
0f73ba9677 | ||
|
Sidharth Mohanty
|
210fe9bb80 | ||
|
Sidharth Mohanty
|
ec8549d0e1 | ||
|
Deven Patel
|
b77d9d750f | ||
|
Deshraj Yadav
|
a10823d309 | ||
|
Sidharth Mohanty
|
3a09c2bd62 | ||
|
Sidharth Mohanty
|
a1394ce32e | ||
|
Sidharth Mohanty
|
1020a4121f | ||
|
Sidharth Mohanty
|
737837ae0b | ||
|
Deshraj Yadav
|
7ee2d0653b | ||
|
Deshraj Yadav
|
43926fb527 | ||
|
Deshraj Yadav
|
7bcc9e35dd | ||
|
Deshraj Yadav
|
6437661837 | ||
|
Sidharth Mohanty
|
b5f84f27ff | ||
|
Sidharth Mohanty
|
48c38b5dc3 | ||
|
Sidharth Mohanty
|
b4f3bbbbc9 | ||
|
Deshraj Yadav
|
3cd50c4cd9 | ||
|
Sidharth Mohanty
|
cd2c40a9c4 | ||
|
Sidharth Mohanty
|
33dcfe42b5 | ||
|
Deven Patel
|
db37b2ac15 | ||
|
Sidharth Mohanty
|
bee4e834b1 | ||
|
Sidharth Mohanty
|
0272459435 | ||
|
Deven Patel
|
c0b5e93967 | ||
|
Sidharth Mohanty
|
6983ebba49 | ||
|
Sidharth Mohanty
|
9943d1e015 | ||
|
Sidharth Mohanty
|
b348251484 | ||
|
xuxiang
|
e719b5bac3 | ||
|
Sidharth Mohanty
|
54f43215cd | ||
|
Deven Patel
|
b246d9823e | ||
|
Deven Patel
|
65c8dd445b | ||
|
Deven Patel
|
0efbc80ac9 | ||
|
Deven Patel
|
151746beec | ||
|
Deven Patel
|
c0ee680546 | ||
|
Sidharth Mohanty
|
9303a1bf81 | ||
|
Deshraj Yadav
|
d54cdc5b00 | ||
|
Sidharth Mohanty
|
b7a44ef472 | ||
|
Deven Patel
|
ae6f866901 | ||
|
Sidharth Mohanty
|
7910cee259 | ||
|
Deshraj Yadav
|
d66e647f99 | ||
|
Deven Patel
|
ff4a333be7 | ||
|
Deshraj Yadav
|
111749a95d | ||
|
Deshraj Yadav
|
adde398b65 | ||
|
Sidharth Mohanty
|
d8897ce356 | ||
|
Deven Patel
|
0ea8ab228c | ||
|
Sidharth Mohanty
|
d62a23edf6 | ||
|
Sidharth Mohanty
|
51ebf3439b | ||
|
Deven Patel
|
4a5ed1dd8d | ||
|
Deven Patel
|
e84b5034ea | ||
|
Deven Patel
|
a4831d6ed9 | ||
|
Deven Patel
|
51b4966801 | ||
|
atkinsh
|
1d4e00ccef | ||
|
Deven Patel
|
c9fbc2e7d6 | ||
|
Deshraj Yadav
|
fa34788df6 | ||
|
Deven Patel
|
0f4f220119 | ||
|
Deven Patel
|
512cfc9466 | ||
|
Deshraj Yadav
|
541b1cb7c7 | ||
|
Deven Patel
|
36af1a7615 | ||
|
Deshraj Yadav
|
b02e8feeda | ||
|
Deven Patel
|
406c46e7f4 | ||
|
Sidharth Mohanty
|
e35eaf1bfc | ||
|
Sidharth Mohanty
|
38426a7af1 | ||
|
Deshraj Yadav
|
141a23fb1e | ||
|
Sidharth Mohanty
|
bb28569abf | ||
|
Deshraj Yadav
|
1df46b2bb3 | ||
|
Deshraj Yadav
|
58f72e1ffe | ||
|
Deshraj Yadav
|
33409140b4 | ||
|
Deshraj Yadav
|
f6b80e01a1 | ||
|
Sidharth Mohanty
|
798d3fcc5a | ||
|
Sidharth Mohanty
|
85f3ac428b | ||
|
Deshraj Yadav
|
9fcf2130b5 | ||
|
Taranjeet Singh
|
51df00729e | ||
|
Deven Patel
|
023a61446f | ||
|
Deshraj Yadav
|
e0b73e6a5a | ||
|
Deven Patel
|
28460f725c | ||
|
Deshraj Yadav
|
c93e49d2b8 | ||
|
Deven Patel
|
07fb6bee54 | ||
|
Deshraj Yadav
|
3fa7db8420 | ||
|
Deven Patel
|
c14bd7b73b | ||
|
Sidharth Mohanty
|
5201beaab0 | ||
|
Sidharth Mohanty
|
122313d8a5 | ||
|
Deven Patel
|
82fd595306 | ||
|
Deven Patel
|
95c0d47236 | ||
|
Deven Patel
|
919cc74e94 | ||
|
Deshraj Yadav
|
d839991acb | ||
|
Deven Patel
|
539286aafd | ||
|
Sidharth Mohanty
|
23522b7b55 | ||
|
UnMonsieur
|
bf3fac56e4 | ||
|
Deshraj Yadav
|
a5bf8e9075 | ||
|
Deshraj Yadav
|
1d31b8f7e4 | ||
|
Deshraj Yadav
|
b144c7dccc | ||
|
Deshraj Yadav
|
1364975396 | ||
|
Deven Patel
|
deaa7f50f8 | ||
|
Sidharth Mohanty
|
744ab5156f | ||
|
Sidharth Mohanty
|
c45413969a | ||
|
Deshraj Yadav
|
b314e5e080 | ||
|
Deshraj Yadav
|
17129e2eaa | ||
|
Deven Patel
|
654fd8d74c |
@@ -5,7 +5,7 @@ body:
|
||||
- type: markdown
|
||||
attributes:
|
||||
value: >
|
||||
#### Before submitting a bug, please make sure the issue hasn't been already addressed by searching through [the existing and past issues](https://github.com/gventuri/pandas-ai/issues?q=is%3Aissue+sort%3Acreated-desc+).
|
||||
#### Before submitting a bug, please make sure the issue hasn't been already addressed by searching through [the existing and past issues](https://github.com/embedchain/embedchain/issues?q=is%3Aissue+sort%3Acreated-desc+).
|
||||
- type: textarea
|
||||
attributes:
|
||||
label: 🐛 Describe the bug
|
||||
|
||||
@@ -3,7 +3,15 @@ name: ci
|
||||
on:
|
||||
push:
|
||||
branches: [main]
|
||||
paths:
|
||||
- 'embedchain/**'
|
||||
- 'tests/**'
|
||||
- 'examples/**'
|
||||
pull_request:
|
||||
paths:
|
||||
- 'embedchain/**'
|
||||
- 'tests/**'
|
||||
- 'examples/**'
|
||||
|
||||
jobs:
|
||||
build:
|
||||
@@ -31,7 +39,7 @@ jobs:
|
||||
path: .venv
|
||||
key: venv-${{ runner.os }}-${{ hashFiles('**/poetry.lock') }}
|
||||
- name: Install dependencies
|
||||
run: poetry install --all-extras
|
||||
run: make install_all
|
||||
if: steps.cached-poetry-dependencies.outputs.cache-hit != 'true'
|
||||
- name: Lint with ruff
|
||||
run: make lint
|
||||
|
||||
@@ -165,6 +165,7 @@ cython_debug/
|
||||
# Database
|
||||
db
|
||||
test-db
|
||||
!embedchain/core/db/
|
||||
|
||||
.vscode
|
||||
.idea/
|
||||
@@ -175,3 +176,6 @@ notebooks/*.yaml
|
||||
.ipynb_checkpoints/
|
||||
|
||||
!configs/*.yaml
|
||||
|
||||
# cache db
|
||||
*.db
|
||||
|
||||
@@ -11,6 +11,7 @@ install:
|
||||
|
||||
install_all:
|
||||
poetry install --all-extras
|
||||
poetry run pip install pinecone-text pinecone-client
|
||||
|
||||
install_es:
|
||||
poetry install --extras elasticsearch
|
||||
@@ -37,6 +38,13 @@ clean:
|
||||
lint:
|
||||
poetry run ruff .
|
||||
|
||||
build:
|
||||
poetry build
|
||||
|
||||
publish:
|
||||
poetry publish
|
||||
|
||||
# for example: make test file=tests/test_factory.py
|
||||
test:
|
||||
poetry run pytest $(file)
|
||||
|
||||
|
||||
@@ -10,20 +10,20 @@
|
||||
<a href="https://pypi.org/project/embedchain/">
|
||||
<img src="https://img.shields.io/pypi/v/embedchain" alt="PyPI">
|
||||
</a>
|
||||
<a href="https://join.slack.com/t/embedchain/shared_invite/zt-22uwz3c46-Zg7cIh5rOBteT_xe1jwLDw">
|
||||
<a href="https://pepy.tech/project/embedchain">
|
||||
<img src="https://static.pepy.tech/badge/embedchain" alt="Downloads">
|
||||
</a>
|
||||
<a href="https://embedchain.ai/slack">
|
||||
<img src="https://img.shields.io/badge/slack-embedchain-brightgreen.svg?logo=slack" alt="Slack">
|
||||
</a>
|
||||
<a href="https://discord.gg/CUU9FPhRNt">
|
||||
<a href="https://embedchain.ai/discord">
|
||||
<img src="https://dcbadge.vercel.app/api/server/6PzXDgEjG5?style=flat" alt="Discord">
|
||||
</a>
|
||||
<a href="https://twitter.com/embedchain">
|
||||
<img src="https://img.shields.io/twitter/follow/embedchain" alt="Twitter">
|
||||
</a>
|
||||
<a href="https://embedchain.substack.com/">
|
||||
<img src="https://img.shields.io/badge/Substack-%23006f5c.svg?logo=substack" alt="Substack">
|
||||
</a>
|
||||
<a href="https://colab.research.google.com/drive/138lMWhENGeEu7Q1-6lNbNTHGLZXBBz_B?usp=sharing">
|
||||
<img src="https://camo.githubusercontent.com/84f0493939e0c4de4e6dbe113251b4bfb5353e57134ffd9fcab6b8714514d4d1/68747470733a2f2f636f6c61622e72657365617263682e676f6f676c652e636f6d2f6173736574732f636f6c61622d62616467652e737667" alt="Open in Colab">
|
||||
<img src="https://colab.research.google.com/assets/colab-badge.svg" alt="Open in Colab">
|
||||
</a>
|
||||
<a href="https://codecov.io/gh/embedchain/embedchain">
|
||||
<img src="https://codecov.io/gh/embedchain/embedchain/graph/badge.svg?token=EMRRHZXW1Q" alt="codecov">
|
||||
@@ -33,25 +33,24 @@
|
||||
<hr />
|
||||
|
||||
## What is Embedchain?
|
||||
Embedchain is a Data Platform for Large Language Models (LLMs). Seamlessly load, index, retrieve, and sync unstructured data to build dynamic, LLM-powered applications. Check out [embedchain-js](https://github.com/embedchain/embedchain/tree/main/embedchain-js) for a JavaScript implementation.
|
||||
|
||||
Embedchain is an Open Source RAG Framework that makes it easy to create and deploy AI apps. At its core, Embedchain follows the design principle of being *"Conventional but Configurable"* to serve both software engineers and machine learning engineers.
|
||||
|
||||
Embedchain streamlines the creation of Retrieval-Augmented Generation (RAG) applications, offering a seamless process for managing various types of unstructured data. It efficiently segments data into manageable chunks, generates relevant embeddings, and stores them in a vector database for optimized retrieval. With a suite of diverse APIs, it enables users to extract contextual information, find precise answers, or engage in interactive chat conversations, all tailored to their own data.
|
||||
|
||||
## 🔧 Quick install
|
||||
|
||||
### Python API
|
||||
```bash
|
||||
pip install --upgrade embedchain
|
||||
```
|
||||
|
||||
### REST API
|
||||
You can also run Embedchain as a REST API server using the following command:
|
||||
|
||||
```bash
|
||||
docker run --name embedchain -p 8080:8080 embedchain/rest-api:latest
|
||||
pip install embedchain
|
||||
```
|
||||
|
||||
Then, navigate to http://0.0.0.0:8080/docs to interact with the API.
|
||||
## ✨ Live demo
|
||||
|
||||
## 🔍 Usage and Demo
|
||||
Checkout the [Chat with PDF](https://embedchain.ai/demo/chat-pdf) live demo we created using Embedchain. You can find the source code [here](https://github.com/embedchain/embedchain/tree/main/examples/chat-pdf).
|
||||
|
||||
## 🔍 Usage
|
||||
|
||||
<!-- Demo GIF or Image -->
|
||||
<p align="center">
|
||||
@@ -62,7 +61,7 @@ For example, you can create an Elon Musk bot using the following code:
|
||||
|
||||
```python
|
||||
import os
|
||||
from embedchain import Pipeline as App
|
||||
from embedchain import App
|
||||
|
||||
# Create a bot instance
|
||||
os.environ["OPENAI_API_KEY"] = "YOUR API KEY"
|
||||
@@ -71,43 +70,33 @@ elon_bot = App()
|
||||
# Embed online resources
|
||||
elon_bot.add("https://en.wikipedia.org/wiki/Elon_Musk")
|
||||
elon_bot.add("https://www.forbes.com/profile/elon-musk")
|
||||
elon_bot.add("https://www.youtube.com/watch?v=RcYjXbSJBN8")
|
||||
|
||||
# Query the bot
|
||||
elon_bot.query("How many companies does Elon Musk run and name those?")
|
||||
# Answer: Elon Musk currently runs several companies. As of my knowledge, he is the CEO and lead designer of SpaceX, the CEO and product architect of Tesla, Inc., the CEO and founder of Neuralink, and the CEO and founder of The Boring Company. However, please note that this information may change over time, so it's always good to verify the latest updates.
|
||||
|
||||
# (Optional): Deploy app to Embedchain Platform
|
||||
app.deploy()
|
||||
# 🔑 Enter your Embedchain API key. You can find the API key at https://app.embedchain.ai/settings/keys/
|
||||
# ec-xxxxxx
|
||||
|
||||
# 🛠️ Creating pipeline on the platform...
|
||||
# 🎉🎉🎉 Pipeline created successfully! View your pipeline: https://app.embedchain.ai/pipelines/xxxxx
|
||||
|
||||
# 🛠️ Adding data to your pipeline...
|
||||
# ✅ Data of type: web_page, value: https://www.forbes.com/profile/elon-musk added successfully.
|
||||
```
|
||||
|
||||
You can also try it in your browser with Google Colab:
|
||||
|
||||
[](https://colab.research.google.com/drive/17ON1LPonnXAtLaZEebnOktstB_1cJJmh?usp=sharing)
|
||||
[](https://colab.research.google.com/drive/17ON1LPonnXAtLaZEebnOktstB_1cJJmh?usp=sharing)
|
||||
|
||||
## 📖 Documentation
|
||||
Comprehensive guides and API documentation are available to help you get the most out of Embedchain:
|
||||
|
||||
- [Getting Started](https://docs.embedchain.ai/get-started/quickstart)
|
||||
- [Introduction](https://docs.embedchain.ai/get-started/introduction#what-is-embedchain)
|
||||
- [Examples](https://docs.embedchain.ai/get-started/examples)
|
||||
- [Supported data types](https://docs.embedchain.ai/data-sources/)
|
||||
- [Getting Started](https://docs.embedchain.ai/get-started/quickstart)
|
||||
- [Examples](https://docs.embedchain.ai/examples)
|
||||
- [Supported data types](https://docs.embedchain.ai/components/data-sources/overview)
|
||||
|
||||
## 🔗 Join the Community
|
||||
|
||||
Connect with fellow developers and users by joining our [Slack Workspace](https://join.slack.com/t/embedchain/shared_invite/zt-22uwz3c46-Zg7cIh5rOBteT_xe1jwLDw). Dive into discussions, ask questions, and share your experiences.
|
||||
* Connect with fellow developers by joining our [Slack Community](https://embedchain.ai/slack) or [Discord Community](https://embedchain.ai/discord).
|
||||
|
||||
* Dive into [GitHub Discussions](https://github.com/embedchain/embedchain/discussions), ask questions, or share your experiences.
|
||||
|
||||
## 🤝 Schedule a 1-on-1 Session
|
||||
|
||||
Book a [1-on-1 Session](https://cal.com/taranjeetio/ec) with Taranjeet, the founder, to discuss any issues, provide feedback, or explore how we can improve Embedchain for you.
|
||||
Book a [1-on-1 Session](https://cal.com/taranjeetio/ec) with the founders, to discuss any issues, provide feedback, or explore how we can improve Embedchain for you.
|
||||
|
||||
## 🌐 Contributing
|
||||
|
||||
@@ -120,9 +109,9 @@ For more reference, please go through [Development Guide](https://docs.embedchai
|
||||
<img src="https://contrib.rocks/image?repo=embedchain/embedchain" />
|
||||
</a>
|
||||
|
||||
## Telemetry
|
||||
## Anonymous Telemetry
|
||||
|
||||
We collect anonymous usage metrics to enhance our package's quality and user experience. This includes data like feature usage frequency and system info, but never personal details. The data helps us prioritize improvements and ensure compatibility. If you wish to opt-out, set the `app.config.collect_metrics = False` in the code. We prioritize data security and don't share this data externally.
|
||||
We collect anonymous usage metrics to enhance our package's quality and user experience. This includes data like feature usage frequency and system info, but never personal details. The data helps us prioritize improvements and ensure compatibility. If you wish to opt-out, set the environment variable `EC_TELEMETRY=false`. We prioritize data security and don't share this data externally.
|
||||
|
||||
## Citation
|
||||
|
||||
@@ -131,7 +120,7 @@ If you utilize this repository, please consider citing it with:
|
||||
```
|
||||
@misc{embedchain,
|
||||
author = {Taranjeet Singh, Deshraj Yadav},
|
||||
title = {Embedchain: Data platform for LLMs - load, index, retrieve, and sync any unstructured data},
|
||||
title = {Embedchain: The Open Source RAG Framework},
|
||||
year = {2023},
|
||||
publisher = {GitHub},
|
||||
journal = {GitHub repository},
|
||||
|
||||
@@ -1,7 +1,6 @@
|
||||
app:
|
||||
config:
|
||||
id: 'my-app'
|
||||
collection_name: 'my-app'
|
||||
|
||||
llm:
|
||||
provider: openai
|
||||
@@ -23,4 +22,3 @@ embedder:
|
||||
provider: openai
|
||||
config:
|
||||
model: 'text-embedding-ada-002'
|
||||
deployment_name: 'test-deployment'
|
||||
|
||||
@@ -15,7 +15,7 @@ llm:
|
||||
max_tokens: 1000
|
||||
top_p: 1
|
||||
stream: false
|
||||
template: |
|
||||
prompt: |
|
||||
Use the following pieces of context to answer the query at the end.
|
||||
If you don't know the answer, just say that you don't know, don't try to make up an answer.
|
||||
|
||||
|
||||
@@ -0,0 +1,13 @@
|
||||
llm:
|
||||
provider: google
|
||||
config:
|
||||
model: gemini-pro
|
||||
max_tokens: 1000
|
||||
temperature: 0.9
|
||||
top_p: 1.0
|
||||
stream: false
|
||||
|
||||
embedder:
|
||||
provider: google
|
||||
config:
|
||||
model: models/embedding-001
|
||||
@@ -0,0 +1,8 @@
|
||||
llm:
|
||||
provider: openai
|
||||
config:
|
||||
model: 'gpt-4'
|
||||
temperature: 0.5
|
||||
max_tokens: 1000
|
||||
top_p: 1
|
||||
stream: false
|
||||
@@ -0,0 +1,12 @@
|
||||
llm:
|
||||
provider: ollama
|
||||
config:
|
||||
model: 'llama2'
|
||||
temperature: 0.5
|
||||
top_p: 1
|
||||
stream: true
|
||||
|
||||
embedder:
|
||||
provider: huggingface
|
||||
config:
|
||||
model: 'BAAI/bge-small-en-v1.5'
|
||||
@@ -1,7 +1,6 @@
|
||||
app:
|
||||
config:
|
||||
id: 'open-source-app'
|
||||
collection_name: 'open-source-app'
|
||||
collect_metrics: false
|
||||
|
||||
llm:
|
||||
|
||||
@@ -0,0 +1,6 @@
|
||||
llm:
|
||||
provider: together
|
||||
config:
|
||||
model: mistralai/Mixtral-8x7B-Instruct-v0.1
|
||||
temperature: 0.5
|
||||
max_tokens: 1000
|
||||
@@ -0,0 +1,14 @@
|
||||
llm:
|
||||
provider: vllm
|
||||
config:
|
||||
model: 'meta-llama/Llama-2-70b-hf'
|
||||
temperature: 0.5
|
||||
top_p: 1
|
||||
top_k: 10
|
||||
stream: true
|
||||
trust_remote_code: true
|
||||
|
||||
embedder:
|
||||
provider: huggingface
|
||||
config:
|
||||
model: 'BAAI/bge-small-en-v1.5'
|
||||
@@ -1,11 +1,11 @@
|
||||
<CardGroup cols={3}>
|
||||
<Card title="Slack" icon="slack" href="https://join.slack.com/t/embedchain/shared_invite/zt-22uwz3c46-Zg7cIh5rOBteT_xe1jwLDw" color="#4A154B">
|
||||
<Card title="Talk to founders" icon="calendar" href="https://cal.com/taranjeetio/ec">
|
||||
Schedule a call
|
||||
</Card>
|
||||
<Card title="Slack" icon="slack" href="https://embedchain.ai/slack" color="#4A154B">
|
||||
Join our slack community
|
||||
</Card>
|
||||
<Card title="Discord" icon="discord" href="https://discord.gg/6PzXDgEjG5" color="#7289DA">
|
||||
Join our discord community
|
||||
</Card>
|
||||
<Card title="Schedule a call" icon="calendar" href="https://cal.com/taranjeetio/ec">
|
||||
Schedule a call with Embedchain founder
|
||||
</Card>
|
||||
</CardGroup>
|
||||
|
||||
@@ -1,7 +1,10 @@
|
||||
<p>If you can't find the specific data source, please feel free to request through one of the following channels and help us prioritize.</p>
|
||||
|
||||
<CardGroup cols={2}>
|
||||
<Card title="Slack" icon="slack" href="https://join.slack.com/t/embedchain/shared_invite/zt-22uwz3c46-Zg7cIh5rOBteT_xe1jwLDw" color="#4A154B">
|
||||
<Card title="Google Form" icon="file" href="https://forms.gle/NDRCKsRpUHsz2Wcm8" color="#7387d0">
|
||||
Fill out this form
|
||||
</Card>
|
||||
<Card title="Slack" icon="slack" href="https://embedchain.ai/slack" color="#4A154B">
|
||||
Let us know on our slack community
|
||||
</Card>
|
||||
<Card title="Discord" icon="discord" href="https://discord.gg/6PzXDgEjG5" color="#7289DA">
|
||||
|
||||
@@ -1,7 +1,7 @@
|
||||
<p>If you can't find the specific LLM you need, no need to fret. We're continuously expanding our support for additional LLMs, and you can help us prioritize by opening an issue on our GitHub or simply reaching out to us on our Slack or Discord community.</p>
|
||||
|
||||
<CardGroup cols={2}>
|
||||
<Card title="Slack" icon="slack" href="https://join.slack.com/t/embedchain/shared_invite/zt-22uwz3c46-Zg7cIh5rOBteT_xe1jwLDw" color="#4A154B">
|
||||
<Card title="Slack" icon="slack" href="https://embedchain.ai/slack" color="#4A154B">
|
||||
Let us know on our slack community
|
||||
</Card>
|
||||
<Card title="Discord" icon="discord" href="https://discord.gg/6PzXDgEjG5" color="#7289DA">
|
||||
|
||||
@@ -1,9 +1,9 @@
|
||||
|
||||
|
||||
<p>If you can't find the specific vector database, please feel free to request through one of the following channels and help us prioritize.</p>
|
||||
<p>If you can't find specific feature or run into issues, please feel free to reach out through one of the following channels.</p>
|
||||
|
||||
<CardGroup cols={2}>
|
||||
<Card title="Slack" icon="slack" href="https://join.slack.com/t/embedchain/shared_invite/zt-22uwz3c46-Zg7cIh5rOBteT_xe1jwLDw" color="#4A154B">
|
||||
<Card title="Slack" icon="slack" href="https://embedchain.ai/slack" color="#4A154B">
|
||||
Let us know on our slack community
|
||||
</Card>
|
||||
<Card title="Discord" icon="discord" href="https://discord.gg/6PzXDgEjG5" color="#7289DA">
|
||||
|
||||
@@ -1,84 +0,0 @@
|
||||
---
|
||||
title: '⚙️ Custom configurations'
|
||||
---
|
||||
|
||||
Embedchain is made to work out of the box. However, for advanced users we're also offering configuration options. All of these configuration options are optional and have sane defaults.
|
||||
|
||||
You can configure different components of your app (`llm`, `embedding model`, or `vector database`) through a simple yaml configuration that Embedchain offers. Here is a generic full-stack example of the yaml config:
|
||||
|
||||
```yaml
|
||||
app:
|
||||
config:
|
||||
id: 'full-stack-app'
|
||||
|
||||
chunker:
|
||||
chunk_size: 100
|
||||
chunk_overlap: 20
|
||||
length_function: 'len'
|
||||
|
||||
llm:
|
||||
provider: openai
|
||||
config:
|
||||
model: 'gpt-3.5-turbo'
|
||||
temperature: 0.5
|
||||
max_tokens: 1000
|
||||
top_p: 1
|
||||
stream: false
|
||||
template: |
|
||||
Use the following pieces of context to answer the query at the end.
|
||||
If you don't know the answer, just say that you don't know, don't try to make up an answer.
|
||||
|
||||
$context
|
||||
|
||||
Query: $query
|
||||
|
||||
Helpful Answer:
|
||||
system_prompt: |
|
||||
Act as William Shakespeare. Answer the following questions in the style of William Shakespeare.
|
||||
|
||||
vectordb:
|
||||
provider: chroma
|
||||
config:
|
||||
collection_name: 'full-stack-app'
|
||||
dir: db
|
||||
allow_reset: true
|
||||
|
||||
embedder:
|
||||
provider: openai
|
||||
config:
|
||||
model: 'text-embedding-ada-002'
|
||||
```
|
||||
|
||||
Alright, let's dive into what each key means in the yaml config above:
|
||||
|
||||
1. `app` Section:
|
||||
- `config`:
|
||||
- `id` (String): The ID or name of your full-stack application.
|
||||
2. `chunker` Section:
|
||||
- `chunk_size` (Integer): The size of each chunk of text that is sent to the language model.
|
||||
- `chunk_overlap` (Integer): The amount of overlap between each chunk of text.
|
||||
- `length_function` (String): The function used to calculate the length of each chunk of text. In this case, it's set to 'len'. You can also use any function import directly as a string here.
|
||||
3. `llm` Section:
|
||||
- `provider` (String): The provider for the language model, which is set to 'openai'. You can find the full list of llm providers in [our docs](/components/llms).
|
||||
- `model` (String): The specific model being used, 'gpt-3.5-turbo'.
|
||||
- `config`:
|
||||
- `temperature` (Float): Controls the randomness of the model's output. A higher value (closer to 1) makes the output more random.
|
||||
- `max_tokens` (Integer): Controls how many tokens are used in the response.
|
||||
- `top_p` (Float): Controls the diversity of word selection. A higher value (closer to 1) makes word selection more diverse.
|
||||
- `stream` (Boolean): Controls if the response is streamed back to the user (set to false).
|
||||
- `template` (String): A custom template for the prompt that the model uses to generate responses.
|
||||
- `system_prompt` (String): A system prompt for the model to follow when generating responses, in this case, it's set to the style of William Shakespeare.
|
||||
4. `vectordb` Section:
|
||||
- `provider` (String): The provider for the vector database, set to 'chroma'. You can find the full list of vector database providers in [our docs](/components/vector-databases).
|
||||
- `config`:
|
||||
- `collection_name` (String): The initial collection name for the database, set to 'full-stack-app'.
|
||||
- `dir` (String): The directory for the database, set to 'db'.
|
||||
- `allow_reset` (Boolean): Indicates whether resetting the database is allowed, set to true.
|
||||
5. `embedder` Section:
|
||||
- `provider` (String): The provider for the embedder, set to 'openai'. You can find the full list of embedding model providers in [our docs](/components/embedding-models).
|
||||
- `config`:
|
||||
- `model` (String): The specific model used for text embedding, 'text-embedding-ada-002'.
|
||||
|
||||
If you have questions about the configuration above, please feel free to reach out to us using one of the following methods:
|
||||
|
||||
<Snippet file="get-help.mdx" />
|
||||
@@ -0,0 +1,241 @@
|
||||
---
|
||||
title: 'Custom configurations'
|
||||
---
|
||||
|
||||
Embedchain offers several configuration options for your LLM, vector database, and embedding model. All of these configuration options are optional and have sane defaults.
|
||||
|
||||
You can configure different components of your app (`llm`, `embedding model`, or `vector database`) through a simple yaml configuration that Embedchain offers. Here is a generic full-stack example of the yaml config:
|
||||
|
||||
|
||||
<Tip>
|
||||
Embedchain applications are configurable using YAML file, JSON file or by directly passing the config dictionary. Checkout the [docs here](/api-reference/app/overview#usage) on how to use other formats.
|
||||
</Tip>
|
||||
|
||||
<CodeGroup>
|
||||
```yaml config.yaml
|
||||
app:
|
||||
config:
|
||||
name: 'full-stack-app'
|
||||
|
||||
llm:
|
||||
provider: openai
|
||||
config:
|
||||
model: 'gpt-3.5-turbo'
|
||||
temperature: 0.5
|
||||
max_tokens: 1000
|
||||
top_p: 1
|
||||
stream: false
|
||||
api_key: sk-xxx
|
||||
prompt: |
|
||||
Use the following pieces of context to answer the query at the end.
|
||||
If you don't know the answer, just say that you don't know, don't try to make up an answer.
|
||||
|
||||
$context
|
||||
|
||||
Query: $query
|
||||
|
||||
Helpful Answer:
|
||||
system_prompt: |
|
||||
Act as William Shakespeare. Answer the following questions in the style of William Shakespeare.
|
||||
|
||||
vectordb:
|
||||
provider: chroma
|
||||
config:
|
||||
collection_name: 'full-stack-app'
|
||||
dir: db
|
||||
allow_reset: true
|
||||
|
||||
embedder:
|
||||
provider: openai
|
||||
config:
|
||||
model: 'text-embedding-ada-002'
|
||||
api_key: sk-xxx
|
||||
|
||||
chunker:
|
||||
chunk_size: 2000
|
||||
chunk_overlap: 100
|
||||
length_function: 'len'
|
||||
min_chunk_size: 0
|
||||
|
||||
cache:
|
||||
similarity_evaluation:
|
||||
strategy: distance
|
||||
max_distance: 1.0
|
||||
config:
|
||||
similarity_threshold: 0.8
|
||||
auto_flush: 50
|
||||
```
|
||||
|
||||
```json config.json
|
||||
{
|
||||
"app": {
|
||||
"config": {
|
||||
"name": "full-stack-app"
|
||||
}
|
||||
},
|
||||
"llm": {
|
||||
"provider": "openai",
|
||||
"config": {
|
||||
"model": "gpt-3.5-turbo",
|
||||
"temperature": 0.5,
|
||||
"max_tokens": 1000,
|
||||
"top_p": 1,
|
||||
"stream": false,
|
||||
"prompt": "Use the following pieces of context to answer the query at the end.\nIf you don't know the answer, just say that you don't know, don't try to make up an answer.\n$context\n\nQuery: $query\n\nHelpful Answer:",
|
||||
"system_prompt": "Act as William Shakespeare. Answer the following questions in the style of William Shakespeare.",
|
||||
"api_key": "sk-xxx"
|
||||
}
|
||||
},
|
||||
"vectordb": {
|
||||
"provider": "chroma",
|
||||
"config": {
|
||||
"collection_name": "full-stack-app",
|
||||
"dir": "db",
|
||||
"allow_reset": true
|
||||
}
|
||||
},
|
||||
"embedder": {
|
||||
"provider": "openai",
|
||||
"config": {
|
||||
"model": "text-embedding-ada-002",
|
||||
"api_key": "sk-xxx"
|
||||
}
|
||||
},
|
||||
"chunker": {
|
||||
"chunk_size": 2000,
|
||||
"chunk_overlap": 100,
|
||||
"length_function": "len",
|
||||
"min_chunk_size": 0
|
||||
},
|
||||
"cache": {
|
||||
"similarity_evaluation": {
|
||||
"strategy": "distance",
|
||||
"max_distance": 1.0,
|
||||
},
|
||||
"config": {
|
||||
"similarity_threshold": 0.8,
|
||||
"auto_flush": 50,
|
||||
},
|
||||
},
|
||||
}
|
||||
```
|
||||
|
||||
```python config.py
|
||||
config = {
|
||||
'app': {
|
||||
'config': {
|
||||
'name': 'full-stack-app'
|
||||
}
|
||||
},
|
||||
'llm': {
|
||||
'provider': 'openai',
|
||||
'config': {
|
||||
'model': 'gpt-3.5-turbo',
|
||||
'temperature': 0.5,
|
||||
'max_tokens': 1000,
|
||||
'top_p': 1,
|
||||
'stream': False,
|
||||
'prompt': (
|
||||
"Use the following pieces of context to answer the query at the end.\n"
|
||||
"If you don't know the answer, just say that you don't know, don't try to make up an answer.\n"
|
||||
"$context\n\nQuery: $query\n\nHelpful Answer:"
|
||||
),
|
||||
'system_prompt': (
|
||||
"Act as William Shakespeare. Answer the following questions in the style of William Shakespeare."
|
||||
),
|
||||
'api_key': 'sk-xxx'
|
||||
}
|
||||
},
|
||||
'vectordb': {
|
||||
'provider': 'chroma',
|
||||
'config': {
|
||||
'collection_name': 'full-stack-app',
|
||||
'dir': 'db',
|
||||
'allow_reset': True
|
||||
}
|
||||
},
|
||||
'embedder': {
|
||||
'provider': 'openai',
|
||||
'config': {
|
||||
'model': 'text-embedding-ada-002',
|
||||
'api_key': 'sk-xxx'
|
||||
}
|
||||
},
|
||||
'chunker': {
|
||||
'chunk_size': 2000,
|
||||
'chunk_overlap': 100,
|
||||
'length_function': 'len',
|
||||
'min_chunk_size': 0
|
||||
},
|
||||
'cache': {
|
||||
'similarity_evaluation': {
|
||||
'strategy': 'distance',
|
||||
'max_distance': 1.0,
|
||||
},
|
||||
'config': {
|
||||
'similarity_threshold': 0.8,
|
||||
'auto_flush': 50,
|
||||
},
|
||||
},
|
||||
}
|
||||
```
|
||||
</CodeGroup>
|
||||
|
||||
Alright, let's dive into what each key means in the yaml config above:
|
||||
|
||||
1. `app` Section:
|
||||
- `config`:
|
||||
- `name` (String): The name of your full-stack application.
|
||||
- `id` (String): The id of your full-stack application.
|
||||
<Note>Only use this to reload already created apps. We recommend users to not create their own ids.</Note>
|
||||
- `collect_metrics` (Boolean): Indicates whether metrics should be collected for the app, defaults to `True`
|
||||
- `log_level` (String): The log level for the app, defaults to `WARNING`
|
||||
2. `llm` Section:
|
||||
- `provider` (String): The provider for the language model, which is set to 'openai'. You can find the full list of llm providers in [our docs](/components/llms).
|
||||
- `config`:
|
||||
- `model` (String): The specific model being used, 'gpt-3.5-turbo'.
|
||||
- `temperature` (Float): Controls the randomness of the model's output. A higher value (closer to 1) makes the output more random.
|
||||
- `max_tokens` (Integer): Controls how many tokens are used in the response.
|
||||
- `top_p` (Float): Controls the diversity of word selection. A higher value (closer to 1) makes word selection more diverse.
|
||||
- `stream` (Boolean): Controls if the response is streamed back to the user (set to false).
|
||||
- `prompt` (String): A prompt for the model to follow when generating responses, requires `$context` and `$query` variables.
|
||||
- `system_prompt` (String): A system prompt for the model to follow when generating responses, in this case, it's set to the style of William Shakespeare.
|
||||
- `stream` (Boolean): Controls if the response is streamed back to the user (set to false).
|
||||
- `number_documents` (Integer): Number of documents to pull from the vectordb as context, defaults to 1
|
||||
- `api_key` (String): The API key for the language model.
|
||||
- `model_kwargs` (Dict): Keyword arguments to pass to the language model. Used for `aws_bedrock` provider, since it requires different arguments for each model.
|
||||
3. `vectordb` Section:
|
||||
- `provider` (String): The provider for the vector database, set to 'chroma'. You can find the full list of vector database providers in [our docs](/components/vector-databases).
|
||||
- `config`:
|
||||
- `collection_name` (String): The initial collection name for the vectordb, set to 'full-stack-app'.
|
||||
- `dir` (String): The directory for the local database, set to 'db'.
|
||||
- `allow_reset` (Boolean): Indicates whether resetting the vectordb is allowed, set to true.
|
||||
<Note>We recommend you to checkout vectordb specific config [here](https://docs.embedchain.ai/components/vector-databases)</Note>
|
||||
4. `embedder` Section:
|
||||
- `provider` (String): The provider for the embedder, set to 'openai'. You can find the full list of embedding model providers in [our docs](/components/embedding-models).
|
||||
- `config`:
|
||||
- `model` (String): The specific model used for text embedding, 'text-embedding-ada-002'.
|
||||
- `vector_dimension` (Integer): The vector dimension of the embedding model. [Defaults](https://github.com/embedchain/embedchain/blob/e572b5a3dc1b66f1e9b3357d11a88c63b5ce06e3/embedchain/models/vector_dimensions.py)
|
||||
- `api_key` (String): The API key for the embedding model.
|
||||
- `deployment_name` (String): The deployment name for the embedding model.
|
||||
- `title` (String): The title for the embedding model for Google Embedder.
|
||||
- `task_type` (String): The task type for the embedding model for Google Embedder.
|
||||
5. `chunker` Section:
|
||||
- `chunk_size` (Integer): The size of each chunk of text that is sent to the language model.
|
||||
- `chunk_overlap` (Integer): The amount of overlap between each chunk of text.
|
||||
- `length_function` (String): The function used to calculate the length of each chunk of text. In this case, it's set to 'len'. You can also use any function import directly as a string here.
|
||||
- `min_chunk_size` (Integer): The minimum size of each chunk of text that is sent to the language model. Must be less than `chunk_size`, and greater than `chunk_overlap`.
|
||||
6. `cache` Section: (Optional)
|
||||
- `similarity_evaluation` (Optional): The config for similarity evaluation strategy. If not provided, the default `distance` based similarity evaluation strategy is used.
|
||||
- `strategy` (String): The strategy to use for similarity evaluation. Currently, only `distance` and `exact` based similarity evaluation is supported. Defaults to `distance`.
|
||||
- `max_distance` (Float): The bound of maximum distance. Defaults to `1.0`.
|
||||
- `positive` (Boolean): If the larger distance indicates more similar of two entities, set it `True`, otherwise `False`. Defaults to `False`.
|
||||
- `config` (Optional): The config for initializing the cache. If not provided, sensible default values are used as mentioned below.
|
||||
- `similarity_threshold` (Float): The threshold for similarity evaluation. Defaults to `0.8`.
|
||||
- `auto_flush` (Integer): The number of queries after which the cache is flushed. Defaults to `20`.
|
||||
<Note>
|
||||
If you provide a cache section, the app will automatically configure and use a cache to store the results of the language model. This is useful if you want to speed up the response time and save inference cost of your app.
|
||||
</Note>
|
||||
If you have questions about the configuration above, please feel free to reach out to us using one of the following methods:
|
||||
|
||||
<Snippet file="get-help.mdx" />
|
||||
@@ -0,0 +1,44 @@
|
||||
---
|
||||
title: '📊 add'
|
||||
---
|
||||
|
||||
`add()` method is used to load the data sources from different data sources to a RAG pipeline. You can find the signature below:
|
||||
|
||||
### Parameters
|
||||
|
||||
<ParamField path="source" type="str">
|
||||
The data to embed, can be a URL, local file or raw content, depending on the data type.. You can find the full list of supported data sources [here](/components/data-sources/overview).
|
||||
</ParamField>
|
||||
<ParamField path="data_type" type="str" optional>
|
||||
Type of data source. It can be automatically detected but user can force what data type to load as.
|
||||
</ParamField>
|
||||
<ParamField path="metadata" type="dict" optional>
|
||||
Any metadata that you want to store with the data source. Metadata is generally really useful for doing metadata filtering on top of semantic search to yield faster search and better results.
|
||||
</ParamField>
|
||||
|
||||
## Usage
|
||||
|
||||
### Load data from webpage
|
||||
|
||||
```python Code example
|
||||
from embedchain import App
|
||||
|
||||
app = App()
|
||||
app.add("https://www.forbes.com/profile/elon-musk")
|
||||
# Inserting batches in chromadb: 100%|███████████████| 1/1 [00:00<00:00, 1.19it/s]
|
||||
# Successfully saved https://www.forbes.com/profile/elon-musk (DataType.WEB_PAGE). New chunks count: 4
|
||||
```
|
||||
|
||||
### Load data from sitemap
|
||||
|
||||
```python Code example
|
||||
from embedchain import App
|
||||
|
||||
app = App()
|
||||
app.add("https://python.langchain.com/sitemap.xml", data_type="sitemap")
|
||||
# Loading pages: 100%|█████████████| 1108/1108 [00:47<00:00, 23.17it/s]
|
||||
# Inserting batches in chromadb: 100%|█████████| 111/111 [04:41<00:00, 2.54s/it]
|
||||
# Successfully saved https://python.langchain.com/sitemap.xml (DataType.SITEMAP). New chunks count: 11024
|
||||
```
|
||||
|
||||
You can find complete list of supported data sources [here](/components/data-sources/overview).
|
||||
@@ -0,0 +1,146 @@
|
||||
---
|
||||
title: '💬 chat'
|
||||
---
|
||||
|
||||
`chat()` method allows you to chat over your data sources using a user-friendly chat API. You can find the signature below:
|
||||
|
||||
### Parameters
|
||||
|
||||
<ParamField path="input_query" type="str">
|
||||
Question to ask
|
||||
</ParamField>
|
||||
<ParamField path="config" type="BaseLlmConfig" optional>
|
||||
Configure different llm settings such as prompt, temprature, number_documents etc.
|
||||
</ParamField>
|
||||
<ParamField path="dry_run" type="bool" optional>
|
||||
The purpose is to test the prompt structure without actually running LLM inference. Defaults to `False`
|
||||
</ParamField>
|
||||
<ParamField path="where" type="dict" optional>
|
||||
A dictionary of key-value pairs to filter the chunks from the vector database. Defaults to `None`
|
||||
</ParamField>
|
||||
<ParamField path="session_id" type="str" optional>
|
||||
Session ID of the chat. This can be used to maintain chat history of different user sessions. Default value: `default`
|
||||
</ParamField>
|
||||
<ParamField path="citations" type="bool" optional>
|
||||
Return citations along with the LLM answer. Defaults to `False`
|
||||
</ParamField>
|
||||
|
||||
### Returns
|
||||
|
||||
<ResponseField name="answer" type="str | tuple">
|
||||
If `citations=False`, return a stringified answer to the question asked. <br />
|
||||
If `citations=True`, returns a tuple with answer and citations respectively.
|
||||
</ResponseField>
|
||||
|
||||
## Usage
|
||||
|
||||
### With citations
|
||||
|
||||
If you want to get the answer to question and return both answer and citations, use the following code snippet:
|
||||
|
||||
```python With Citations
|
||||
from embedchain import App
|
||||
|
||||
# Initialize app
|
||||
app = App()
|
||||
|
||||
# Add data source
|
||||
app.add("https://www.forbes.com/profile/elon-musk")
|
||||
|
||||
# Get relevant answer for your query
|
||||
answer, sources = app.chat("What is the net worth of Elon?", citations=True)
|
||||
print(answer)
|
||||
# Answer: The net worth of Elon Musk is $221.9 billion.
|
||||
|
||||
print(sources)
|
||||
# [
|
||||
# (
|
||||
# 'Elon Musk PROFILEElon MuskCEO, Tesla$247.1B$2.3B (0.96%)Real Time Net Worthas of 12/7/23 ...',
|
||||
# {
|
||||
# 'url': 'https://www.forbes.com/profile/elon-musk',
|
||||
# 'score': 0.89,
|
||||
# ...
|
||||
# }
|
||||
# ),
|
||||
# (
|
||||
# '74% of the company, which is now called X.Wealth HistoryHOVER TO REVEAL NET WORTH BY YEARForbes ...',
|
||||
# {
|
||||
# 'url': 'https://www.forbes.com/profile/elon-musk',
|
||||
# 'score': 0.81,
|
||||
# ...
|
||||
# }
|
||||
# ),
|
||||
# (
|
||||
# 'founded in 2002, is worth nearly $150 billion after a $750 million tender offer in June 2023 ...',
|
||||
# {
|
||||
# 'url': 'https://www.forbes.com/profile/elon-musk',
|
||||
# 'score': 0.73,
|
||||
# ...
|
||||
# }
|
||||
# )
|
||||
# ]
|
||||
```
|
||||
|
||||
<Note>
|
||||
When `citations=True`, note that the returned `sources` are a list of tuples where each tuple has two elements (in the following order):
|
||||
1. source chunk
|
||||
2. dictionary with metadata about the source chunk
|
||||
- `url`: url of the source
|
||||
- `doc_id`: document id (used for book keeping purposes)
|
||||
- `score`: score of the source chunk with respect to the question
|
||||
- other metadata you might have added at the time of adding the source
|
||||
</Note>
|
||||
|
||||
|
||||
### Without citations
|
||||
|
||||
If you just want to return answers and don't want to return citations, you can use the following example:
|
||||
|
||||
```python Without Citations
|
||||
from embedchain import App
|
||||
|
||||
# Initialize app
|
||||
app = App()
|
||||
|
||||
# Add data source
|
||||
app.add("https://www.forbes.com/profile/elon-musk")
|
||||
|
||||
# Chat on your data using `.chat()`
|
||||
answer = app.chat("What is the net worth of Elon?")
|
||||
print(answer)
|
||||
# Answer: The net worth of Elon Musk is $221.9 billion.
|
||||
```
|
||||
|
||||
### With session id
|
||||
|
||||
If you want to maintain chat sessions for different users, you can simply pass the `session_id` keyword argument. See the example below:
|
||||
|
||||
```python With session id
|
||||
from embedchain import App
|
||||
|
||||
app = App()
|
||||
app.add("https://www.forbes.com/profile/elon-musk")
|
||||
|
||||
# Chat on your data using `.chat()`
|
||||
app.chat("What is the net worth of Elon Musk?", session_id="user1")
|
||||
# 'The net worth of Elon Musk is $250.8 billion.'
|
||||
app.chat("What is the net worth of Bill Gates?", session_id="user2")
|
||||
# "I don't know the current net worth of Bill Gates."
|
||||
app.chat("What was my last question", session_id="user1")
|
||||
# 'Your last question was "What is the net worth of Elon Musk?"'
|
||||
```
|
||||
|
||||
### With custom context window
|
||||
|
||||
If you want to customize the context window that you want to use during chat (default context window is 3 document chunks), you can do using the following code snippet:
|
||||
|
||||
```python with custom chunks size
|
||||
from embedchain import App
|
||||
from embedchain.config import BaseLlmConfig
|
||||
|
||||
app = App()
|
||||
app.add("https://www.forbes.com/profile/elon-musk")
|
||||
|
||||
query_config = BaseLlmConfig(number_documents=5)
|
||||
app.chat("What is the net worth of Elon Musk?", config=query_config)
|
||||
```
|
||||
@@ -0,0 +1,48 @@
|
||||
---
|
||||
title: 🗑 delete
|
||||
---
|
||||
|
||||
## Delete Document
|
||||
|
||||
`delete()` method allows you to delete a document previously added to the app.
|
||||
|
||||
### Usage
|
||||
|
||||
```python
|
||||
from embedchain import App
|
||||
|
||||
app = App()
|
||||
|
||||
forbes_doc_id = app.add("https://www.forbes.com/profile/elon-musk")
|
||||
wiki_doc_id = app.add("https://en.wikipedia.org/wiki/Elon_Musk")
|
||||
|
||||
app.delete(forbes_doc_id) # deletes the forbes document
|
||||
```
|
||||
|
||||
<Note>
|
||||
If you do not have the document id, you can use `app.db.get()` method to get the document and extract the `hash` key from `metadatas` dictionary object, which serves as the document id.
|
||||
</Note>
|
||||
|
||||
|
||||
## Delete Chat Session History
|
||||
|
||||
`delete_session_chat_history()` method allows you to delete all previous messages in a chat history.
|
||||
|
||||
### Usage
|
||||
|
||||
```python
|
||||
from embedchain import App
|
||||
|
||||
app = App()
|
||||
|
||||
app.add("https://www.forbes.com/profile/elon-musk")
|
||||
|
||||
app.chat("What is the net worth of Elon Musk?")
|
||||
|
||||
app.delete_session_chat_history()
|
||||
```
|
||||
|
||||
<Note>
|
||||
`delete_session_chat_history(session_id="session_1")` method also accepts `session_id` optional param for deleting chat history of a specific session.
|
||||
It assumes the default session if no `session_id` is provided.
|
||||
</Note>
|
||||
@@ -0,0 +1,5 @@
|
||||
---
|
||||
title: 🚀 deploy
|
||||
---
|
||||
|
||||
The `deploy()` method is currently available on an invitation-only basis. To request access, please submit your information via the provided [Google Form](https://forms.gle/vigN11h7b4Ywat668). We will review your request and respond promptly.
|
||||
@@ -0,0 +1,41 @@
|
||||
---
|
||||
title: '📝 evaluate'
|
||||
---
|
||||
|
||||
`evaluate()` method is used to evaluate the performance of a RAG app. You can find the signature below:
|
||||
|
||||
### Parameters
|
||||
|
||||
<ParamField path="question" type="Union[str, list[str]]">
|
||||
A question or a list of questions to evaluate your app on.
|
||||
</ParamField>
|
||||
<ParamField path="metrics" type="Optional[list[Union[BaseMetric, str]]]" optional>
|
||||
The metrics to evaluate your app on. Defaults to all metrics: `["context_relevancy", "answer_relevancy", "groundedness"]`
|
||||
</ParamField>
|
||||
<ParamField path="num_workers" type="int" optional>
|
||||
Specify the number of threads to use for parallel processing.
|
||||
</ParamField>
|
||||
|
||||
### Returns
|
||||
|
||||
<ResponseField name="metrics" type="dict">
|
||||
Returns the metrics you have chosen to evaluate your app on as a dictionary.
|
||||
</ResponseField>
|
||||
|
||||
## Usage
|
||||
|
||||
```python
|
||||
from embedchain import App
|
||||
|
||||
app = App()
|
||||
|
||||
# add data source
|
||||
app.add("https://www.forbes.com/profile/elon-musk")
|
||||
|
||||
# run evaluation
|
||||
app.evaluate("what is the net worth of Elon Musk?")
|
||||
# {'answer_relevancy': 0.958019958036268, 'context_relevancy': 0.12903225806451613}
|
||||
|
||||
# or
|
||||
# app.evaluate(["what is the net worth of Elon Musk?", "which companies does Elon Musk own?"])
|
||||
```
|
||||
@@ -0,0 +1,33 @@
|
||||
---
|
||||
title: 📄 get
|
||||
---
|
||||
|
||||
## Get data sources
|
||||
|
||||
`get_data_sources()` returns a list of all the data sources added in the app.
|
||||
|
||||
|
||||
### Usage
|
||||
|
||||
```python
|
||||
from embedchain import App
|
||||
|
||||
app = App()
|
||||
|
||||
app.add("https://www.forbes.com/profile/elon-musk")
|
||||
app.add("https://en.wikipedia.org/wiki/Elon_Musk")
|
||||
|
||||
data_sources = app.get_data_sources()
|
||||
# [
|
||||
# {
|
||||
# 'data_type': 'web_page',
|
||||
# 'data_value': 'https://en.wikipedia.org/wiki/Elon_Musk',
|
||||
# 'metadata': 'null'
|
||||
# },
|
||||
# {
|
||||
# 'data_type': 'web_page',
|
||||
# 'data_value': 'https://www.forbes.com/profile/elon-musk',
|
||||
# 'metadata': 'null'
|
||||
# }
|
||||
# ]
|
||||
```
|
||||
@@ -0,0 +1,130 @@
|
||||
---
|
||||
title: "App"
|
||||
---
|
||||
|
||||
Create a RAG app object on Embedchain. This is the main entrypoint for a developer to interact with Embedchain APIs. An app configures the llm, vector database, embedding model, and retrieval strategy of your choice.
|
||||
|
||||
### Attributes
|
||||
|
||||
<ParamField path="local_id" type="str">
|
||||
App ID
|
||||
</ParamField>
|
||||
<ParamField path="name" type="str" optional>
|
||||
Name of the app
|
||||
</ParamField>
|
||||
<ParamField path="config" type="BaseConfig">
|
||||
Configuration of the app
|
||||
</ParamField>
|
||||
<ParamField path="llm" type="BaseLlm">
|
||||
Configured LLM for the RAG app
|
||||
</ParamField>
|
||||
<ParamField path="db" type="BaseVectorDB">
|
||||
Configured vector database for the RAG app
|
||||
</ParamField>
|
||||
<ParamField path="embedding_model" type="BaseEmbedder">
|
||||
Configured embedding model for the RAG app
|
||||
</ParamField>
|
||||
<ParamField path="chunker" type="ChunkerConfig">
|
||||
Chunker configuration
|
||||
</ParamField>
|
||||
<ParamField path="client" type="Client" optional>
|
||||
Client object (used to deploy an app to Embedchain platform)
|
||||
</ParamField>
|
||||
<ParamField path="logger" type="logging.Logger">
|
||||
Logger object
|
||||
</ParamField>
|
||||
|
||||
## Usage
|
||||
|
||||
You can create an app instance using the following methods:
|
||||
|
||||
### Default setting
|
||||
|
||||
```python Code Example
|
||||
from embedchain import App
|
||||
app = App()
|
||||
```
|
||||
|
||||
|
||||
### Python Dict
|
||||
|
||||
```python Code Example
|
||||
from embedchain import App
|
||||
|
||||
config_dict = {
|
||||
'llm': {
|
||||
'provider': 'gpt4all',
|
||||
'config': {
|
||||
'model': 'orca-mini-3b-gguf2-q4_0.gguf',
|
||||
'temperature': 0.5,
|
||||
'max_tokens': 1000,
|
||||
'top_p': 1,
|
||||
'stream': False
|
||||
}
|
||||
},
|
||||
'embedder': {
|
||||
'provider': 'gpt4all'
|
||||
}
|
||||
}
|
||||
|
||||
# load llm configuration from config dict
|
||||
app = App.from_config(config=config_dict)
|
||||
```
|
||||
|
||||
### YAML Config
|
||||
|
||||
<CodeGroup>
|
||||
|
||||
```python main.py
|
||||
from embedchain import App
|
||||
|
||||
# load llm configuration from config.yaml file
|
||||
app = App.from_config(config_path="config.yaml")
|
||||
```
|
||||
|
||||
```yaml config.yaml
|
||||
llm:
|
||||
provider: gpt4all
|
||||
config:
|
||||
model: 'orca-mini-3b-gguf2-q4_0.gguf'
|
||||
temperature: 0.5
|
||||
max_tokens: 1000
|
||||
top_p: 1
|
||||
stream: false
|
||||
|
||||
embedder:
|
||||
provider: gpt4all
|
||||
```
|
||||
|
||||
</CodeGroup>
|
||||
|
||||
### JSON Config
|
||||
|
||||
<CodeGroup>
|
||||
|
||||
```python main.py
|
||||
from embedchain import App
|
||||
|
||||
# load llm configuration from config.json file
|
||||
app = App.from_config(config_path="config.json")
|
||||
```
|
||||
|
||||
```json config.json
|
||||
{
|
||||
"llm": {
|
||||
"provider": "gpt4all",
|
||||
"config": {
|
||||
"model": "orca-mini-3b-gguf2-q4_0.gguf",
|
||||
"temperature": 0.5,
|
||||
"max_tokens": 1000,
|
||||
"top_p": 1,
|
||||
"stream": false
|
||||
}
|
||||
},
|
||||
"embedder": {
|
||||
"provider": "gpt4all"
|
||||
}
|
||||
}
|
||||
```
|
||||
|
||||
</CodeGroup>
|
||||
@@ -0,0 +1,109 @@
|
||||
---
|
||||
title: '❓ query'
|
||||
---
|
||||
|
||||
`.query()` method empowers developers to ask questions and receive relevant answers through a user-friendly query API. Function signature is given below:
|
||||
|
||||
### Parameters
|
||||
|
||||
<ParamField path="input_query" type="str">
|
||||
Question to ask
|
||||
</ParamField>
|
||||
<ParamField path="config" type="BaseLlmConfig" optional>
|
||||
Configure different llm settings such as prompt, temprature, number_documents etc.
|
||||
</ParamField>
|
||||
<ParamField path="dry_run" type="bool" optional>
|
||||
The purpose is to test the prompt structure without actually running LLM inference. Defaults to `False`
|
||||
</ParamField>
|
||||
<ParamField path="where" type="dict" optional>
|
||||
A dictionary of key-value pairs to filter the chunks from the vector database. Defaults to `None`
|
||||
</ParamField>
|
||||
<ParamField path="citations" type="bool" optional>
|
||||
Return citations along with the LLM answer. Defaults to `False`
|
||||
</ParamField>
|
||||
|
||||
### Returns
|
||||
|
||||
<ResponseField name="answer" type="str | tuple">
|
||||
If `citations=False`, return a stringified answer to the question asked. <br />
|
||||
If `citations=True`, returns a tuple with answer and citations respectively.
|
||||
</ResponseField>
|
||||
|
||||
## Usage
|
||||
|
||||
### With citations
|
||||
|
||||
If you want to get the answer to question and return both answer and citations, use the following code snippet:
|
||||
|
||||
```python With Citations
|
||||
from embedchain import App
|
||||
|
||||
# Initialize app
|
||||
app = App()
|
||||
|
||||
# Add data source
|
||||
app.add("https://www.forbes.com/profile/elon-musk")
|
||||
|
||||
# Get relevant answer for your query
|
||||
answer, sources = app.query("What is the net worth of Elon?", citations=True)
|
||||
print(answer)
|
||||
# Answer: The net worth of Elon Musk is $221.9 billion.
|
||||
|
||||
print(sources)
|
||||
# [
|
||||
# (
|
||||
# 'Elon Musk PROFILEElon MuskCEO, Tesla$247.1B$2.3B (0.96%)Real Time Net Worthas of 12/7/23 ...',
|
||||
# {
|
||||
# 'url': 'https://www.forbes.com/profile/elon-musk',
|
||||
# 'score': 0.89,
|
||||
# ...
|
||||
# }
|
||||
# ),
|
||||
# (
|
||||
# '74% of the company, which is now called X.Wealth HistoryHOVER TO REVEAL NET WORTH BY YEARForbes ...',
|
||||
# {
|
||||
# 'url': 'https://www.forbes.com/profile/elon-musk',
|
||||
# 'score': 0.81,
|
||||
# ...
|
||||
# }
|
||||
# ),
|
||||
# (
|
||||
# 'founded in 2002, is worth nearly $150 billion after a $750 million tender offer in June 2023 ...',
|
||||
# {
|
||||
# 'url': 'https://www.forbes.com/profile/elon-musk',
|
||||
# 'score': 0.73,
|
||||
# ...
|
||||
# }
|
||||
# )
|
||||
# ]
|
||||
```
|
||||
|
||||
<Note>
|
||||
When `citations=True`, note that the returned `sources` are a list of tuples where each tuple has two elements (in the following order):
|
||||
1. source chunk
|
||||
2. dictionary with metadata about the source chunk
|
||||
- `url`: url of the source
|
||||
- `doc_id`: document id (used for book keeping purposes)
|
||||
- `score`: score of the source chunk with respect to the question
|
||||
- other metadata you might have added at the time of adding the source
|
||||
</Note>
|
||||
|
||||
### Without citations
|
||||
|
||||
If you just want to return answers and don't want to return citations, you can use the following example:
|
||||
|
||||
```python Without Citations
|
||||
from embedchain import App
|
||||
|
||||
# Initialize app
|
||||
app = App()
|
||||
|
||||
# Add data source
|
||||
app.add("https://www.forbes.com/profile/elon-musk")
|
||||
|
||||
# Get relevant answer for your query
|
||||
answer = app.query("What is the net worth of Elon?")
|
||||
print(answer)
|
||||
# Answer: The net worth of Elon Musk is $221.9 billion.
|
||||
```
|
||||
|
||||
@@ -0,0 +1,17 @@
|
||||
---
|
||||
title: 🔄 reset
|
||||
---
|
||||
|
||||
`reset()` method allows you to wipe the data from your RAG application and start from scratch.
|
||||
|
||||
## Usage
|
||||
|
||||
```python
|
||||
from embedchain import App
|
||||
|
||||
app = App()
|
||||
app.add("https://www.forbes.com/profile/elon-musk")
|
||||
|
||||
# Reset the app
|
||||
app.reset()
|
||||
```
|
||||
@@ -0,0 +1,111 @@
|
||||
---
|
||||
title: '🔍 search'
|
||||
---
|
||||
|
||||
`.search()` enables you to uncover the most pertinent context by performing a semantic search across your data sources based on a given query. Refer to the function signature below:
|
||||
|
||||
### Parameters
|
||||
|
||||
<ParamField path="query" type="str">
|
||||
Question
|
||||
</ParamField>
|
||||
<ParamField path="num_documents" type="int" optional>
|
||||
Number of relevant documents to fetch. Defaults to `3`
|
||||
</ParamField>
|
||||
<ParamField path="where" type="dict" optional>
|
||||
Key value pair for metadata filtering.
|
||||
</ParamField>
|
||||
<ParamField path="raw_filter" type="dict" optional>
|
||||
Pass raw filter query based on your vector database.
|
||||
Currently, `raw_filter` param is only supported for Pinecone vector database.
|
||||
</ParamField>
|
||||
|
||||
### Returns
|
||||
|
||||
<ResponseField name="answer" type="dict">
|
||||
Return list of dictionaries that contain the relevant chunk and their source information.
|
||||
</ResponseField>
|
||||
|
||||
## Usage
|
||||
|
||||
### Basic
|
||||
|
||||
Refer to the following example on how to use the search api:
|
||||
|
||||
```python Code example
|
||||
from embedchain import App
|
||||
|
||||
app = App()
|
||||
app.add("https://www.forbes.com/profile/elon-musk")
|
||||
|
||||
context = app.search("What is the net worth of Elon?", num_documents=2)
|
||||
print(context)
|
||||
```
|
||||
|
||||
### Advanced
|
||||
|
||||
#### Metadata filtering using `where` params
|
||||
|
||||
Here is an advanced example of `search()` API with metadata filtering on pinecone database:
|
||||
|
||||
```python
|
||||
import os
|
||||
|
||||
from embedchain import App
|
||||
|
||||
os.environ["PINECONE_API_KEY"] = "xxx"
|
||||
|
||||
config = {
|
||||
"vectordb": {
|
||||
"provider": "pinecone",
|
||||
"config": {
|
||||
"metric": "dotproduct",
|
||||
"vector_dimension": 1536,
|
||||
"index_name": "ec-test",
|
||||
"serverless_config": {"cloud": "aws", "region": "us-west-2"},
|
||||
},
|
||||
}
|
||||
}
|
||||
|
||||
app = App.from_config(config=config)
|
||||
|
||||
app.add("https://www.forbes.com/profile/bill-gates", metadata={"type": "forbes", "person": "gates"})
|
||||
app.add("https://en.wikipedia.org/wiki/Bill_Gates", metadata={"type": "wiki", "person": "gates"})
|
||||
|
||||
results = app.search("What is the net worth of Bill Gates?", where={"person": "gates"})
|
||||
print("Num of search results: ", len(results))
|
||||
```
|
||||
|
||||
#### Metadata filtering using `raw_filter` params
|
||||
|
||||
Following is an example of metadata filtering by passing the raw filter query that pinecone vector database follows:
|
||||
|
||||
```python
|
||||
import os
|
||||
|
||||
from embedchain import App
|
||||
|
||||
os.environ["PINECONE_API_KEY"] = "xxx"
|
||||
|
||||
config = {
|
||||
"vectordb": {
|
||||
"provider": "pinecone",
|
||||
"config": {
|
||||
"metric": "dotproduct",
|
||||
"vector_dimension": 1536,
|
||||
"index_name": "ec-test",
|
||||
"serverless_config": {"cloud": "aws", "region": "us-west-2"},
|
||||
},
|
||||
}
|
||||
}
|
||||
|
||||
app = App.from_config(config=config)
|
||||
|
||||
app.add("https://www.forbes.com/profile/bill-gates", metadata={"year": 2022, "person": "gates"})
|
||||
app.add("https://en.wikipedia.org/wiki/Bill_Gates", metadata={"year": 2024, "person": "gates"})
|
||||
|
||||
print("Filter with person: gates and year > 2023")
|
||||
raw_filter = {"$and": [{"person": "gates"}, {"year": {"$gt": 2023}}]}
|
||||
results = app.search("What is the net worth of Bill Gates?", raw_filter=raw_filter)
|
||||
print("Num of search results: ", len(results))
|
||||
```
|
||||
@@ -0,0 +1,54 @@
|
||||
---
|
||||
title: 'AI Assistant'
|
||||
---
|
||||
|
||||
The `AIAssistant` class, an alternative to the OpenAI Assistant API, is designed for those who prefer using large language models (LLMs) other than those provided by OpenAI. It facilitates the creation of AI Assistants with several key benefits:
|
||||
|
||||
- **Visibility into Citations**: It offers transparent access to the sources and citations used by the AI, enhancing the understanding and trustworthiness of its responses.
|
||||
|
||||
- **Debugging Capabilities**: Users have the ability to delve into and debug the AI's processes, allowing for a deeper understanding and fine-tuning of its performance.
|
||||
|
||||
- **Customizable Prompts**: The class provides the flexibility to modify and tailor prompts according to specific needs, enabling more precise and relevant interactions.
|
||||
|
||||
- **Chain of Thought Integration**: It supports the incorporation of a 'chain of thought' approach, which helps in breaking down complex queries into simpler, sequential steps, thereby improving the clarity and accuracy of responses.
|
||||
|
||||
It is ideal for those who value customization, transparency, and detailed control over their AI Assistant's functionalities.
|
||||
|
||||
### Arguments
|
||||
|
||||
<ParamField path="name" type="string" optional>
|
||||
Name for your AI assistant
|
||||
</ParamField>
|
||||
|
||||
<ParamField path="instructions" type="string" optional>
|
||||
How the Assistant and model should behave or respond
|
||||
</ParamField>
|
||||
|
||||
<ParamField path="assistant_id" type="string" optional>
|
||||
Load existing AI Assistant. If you pass this, you don't have to pass other arguments.
|
||||
</ParamField>
|
||||
|
||||
<ParamField path="thread_id" type="string" optional>
|
||||
Existing thread id if exists
|
||||
</ParamField>
|
||||
|
||||
<ParamField path="yaml_path" type="str" Optional>
|
||||
Embedchain pipeline config yaml path to use. This will define the configuration of the AI Assistant (such as configuring the LLM, vector database, and embedding model)
|
||||
</ParamField>
|
||||
|
||||
<ParamField path="data_sources" type="list" default="[]">
|
||||
Add data sources to your assistant. You can add in the following format: `[{"source": "https://example.com", "data_type": "web_page"}]`
|
||||
</ParamField>
|
||||
|
||||
<ParamField path="collect_metrics" type="boolean" default="True">
|
||||
Anonymous telemetry (doesn't collect any user information or user's files). Used to improve the Embedchain package utilization. Default is `True`.
|
||||
</ParamField>
|
||||
|
||||
|
||||
## Usage
|
||||
|
||||
For detailed guidance on creating your own AI Assistant, click the link below. It provides step-by-step instructions to help you through the process:
|
||||
|
||||
<Card title="Guide to Creating Your AI Assistant" icon="link" href="/examples/opensource-assistant">
|
||||
Learn how to build a customized AI Assistant using the `AIAssistant` class.
|
||||
</Card>
|
||||
@@ -0,0 +1,45 @@
|
||||
---
|
||||
title: 'OpenAI Assistant'
|
||||
---
|
||||
|
||||
### Arguments
|
||||
|
||||
<ParamField path="name" type="string">
|
||||
Name for your AI assistant
|
||||
</ParamField>
|
||||
|
||||
<ParamField path="instructions" type="string">
|
||||
how the Assistant and model should behave or respond
|
||||
</ParamField>
|
||||
|
||||
<ParamField path="assistant_id" type="string">
|
||||
Load existing OpenAI Assistant. If you pass this, you don't have to pass other arguments.
|
||||
</ParamField>
|
||||
|
||||
<ParamField path="thread_id" type="string">
|
||||
Existing OpenAI thread id if exists
|
||||
</ParamField>
|
||||
|
||||
<ParamField path="model" type="str" default="gpt-4-1106-preview">
|
||||
OpenAI model to use
|
||||
</ParamField>
|
||||
|
||||
<ParamField path="tools" type="list">
|
||||
OpenAI tools to use. Default set to `[{"type": "retrieval"}]`
|
||||
</ParamField>
|
||||
|
||||
<ParamField path="data_sources" type="list" default="[]">
|
||||
Add data sources to your assistant. You can add in the following format: `[{"source": "https://example.com", "data_type": "web_page"}]`
|
||||
</ParamField>
|
||||
|
||||
<ParamField path="telemetry" type="boolean" default="True">
|
||||
Anonymous telemetry (doesn't collect any user information or user's files). Used to improve the Embedchain package utilization. Default is `True`.
|
||||
</ParamField>
|
||||
|
||||
## Usage
|
||||
|
||||
For detailed guidance on creating your own OpenAI Assistant, click the link below. It provides step-by-step instructions to help you through the process:
|
||||
|
||||
<Card title="Guide to Creating Your OpenAI Assistant" icon="link" href="/examples/openai-assistant">
|
||||
Learn how to build an OpenAI Assistant using the `OpenAIAssistant` class.
|
||||
</Card>
|
||||
@@ -8,7 +8,7 @@ We believe in building a vibrant and supportive community around embedchain. The
|
||||
<Card title="Twitter" icon="twitter" href="https://twitter.com/embedchain">
|
||||
Follow us on Twitter
|
||||
</Card>
|
||||
<Card title="Slack" icon="slack" href="https://join.slack.com/t/embedchain/shared_invite/zt-22uwz3c46-Zg7cIh5rOBteT_xe1jwLDw" color="#4A154B">
|
||||
<Card title="Slack" icon="slack" href="https://embedchain.ai/slack" color="#4A154B">
|
||||
Join our slack community
|
||||
</Card>
|
||||
<Card title="Discord" icon="discord" href="https://discord.gg/6PzXDgEjG5" color="#7289DA">
|
||||
|
||||
@@ -0,0 +1,16 @@
|
||||
---
|
||||
title: "🐝 Beehiiv"
|
||||
---
|
||||
|
||||
To add any Beehiiv data sources to your app, just add the base url as the source and set the data_type to `beehiiv`.
|
||||
|
||||
```python
|
||||
from embedchain import App
|
||||
|
||||
app = App()
|
||||
|
||||
# source: just add the base url and set the data_type to 'beehiiv'
|
||||
app.add('https://aibreakfast.beehiiv.com', data_type='beehiiv')
|
||||
app.query("How much is OpenAI paying developers?")
|
||||
# Answer: OpenAI is aggressively recruiting Google's top AI researchers with offers ranging between $5 to $10 million annually, primarily in stock options.
|
||||
```
|
||||
@@ -0,0 +1,28 @@
|
||||
---
|
||||
title: '📊 CSV'
|
||||
---
|
||||
|
||||
You can load any csv file from your local file system or through a URL. Headers are included for each line, so if you have an `age` column, `18` will be added as `age: 18`.
|
||||
|
||||
## Usage
|
||||
|
||||
### Load from a local file
|
||||
|
||||
```python
|
||||
from embedchain import App
|
||||
app = App()
|
||||
app.add('/path/to/file.csv', data_type='csv')
|
||||
```
|
||||
|
||||
### Load from URL
|
||||
|
||||
```python
|
||||
from embedchain import App
|
||||
app = App()
|
||||
app.add('https://people.sc.fsu.edu/~jburkardt/data/csv/airtravel.csv', data_type="csv")
|
||||
```
|
||||
|
||||
<Note>
|
||||
There is a size limit allowed for csv file beyond which it can throw error. This limit is set by the LLMs. Please consider chunking large csv files into smaller csv files.
|
||||
</Note>
|
||||
|
||||
@@ -0,0 +1,42 @@
|
||||
---
|
||||
title: '⚙️ Custom'
|
||||
---
|
||||
|
||||
When we say "custom", we mean that you can customize the loader and chunker to your needs. This is done by passing a custom loader and chunker to the `add` method.
|
||||
|
||||
```python
|
||||
from embedchain import App
|
||||
import your_loader
|
||||
from my_module import CustomLoader
|
||||
from my_module import CustomChunker
|
||||
|
||||
app = App()
|
||||
loader = CustomLoader()
|
||||
chunker = CustomChunker()
|
||||
|
||||
app.add("source", data_type="custom", loader=loader, chunker=chunker)
|
||||
```
|
||||
|
||||
<Note>
|
||||
The custom loader and chunker must be a class that inherits from the [`BaseLoader`](https://github.com/embedchain/embedchain/blob/main/embedchain/loaders/base_loader.py) and [`BaseChunker`](https://github.com/embedchain/embedchain/blob/main/embedchain/chunkers/base_chunker.py) classes respectively.
|
||||
</Note>
|
||||
|
||||
<Note>
|
||||
If the `data_type` is not a valid data type, the `add` method will fallback to the `custom` data type and expect a custom loader and chunker to be passed by the user.
|
||||
</Note>
|
||||
|
||||
Example:
|
||||
|
||||
```python
|
||||
from embedchain import App
|
||||
from embedchain.loaders.github import GithubLoader
|
||||
|
||||
app = App()
|
||||
|
||||
loader = GithubLoader(config={"token": "ghp_xxx"})
|
||||
|
||||
app.add("repo:embedchain/embedchain type:repo", data_type="github", loader=loader)
|
||||
|
||||
app.query("What is Embedchain?")
|
||||
# Answer: Embedchain is a Data Platform for Large Language Models (LLMs). It allows users to seamlessly load, index, retrieve, and sync unstructured data in order to build dynamic, LLM-powered applications. There is also a JavaScript implementation called embedchain-js available on GitHub.
|
||||
```
|
||||
+37
-4
@@ -35,9 +35,16 @@ Default behavior is to create a persistent vector db in the directory **./db**.
|
||||
Create a local index:
|
||||
|
||||
```python
|
||||
from embedchain import Pipeline as App
|
||||
from embedchain import App
|
||||
|
||||
naval_chat_bot = App()
|
||||
config = {
|
||||
"app": {
|
||||
"config": {
|
||||
"id": "app-1"
|
||||
}
|
||||
}
|
||||
}
|
||||
naval_chat_bot = App.from_config(config=config)
|
||||
naval_chat_bot.add("https://www.youtube.com/watch?v=3qHkcs3kG44")
|
||||
naval_chat_bot.add("https://navalmanack.s3.amazonaws.com/Eric-Jorgenson_The-Almanack-of-Naval-Ravikant_Final.pdf")
|
||||
```
|
||||
@@ -45,8 +52,34 @@ naval_chat_bot.add("https://navalmanack.s3.amazonaws.com/Eric-Jorgenson_The-Alma
|
||||
You can reuse the local index with the same code, but without adding new documents:
|
||||
|
||||
```python
|
||||
from embedchain import Pipeline as App
|
||||
from embedchain import App
|
||||
|
||||
naval_chat_bot = App()
|
||||
config = {
|
||||
"app": {
|
||||
"config": {
|
||||
"id": "app-1"
|
||||
}
|
||||
}
|
||||
}
|
||||
naval_chat_bot = App.from_config(config=config)
|
||||
print(naval_chat_bot.query("What unique capacity does Naval argue humans possess when it comes to understanding explanations or concepts?"))
|
||||
```
|
||||
|
||||
## Resetting an app and vector database
|
||||
|
||||
You can reset the app by simply calling the `reset` method. This will delete the vector database and all other app related files.
|
||||
|
||||
```python
|
||||
from embedchain import App
|
||||
|
||||
app = App()config = {
|
||||
"app": {
|
||||
"config": {
|
||||
"id": "app-1"
|
||||
}
|
||||
}
|
||||
}
|
||||
naval_chat_bot = App.from_config(config=config)
|
||||
app.add("https://www.youtube.com/watch?v=3qHkcs3kG44")
|
||||
app.reset()
|
||||
```
|
||||
@@ -0,0 +1,41 @@
|
||||
---
|
||||
title: '📁 Directory/Folder'
|
||||
---
|
||||
|
||||
To use an entire directory as data source, just add `data_type` as `directory` and pass in the path of the local directory.
|
||||
|
||||
### Without customization
|
||||
|
||||
```python
|
||||
import os
|
||||
from embedchain import App
|
||||
|
||||
os.environ["OPENAI_API_KEY"] = "sk-xxx"
|
||||
|
||||
app = App()
|
||||
app.add("./elon-musk", data_type="directory")
|
||||
response = app.query("list all files")
|
||||
print(response)
|
||||
# Answer: Files are elon-musk-1.txt, elon-musk-2.pdf.
|
||||
```
|
||||
|
||||
### Customization
|
||||
|
||||
```python
|
||||
import os
|
||||
from embedchain import App
|
||||
from embedchain.loaders.directory_loader import DirectoryLoader
|
||||
|
||||
os.environ["OPENAI_API_KEY"] = "sk-xxx"
|
||||
lconfig = {
|
||||
"recursive": True,
|
||||
"extensions": [".txt"]
|
||||
}
|
||||
loader = DirectoryLoader(config=lconfig)
|
||||
app = App()
|
||||
app.add("./elon-musk", loader=loader)
|
||||
response = app.query("what are all the files related to?")
|
||||
print(response)
|
||||
|
||||
# Answer: The files are related to Elon Musk.
|
||||
```
|
||||
@@ -0,0 +1,28 @@
|
||||
---
|
||||
title: "💬 Discord"
|
||||
---
|
||||
|
||||
To add any Discord channel messages to your app, just add the `channel_id` as the source and set the `data_type` to `discord`.
|
||||
|
||||
<Note>
|
||||
This loader requires a Discord bot token with read messages access.
|
||||
To obtain the token, follow the instructions provided in this tutorial:
|
||||
<a href="https://www.writebots.com/discord-bot-token/">How to Get a Discord Bot Token?</a>.
|
||||
</Note>
|
||||
|
||||
```python
|
||||
import os
|
||||
from embedchain import App
|
||||
|
||||
# add your discord "BOT" token
|
||||
os.environ["DISCORD_TOKEN"] = "xxx"
|
||||
|
||||
app = App()
|
||||
|
||||
app.add("1177296711023075338", data_type="discord")
|
||||
|
||||
response = app.query("What is Joe saying about Elon Musk?")
|
||||
|
||||
print(response)
|
||||
# Answer: Joe is saying "Elon Musk is a genius".
|
||||
```
|
||||
@@ -0,0 +1,44 @@
|
||||
---
|
||||
title: '🗨️ Discourse'
|
||||
---
|
||||
|
||||
You can now easily load data from your community built with [Discourse](https://discourse.org/).
|
||||
|
||||
## Example
|
||||
|
||||
1. Setup the Discourse Loader with your community url.
|
||||
```Python
|
||||
from embedchain.loaders.discourse import DiscourseLoader
|
||||
|
||||
dicourse_loader = DiscourseLoader(config={"domain": "https://community.openai.com"})
|
||||
```
|
||||
|
||||
2. Once you setup the loader, you can create an app and load data using the above discourse loader
|
||||
```Python
|
||||
import os
|
||||
from embedchain.pipeline import Pipeline as App
|
||||
|
||||
os.environ["OPENAI_API_KEY"] = "sk-xxx"
|
||||
|
||||
app = App()
|
||||
|
||||
app.add("openai after:2023-10-1", data_type="discourse", loader=dicourse_loader)
|
||||
|
||||
question = "Where can I find the OpenAI API status page?"
|
||||
app.query(question)
|
||||
# Answer: You can find the OpenAI API status page at https:/status.openai.com/.
|
||||
```
|
||||
|
||||
NOTE: The `add` function of the app will accept any executable search query to load data. Refer [Discourse API Docs](https://docs.discourse.org/#tag/Search) to learn more about search queries.
|
||||
|
||||
3. We automatically create a chunker to chunk your discourse data, however if you wish to provide your own chunker class. Here is how you can do that:
|
||||
```Python
|
||||
|
||||
from embedchain.chunkers.discourse import DiscourseChunker
|
||||
from embedchain.config.add_config import ChunkerConfig
|
||||
|
||||
discourse_chunker_config = ChunkerConfig(chunk_size=1000, chunk_overlap=0, length_function=len)
|
||||
discourse_chunker = DiscourseChunker(config=discourse_chunker_config)
|
||||
|
||||
app.add("openai", data_type='discourse', loader=dicourse_loader, chunker=discourse_chunker)
|
||||
```
|
||||
@@ -1,14 +1,14 @@
|
||||
---
|
||||
title: '📚🌐 Code documentation'
|
||||
title: '📚 Code Docs website'
|
||||
---
|
||||
|
||||
To add any code documentation website as a loader, use the data_type as `docs_site`. Eg:
|
||||
|
||||
```python
|
||||
from embedchain import Pipeline as App
|
||||
from embedchain import App
|
||||
|
||||
app = App()
|
||||
app.add("https://docs.embedchain.ai/", data_type="docs_site")
|
||||
app.query("What is Embedchain?")
|
||||
# Answer: Embedchain is a platform that utilizes various components, including paid/proprietary ones, to provide what is believed to be the best configuration available. It uses LLM (Language Model) providers such as OpenAI, Anthpropic, Vertex_AI, GPT4ALL, Azure_OpenAI, LLAMA2, JINA, and COHERE. Embedchain allows users to import and utilize these LLM providers for their applications.'
|
||||
# Answer: Embedchain is a platform that utilizes various components, including paid/proprietary ones, to provide what is believed to be the best configuration available. It uses LLM (Language Model) providers such as OpenAI, Anthpropic, Vertex_AI, GPT4ALL, Azure_OpenAI, LLAMA2, JINA, Ollama, Together and COHERE. Embedchain allows users to import and utilize these LLM providers for their applications.'
|
||||
```
|
||||
@@ -7,7 +7,7 @@ title: '📄 Docx file'
|
||||
To add any doc/docx file, use the data_type as `docx`. `docx` allows remote urls and conventional file paths. Eg:
|
||||
|
||||
```python
|
||||
from embedchain import Pipeline as App
|
||||
from embedchain import App
|
||||
|
||||
app = App()
|
||||
app.add('https://example.com/content/intro.docx', data_type="docx")
|
||||
@@ -0,0 +1,37 @@
|
||||
---
|
||||
title: '💾 Dropbox'
|
||||
---
|
||||
|
||||
To load folders or files from your Dropbox account, configure the `data_type` parameter as `dropbox` and specify the path to the desired file or folder, starting from the root directory of your Dropbox account.
|
||||
|
||||
For Dropbox access, an **access token** is required. Obtain this token by visiting [Dropbox Developer Apps](https://www.dropbox.com/developers/apps). There, create a new app and generate an access token for it.
|
||||
|
||||
Ensure your app has the following settings activated:
|
||||
|
||||
- In the Permissions section, enable `files.content.read` and `files.metadata.read`.
|
||||
|
||||
## Usage
|
||||
|
||||
Install the `dropbox` pypi package:
|
||||
|
||||
```bash
|
||||
pip install dropbox
|
||||
```
|
||||
|
||||
Following is an example of how to use the dropbox loader:
|
||||
|
||||
```python
|
||||
import os
|
||||
from embedchain import App
|
||||
|
||||
os.environ["DROPBOX_ACCESS_TOKEN"] = "sl.xxx"
|
||||
os.environ["OPENAI_API_KEY"] = "sk-xxx"
|
||||
|
||||
app = App()
|
||||
|
||||
# any path from the root of your dropbox account, you can leave it "" for the root folder
|
||||
app.add("/test", data_type="dropbox")
|
||||
|
||||
print(app.query("Which two celebrities are mentioned here?"))
|
||||
# The two celebrities mentioned in the given context are Elon Musk and Jeff Bezos.
|
||||
```
|
||||
@@ -0,0 +1,50 @@
|
||||
---
|
||||
title: 📝 Github
|
||||
---
|
||||
|
||||
1. Setup the Github loader by configuring the Github account with username and personal access token (PAT). Check out [this](https://docs.github.com/en/enterprise-server@3.6/authentication/keeping-your-account-and-data-secure/managing-your-personal-access-tokens#creating-a-personal-access-token) link to learn how to create a PAT.
|
||||
```Python
|
||||
from embedchain.loaders.github import GithubLoader
|
||||
|
||||
loader = GithubLoader(
|
||||
config={
|
||||
"token":"ghp_xxxx"
|
||||
}
|
||||
)
|
||||
```
|
||||
|
||||
2. Once you setup the loader, you can create an app and load data using the above Github loader
|
||||
```Python
|
||||
import os
|
||||
from embedchain.pipeline import Pipeline as App
|
||||
|
||||
os.environ["OPENAI_API_KEY"] = "sk-xxxx"
|
||||
|
||||
app = App()
|
||||
|
||||
app.add("repo:embedchain/embedchain type:repo", data_type="github", loader=loader)
|
||||
|
||||
response = app.query("What is Embedchain?")
|
||||
# Answer: Embedchain is a Data Platform for Large Language Models (LLMs). It allows users to seamlessly load, index, retrieve, and sync unstructured data in order to build dynamic, LLM-powered applications. There is also a JavaScript implementation called embedchain-js available on GitHub.
|
||||
```
|
||||
The `add` function of the app will accept any valid github query with qualifiers. It only supports loading github code, repository, issues and pull-requests.
|
||||
<Note>
|
||||
You must provide qualifiers `type:` and `repo:` in the query. The `type:` qualifier can be a combination of `code`, `repo`, `pr`, `issue`. The `repo:` qualifier must be a valid github repository name.
|
||||
</Note>
|
||||
|
||||
<Card title="Valid queries" icon="lightbulb" iconType="duotone" color="#ca8b04">
|
||||
- `repo:embedchain/embedchain type:repo` - to load the repository
|
||||
- `repo:embedchain/embedchain type:issue,pr` - to load the issues and pull-requests of the repository
|
||||
- `repo:embedchain/embedchain type:issue state:closed` - to load the closed issues of the repository
|
||||
</Card>
|
||||
|
||||
3. We automatically create a chunker to chunk your GitHub data, however if you wish to provide your own chunker class. Here is how you can do that:
|
||||
```Python
|
||||
from embedchain.chunkers.common_chunker import CommonChunker
|
||||
from embedchain.config.add_config import ChunkerConfig
|
||||
|
||||
github_chunker_config = ChunkerConfig(chunk_size=2000, chunk_overlap=0, length_function=len)
|
||||
github_chunker = CommonChunker(config=github_chunker_config)
|
||||
|
||||
app.add(load_query, data_type="github", loader=loader, chunker=github_chunker)
|
||||
```
|
||||
@@ -24,7 +24,7 @@ To use this you need to save `credentials.json` in the directory from where you
|
||||
12. Put the `.json` file in your current directory and rename it to `credentials.json`
|
||||
|
||||
```python
|
||||
from embedchain import Pipeline as App
|
||||
from embedchain import App
|
||||
|
||||
app = App()
|
||||
|
||||
@@ -0,0 +1,28 @@
|
||||
---
|
||||
title: 'Google Drive'
|
||||
---
|
||||
|
||||
To use GoogleDriveLoader you must install the extra dependencies with `pip install --upgrade embedchain[googledrive]`.
|
||||
|
||||
The data_type must be `google_drive`. Otherwise, it will be considered a regular web page.
|
||||
|
||||
Google Drive requires the setup of credentials. This can be done by following the steps below:
|
||||
|
||||
1. Go to the [Google Cloud Console](https://console.cloud.google.com/apis/credentials).
|
||||
2. Create a project if you don't have one already.
|
||||
3. Enable the [Google Drive API](https://console.cloud.google.com/flows/enableapi?apiid=drive.googleapis.com)
|
||||
4. [Authorize credentials for desktop app](https://developers.google.com/drive/api/quickstart/python#authorize_credentials_for_a_desktop_application)
|
||||
5. When done, you will be able to download the credentials in `json` format. Rename the downloaded file to `credentials.json` and save it in `~/.credentials/credentials.json`
|
||||
6. Set the environment variable `GOOGLE_APPLICATION_CREDENTIALS=~/.credentials/credentials.json`
|
||||
|
||||
The first time you use the loader, you will be prompted to enter your Google account credentials.
|
||||
|
||||
|
||||
```python
|
||||
from embedchain import App
|
||||
|
||||
app = App()
|
||||
|
||||
url = "https://drive.google.com/drive/u/0/folders/xxx-xxx"
|
||||
app.add(url, data_type="google_drive")
|
||||
```
|
||||
@@ -0,0 +1,45 @@
|
||||
---
|
||||
title: "🖼️ Image"
|
||||
---
|
||||
|
||||
|
||||
To use an image as data source, just add `data_type` as `image` and pass in the path of the image (local or hosted).
|
||||
|
||||
We use [GPT4 Vision](https://platform.openai.com/docs/guides/vision) to generate meaning of the image using a custom prompt, and then use the generated text as the data source.
|
||||
|
||||
You would require an OpenAI API key with access to `gpt-4-vision-preview` model to use this feature.
|
||||
|
||||
### Without customization
|
||||
|
||||
```python
|
||||
import os
|
||||
from embedchain import App
|
||||
|
||||
os.environ["OPENAI_API_KEY"] = "sk-xxx"
|
||||
|
||||
app = App()
|
||||
app.add("./Elon-Musk.webp", data_type="image")
|
||||
response = app.query("Describe the man in the image.")
|
||||
print(response)
|
||||
# Answer: The man in the image is dressed in formal attire, wearing a dark suit jacket and a white collared shirt. He has short hair and is standing. He appears to be gazing off to the side with a reflective expression. The background is dark with faint, warm-toned vertical lines, possibly from a lit environment behind the individual or reflections. The overall atmosphere is somewhat moody and introspective.
|
||||
```
|
||||
|
||||
### Customization
|
||||
|
||||
```python
|
||||
import os
|
||||
from embedchain import App
|
||||
from embedchain.loaders.image import ImageLoader
|
||||
|
||||
image_loader = ImageLoader(
|
||||
max_tokens=100,
|
||||
api_key="sk-xxx",
|
||||
prompt="Is the person looking wealthy? Structure your thoughts around what you see in the image.",
|
||||
)
|
||||
|
||||
app = App()
|
||||
app.add("./Elon-Musk.webp", data_type="image", loader=image_loader)
|
||||
response = app.query("Describe the man in the image.")
|
||||
print(response)
|
||||
# Answer: The man in the image appears to be well-dressed in a suit and shirt, suggesting that he may be in a professional or formal setting. His composed demeanor and confident posture further indicate a sense of self-assurance. Based on these visual cues, one could infer that the man may have a certain level of economic or social status, possibly indicating wealth or professional success.
|
||||
```
|
||||
@@ -21,7 +21,7 @@ If you would like to add other data structures (e.g. list, dict etc.), convert i
|
||||
<CodeGroup>
|
||||
|
||||
```python python
|
||||
from embedchain import Pipeline as App
|
||||
from embedchain import App
|
||||
|
||||
app = App()
|
||||
|
||||
@@ -5,7 +5,7 @@ title: '📝 Mdx file'
|
||||
To add any `.mdx` file to your app, use the data_type (first argument to `.add()` method) as `mdx`. Note that this supports support mdx file present on machine, so this should be a file path. Eg:
|
||||
|
||||
```python
|
||||
from embedchain import Pipeline as App
|
||||
from embedchain import App
|
||||
|
||||
app = App()
|
||||
app.add('path/to/file.mdx', data_type='mdx')
|
||||
@@ -0,0 +1,47 @@
|
||||
---
|
||||
title: '🐬 MySQL'
|
||||
---
|
||||
|
||||
1. Setup the MySQL loader by configuring the SQL db.
|
||||
```Python
|
||||
from embedchain.loaders.mysql import MySQLLoader
|
||||
|
||||
config = {
|
||||
"host": "host",
|
||||
"port": "port",
|
||||
"database": "database",
|
||||
"user": "username",
|
||||
"password": "password",
|
||||
}
|
||||
|
||||
mysql_loader = MySQLLoader(config=config)
|
||||
```
|
||||
|
||||
For more details on how to setup with valid config, check MySQL [documentation](https://dev.mysql.com/doc/connector-python/en/connector-python-connectargs.html).
|
||||
|
||||
2. Once you setup the loader, you can create an app and load data using the above MySQL loader
|
||||
```Python
|
||||
from embedchain.pipeline import Pipeline as App
|
||||
|
||||
app = App()
|
||||
|
||||
app.add("SELECT * FROM table_name;", data_type='mysql', loader=mysql_loader)
|
||||
# Adds `(1, 'What is your net worth, Elon Musk?', "As of October 2023, Elon Musk's net worth is $255.2 billion.")`
|
||||
|
||||
response = app.query(question)
|
||||
# Answer: As of October 2023, Elon Musk's net worth is $255.2 billion.
|
||||
```
|
||||
|
||||
NOTE: The `add` function of the app will accept any executable query to load data. DO NOT pass the `CREATE`, `INSERT` queries in `add` function.
|
||||
|
||||
3. We automatically create a chunker to chunk your SQL data, however if you wish to provide your own chunker class. Here is how you can do that:
|
||||
``Python
|
||||
|
||||
from embedchain.chunkers.mysql import MySQLChunker
|
||||
from embedchain.config.add_config import ChunkerConfig
|
||||
|
||||
mysql_chunker_config = ChunkerConfig(chunk_size=1000, chunk_overlap=0, length_function=len)
|
||||
mysql_chunker = MySQLChunker(config=mysql_chunker_config)
|
||||
|
||||
app.add("SELECT * FROM table_name;", data_type='mysql', loader=mysql_loader, chunker=mysql_chunker)
|
||||
```
|
||||
@@ -8,7 +8,7 @@ To load a notion page, use the data_type as `notion`. Since it is hard to automa
|
||||
The next argument must **end** with the `notion page id`. The id is a 32-character string. Eg:
|
||||
|
||||
```python
|
||||
from embedchain import Pipeline as App
|
||||
from embedchain import App
|
||||
|
||||
app = App()
|
||||
|
||||
@@ -5,7 +5,7 @@ title: 🙌 OpenAPI
|
||||
To add any OpenAPI spec yaml file (currently the json file will be detected as JSON data type), use the data_type as 'openapi'. 'openapi' allows remote urls and conventional file paths.
|
||||
|
||||
```python
|
||||
from embedchain import Pipeline as App
|
||||
from embedchain import App
|
||||
|
||||
app = App()
|
||||
|
||||
@@ -0,0 +1,41 @@
|
||||
---
|
||||
title: Overview
|
||||
---
|
||||
|
||||
Embedchain comes with built-in support for various data sources. We handle the complexity of loading unstructured data from these data sources, allowing you to easily customize your app through a user-friendly interface.
|
||||
|
||||
<CardGroup cols={4}>
|
||||
<Card title="PDF file" href="/components/data-sources/pdf-file"></Card>
|
||||
<Card title="CSV file" href="/components/data-sources/csv"></Card>
|
||||
<Card title="JSON file" href="/components/data-sources/json"></Card>
|
||||
<Card title="Text" href="/components/data-sources/text"></Card>
|
||||
<Card title="Directory" href="/components/data-sources/directory"></Card>
|
||||
<Card title="Web page" href="/components/data-sources/web-page"></Card>
|
||||
<Card title="Youtube Channel" href="/components/data-sources/youtube-channel"></Card>
|
||||
<Card title="Youtube Video" href="/components/data-sources/youtube-video"></Card>
|
||||
<Card title="Docs website" href="/components/data-sources/docs-site"></Card>
|
||||
<Card title="MDX file" href="/components/data-sources/mdx"></Card>
|
||||
<Card title="DOCX file" href="/components/data-sources/docx"></Card>
|
||||
<Card title="Notion" href="/components/data-sources/notion"></Card>
|
||||
<Card title="Sitemap" href="/components/data-sources/sitemap"></Card>
|
||||
<Card title="XML file" href="/components/data-sources/xml"></Card>
|
||||
<Card title="Q&A pair" href="/components/data-sources/qna"></Card>
|
||||
<Card title="OpenAPI" href="/components/data-sources/openapi"></Card>
|
||||
<Card title="Gmail" href="/components/data-sources/gmail"></Card>
|
||||
<Card title="Google Drive" href="/components/data-sources/google-drive"></Card>
|
||||
<Card title="GitHub" href="/components/data-sources/github"></Card>
|
||||
<Card title="Postgres" href="/components/data-sources/postgres"></Card>
|
||||
<Card title="MySQL" href="/components/data-sources/mysql"></Card>
|
||||
<Card title="Slack" href="/components/data-sources/slack"></Card>
|
||||
<Card title="Discord" href="/components/data-sources/discord"></Card>
|
||||
<Card title="Discourse" href="/components/data-sources/discourse"></Card>
|
||||
<Card title="Substack" href="/components/data-sources/substack"></Card>
|
||||
<Card title="Beehiiv" href="/components/data-sources/beehiiv"></Card>
|
||||
<Card title="Dropbox" href="/components/data-sources/dropbox"></Card>
|
||||
<Card title="Image" href="/components/data-sources/image"></Card>
|
||||
<Card title="Custom" href="/components/data-sources/custom"></Card>
|
||||
</CardGroup>
|
||||
|
||||
<br/ >
|
||||
|
||||
<Snippet file="missing-data-source-tip.mdx" />
|
||||
@@ -0,0 +1,43 @@
|
||||
---
|
||||
title: '📰 PDF'
|
||||
---
|
||||
|
||||
You can load any pdf file from your local file system or through a URL.
|
||||
|
||||
## Usage
|
||||
|
||||
### Load from a local file
|
||||
|
||||
```python
|
||||
from embedchain import App
|
||||
app = App()
|
||||
app.add('/path/to/file.pdf', data_type='pdf_file')
|
||||
```
|
||||
|
||||
### Load from URL
|
||||
|
||||
```python
|
||||
from embedchain import App
|
||||
app = App()
|
||||
app.add('https://arxiv.org/pdf/1706.03762.pdf', data_type='pdf_file')
|
||||
app.query("What is the paper 'attention is all you need' about?", citations=True)
|
||||
# Answer: The paper "Attention Is All You Need" proposes a new network architecture called the Transformer, which is based solely on attention mechanisms. It suggests that complex recurrent or convolutional neural networks can be replaced with a simpler architecture that connects the encoder and decoder through attention. The paper discusses how this approach can improve sequence transduction models, such as neural machine translation.
|
||||
# Contexts:
|
||||
# [
|
||||
# (
|
||||
# 'Provided proper attribution is ...',
|
||||
# {
|
||||
# 'page': 0,
|
||||
# 'url': 'https://arxiv.org/pdf/1706.03762.pdf',
|
||||
# 'score': 0.3676220203221626,
|
||||
# ...
|
||||
# }
|
||||
# ),
|
||||
# ]
|
||||
```
|
||||
|
||||
We also store the page number under the key `page` with each chunk that helps understand where the answer is coming from. You can fetch the `page` key while during retrieval (refer to the example given above).
|
||||
|
||||
<Note>
|
||||
Note that we do not support password protected pdf files.
|
||||
</Note>
|
||||
@@ -5,7 +5,7 @@ title: '❓💬 Queston and answer pair'
|
||||
QnA pair is a local data type. To supply your own QnA pair, use the data_type as `qna_pair` and enter a tuple. Eg:
|
||||
|
||||
```python
|
||||
from embedchain import Pipeline as App
|
||||
from embedchain import App
|
||||
|
||||
app = App()
|
||||
|
||||
@@ -5,7 +5,7 @@ title: '🗺️ Sitemap'
|
||||
Add all web pages from an xml-sitemap. Filters non-text files. Use the data_type as `sitemap`. Eg:
|
||||
|
||||
```python
|
||||
from embedchain import Pipeline as App
|
||||
from embedchain import App
|
||||
|
||||
app = App()
|
||||
|
||||
@@ -0,0 +1,71 @@
|
||||
---
|
||||
title: '🤖 Slack'
|
||||
---
|
||||
|
||||
## Pre-requisite
|
||||
- Download required packages by running `pip install --upgrade "embedchain[slack]"`.
|
||||
- Configure your slack bot token as environment variable `SLACK_USER_TOKEN`.
|
||||
- Find your user token on your [Slack Account](https://api.slack.com/authentication/token-types)
|
||||
- Make sure your slack user token includes [search](https://api.slack.com/scopes/search:read) scope.
|
||||
|
||||
## Example
|
||||
|
||||
### Get Started
|
||||
|
||||
This will automatically retrieve data from the workspace associated with the user's token.
|
||||
|
||||
```python
|
||||
import os
|
||||
from embedchain import App
|
||||
|
||||
os.environ["SLACK_USER_TOKEN"] = "xoxp-xxx"
|
||||
app = App()
|
||||
|
||||
app.add("in:general", data_type="slack")
|
||||
|
||||
result = app.query("what are the messages in general channel?")
|
||||
|
||||
print(result)
|
||||
```
|
||||
|
||||
|
||||
### Customize your SlackLoader
|
||||
1. Setup the Slack loader by configuring the Slack Webclient.
|
||||
```Python
|
||||
from embedchain.loaders.slack import SlackLoader
|
||||
|
||||
os.environ["SLACK_USER_TOKEN"] = "xoxp-*"
|
||||
|
||||
config = {
|
||||
'base_url': slack_app_url,
|
||||
'headers': web_headers,
|
||||
'team_id': slack_team_id,
|
||||
}
|
||||
|
||||
loader = SlackLoader(config)
|
||||
```
|
||||
|
||||
NOTE: you can also pass the `config` with `base_url`, `headers`, `team_id` to setup your SlackLoader.
|
||||
|
||||
2. Once you setup the loader, you can create an app and load data using the above slack loader
|
||||
```Python
|
||||
import os
|
||||
from embedchain.pipeline import Pipeline as App
|
||||
|
||||
app = App()
|
||||
|
||||
app.add("in:random", data_type="slack", loader=loader)
|
||||
question = "Which bots are available in the slack workspace's random channel?"
|
||||
# Answer: The available bot in the slack workspace's random channel is the Embedchain bot.
|
||||
```
|
||||
|
||||
3. We automatically create a chunker to chunk your slack data, however if you wish to provide your own chunker class. Here is how you can do that:
|
||||
```Python
|
||||
from embedchain.chunkers.slack import SlackChunker
|
||||
from embedchain.config.add_config import ChunkerConfig
|
||||
|
||||
slack_chunker_config = ChunkerConfig(chunk_size=1000, chunk_overlap=0, length_function=len)
|
||||
slack_chunker = SlackChunker(config=slack_chunker_config)
|
||||
|
||||
app.add(slack_chunker, data_type="slack", loader=loader, chunker=slack_chunker)
|
||||
```
|
||||
@@ -0,0 +1,16 @@
|
||||
---
|
||||
title: "📝 Substack"
|
||||
---
|
||||
|
||||
To add any Substack data sources to your app, just add the main base url as the source and set the data_type to `substack`.
|
||||
|
||||
```python
|
||||
from embedchain import App
|
||||
|
||||
app = App()
|
||||
|
||||
# source: for any substack just add the root URL
|
||||
app.add('https://www.lennysnewsletter.com', data_type='substack')
|
||||
app.query("Who is Brian Chesky?")
|
||||
# Answer: Brian Chesky is the co-founder and CEO of Airbnb.
|
||||
```
|
||||
@@ -7,7 +7,7 @@ title: '📝 Text'
|
||||
Text is a local data type. To supply your own text, use the data_type as `text` and enter a string. The text is not processed, this can be very versatile. Eg:
|
||||
|
||||
```python
|
||||
from embedchain import Pipeline as App
|
||||
from embedchain import App
|
||||
|
||||
app = App()
|
||||
|
||||
@@ -1,11 +1,11 @@
|
||||
---
|
||||
title: '🌐📄 Web page'
|
||||
title: '🌐 HTML Web page'
|
||||
---
|
||||
|
||||
To add any web page, use the data_type as `web_page`. Eg:
|
||||
|
||||
```python
|
||||
from embedchain import Pipeline as App
|
||||
from embedchain import App
|
||||
|
||||
app = App()
|
||||
|
||||
@@ -7,7 +7,7 @@ title: '🧾 XML file'
|
||||
To add any xml file, use the data_type as `xml`. Eg:
|
||||
|
||||
```python
|
||||
from embedchain import Pipeline as App
|
||||
from embedchain import App
|
||||
|
||||
app = App()
|
||||
|
||||
@@ -0,0 +1,22 @@
|
||||
---
|
||||
title: '📽️ Youtube Channel'
|
||||
---
|
||||
|
||||
## Setup
|
||||
|
||||
Make sure you have all the required packages installed before using this data type. You can install them by running the following command in your terminal.
|
||||
|
||||
```bash
|
||||
pip install -U "embedchain[youtube]"
|
||||
```
|
||||
|
||||
## Usage
|
||||
|
||||
To add all the videos from a youtube channel to your app, use the data_type as `youtube_channel`.
|
||||
|
||||
```python
|
||||
from embedchain import App
|
||||
|
||||
app = App()
|
||||
app.add("@channel_name", data_type="youtube_channel")
|
||||
```
|
||||
@@ -0,0 +1,22 @@
|
||||
---
|
||||
title: '📺 Youtube Video'
|
||||
---
|
||||
|
||||
## Setup
|
||||
|
||||
Make sure you have all the required packages installed before using this data type. You can install them by running the following command in your terminal.
|
||||
|
||||
```bash
|
||||
pip install -U "embedchain[youtube]"
|
||||
```
|
||||
|
||||
## Usage
|
||||
|
||||
To add any youtube video to your app, use the data_type as `youtube_video`. Eg:
|
||||
|
||||
```python
|
||||
from embedchain import App
|
||||
|
||||
app = App()
|
||||
app.add('a_valid_youtube_url_here', data_type='youtube_video')
|
||||
```
|
||||
@@ -8,10 +8,12 @@ Embedchain supports several embedding models from the following providers:
|
||||
|
||||
<CardGroup cols={4}>
|
||||
<Card title="OpenAI" href="#openai"></Card>
|
||||
<Card title="GoogleAI" href="#google-ai"></Card>
|
||||
<Card title="Azure OpenAI" href="#azure-openai"></Card>
|
||||
<Card title="GPT4All" href="#gpt4all"></Card>
|
||||
<Card title="Hugging Face" href="#hugging-face"></Card>
|
||||
<Card title="Vertex AI" href="#vertex-ai"></Card>
|
||||
<Card title="NVIDIA AI" href="#nvidia-ai"></Card>
|
||||
</CardGroup>
|
||||
|
||||
## OpenAI
|
||||
@@ -24,12 +26,12 @@ Once you have obtained the key, you can use it like this:
|
||||
|
||||
```python main.py
|
||||
import os
|
||||
from embedchain import Pipeline as App
|
||||
from embedchain import App
|
||||
|
||||
os.environ['OPENAI_API_KEY'] = 'xxx'
|
||||
|
||||
# load embedding model configuration from config.yaml file
|
||||
app = App.from_config(yaml_path="config.yaml")
|
||||
app = App.from_config(config_path="config.yaml")
|
||||
|
||||
app.add("https://en.wikipedia.org/wiki/OpenAI")
|
||||
app.query("What is OpenAI?")
|
||||
@@ -39,11 +41,59 @@ app.query("What is OpenAI?")
|
||||
embedder:
|
||||
provider: openai
|
||||
config:
|
||||
model: 'text-embedding-ada-002'
|
||||
model: 'text-embedding-3-small'
|
||||
```
|
||||
|
||||
</CodeGroup>
|
||||
|
||||
* OpenAI announced two new embedding models: `text-embedding-3-small` and `text-embedding-3-large`. Embedchain supports both these models. Below you can find YAML config for both:
|
||||
|
||||
<CodeGroup>
|
||||
|
||||
```yaml text-embedding-3-small.yaml
|
||||
embedder:
|
||||
provider: openai
|
||||
config:
|
||||
model: 'text-embedding-3-small'
|
||||
```
|
||||
|
||||
```yaml text-embedding-3-large.yaml
|
||||
embedder:
|
||||
provider: openai
|
||||
config:
|
||||
model: 'text-embedding-3-large'
|
||||
```
|
||||
|
||||
</CodeGroup>
|
||||
|
||||
## Google AI
|
||||
|
||||
To use Google AI embedding function, you have to set the `GOOGLE_API_KEY` environment variable. You can obtain the Google API key from the [Google Maker Suite](https://makersuite.google.com/app/apikey)
|
||||
|
||||
<CodeGroup>
|
||||
```python main.py
|
||||
import os
|
||||
from embedchain import App
|
||||
|
||||
os.environ["GOOGLE_API_KEY"] = "xxx"
|
||||
|
||||
app = App.from_config(config_path="config.yaml")
|
||||
```
|
||||
|
||||
```yaml config.yaml
|
||||
embedder:
|
||||
provider: google
|
||||
config:
|
||||
model: 'models/embedding-001'
|
||||
task_type: "retrieval_document"
|
||||
title: "Embeddings for Embedchain"
|
||||
```
|
||||
</CodeGroup>
|
||||
<br/>
|
||||
<Note>
|
||||
For more details regarding the Google AI embedding model, please refer to the [Google AI documentation](https://ai.google.dev/tutorials/python_quickstart#use_embeddings).
|
||||
</Note>
|
||||
|
||||
## Azure OpenAI
|
||||
|
||||
To use Azure OpenAI embedding model, you have to set some of the azure openai related environment variables as given in the code block below:
|
||||
@@ -52,14 +102,14 @@ To use Azure OpenAI embedding model, you have to set some of the azure openai re
|
||||
|
||||
```python main.py
|
||||
import os
|
||||
from embedchain import Pipeline as App
|
||||
from embedchain import App
|
||||
|
||||
os.environ["OPENAI_API_TYPE"] = "azure"
|
||||
os.environ["OPENAI_API_BASE"] = "https://xxx.openai.azure.com/"
|
||||
os.environ["OPENAI_API_KEY"] = "xxx"
|
||||
os.environ["AZURE_OPENAI_ENDPOINT"] = "https://xxx.openai.azure.com/"
|
||||
os.environ["AZURE_OPENAI_API_KEY"] = "xxx"
|
||||
os.environ["OPENAI_API_VERSION"] = "xxx"
|
||||
|
||||
app = App.from_config(yaml_path="config.yaml")
|
||||
app = App.from_config(config_path="config.yaml")
|
||||
```
|
||||
|
||||
```yaml config.yaml
|
||||
@@ -90,10 +140,10 @@ GPT4All supports generating high quality embeddings of arbitrary length document
|
||||
<CodeGroup>
|
||||
|
||||
```python main.py
|
||||
from embedchain import Pipeline as App
|
||||
from embedchain import App
|
||||
|
||||
# load embedding model configuration from config.yaml file
|
||||
app = App.from_config(yaml_path="config.yaml")
|
||||
app = App.from_config(config_path="config.yaml")
|
||||
```
|
||||
|
||||
```yaml config.yaml
|
||||
@@ -119,10 +169,10 @@ Hugging Face supports generating embeddings of arbitrary length documents of tex
|
||||
<CodeGroup>
|
||||
|
||||
```python main.py
|
||||
from embedchain import Pipeline as App
|
||||
from embedchain import App
|
||||
|
||||
# load embedding model configuration from config.yaml file
|
||||
app = App.from_config(yaml_path="config.yaml")
|
||||
app = App.from_config(config_path="config.yaml")
|
||||
```
|
||||
|
||||
```yaml config.yaml
|
||||
@@ -150,10 +200,10 @@ Embedchain supports Google's VertexAI embeddings model through a simple interfac
|
||||
<CodeGroup>
|
||||
|
||||
```python main.py
|
||||
from embedchain import Pipeline as App
|
||||
from embedchain import App
|
||||
|
||||
# load embedding model configuration from config.yaml file
|
||||
app = App.from_config(yaml_path="config.yaml")
|
||||
app = App.from_config(config_path="config.yaml")
|
||||
```
|
||||
|
||||
```yaml config.yaml
|
||||
@@ -171,3 +221,55 @@ embedder:
|
||||
```
|
||||
|
||||
</CodeGroup>
|
||||
|
||||
## NVIDIA AI
|
||||
|
||||
[NVIDIA AI Foundation Endpoints](https://www.nvidia.com/en-us/ai-data-science/foundation-models/) let you quickly use NVIDIA's AI models, such as Mixtral 8x7B, Llama 2 etc, through our API. These models are available in the [NVIDIA NGC catalog](https://catalog.ngc.nvidia.com/ai-foundation-models), fully optimized and ready to use on NVIDIA's AI platform. They are designed for high speed and easy customization, ensuring smooth performance on any accelerated setup.
|
||||
|
||||
|
||||
### Usage
|
||||
|
||||
In order to use embedding models and LLMs from NVIDIA AI, create an account on [NVIDIA NGC Service](https://catalog.ngc.nvidia.com/).
|
||||
|
||||
Generate an API key from their dashboard. Set the API key as `NVIDIA_API_KEY` environment variable. Note that the `NVIDIA_API_KEY` will start with `nvapi-`.
|
||||
|
||||
Below is an example of how to use LLM model and embedding model from NVIDIA AI:
|
||||
|
||||
<CodeGroup>
|
||||
|
||||
```python main.py
|
||||
import os
|
||||
from embedchain import App
|
||||
|
||||
os.environ['NVIDIA_API_KEY'] = 'nvapi-xxxx'
|
||||
|
||||
config = {
|
||||
"app": {
|
||||
"config": {
|
||||
"id": "my-app",
|
||||
},
|
||||
},
|
||||
"llm": {
|
||||
"provider": "nvidia",
|
||||
"config": {
|
||||
"model": "nemotron_steerlm_8b",
|
||||
},
|
||||
},
|
||||
"embedder": {
|
||||
"provider": "nvidia",
|
||||
"config": {
|
||||
"model": "nvolveqa_40k",
|
||||
"vector_dimension": 1024,
|
||||
},
|
||||
},
|
||||
}
|
||||
|
||||
app = App.from_config(config=config)
|
||||
|
||||
app.add("https://www.forbes.com/profile/elon-musk")
|
||||
answer = app.query("What is the net worth of Elon Musk today?")
|
||||
# Answer: The net worth of Elon Musk is subject to fluctuations based on the market value of his holdings in various companies.
|
||||
# As of March 1, 2024, his net worth is estimated to be approximately $210 billion. However, this figure can change rapidly due to stock market fluctuations and other factors.
|
||||
# Additionally, his net worth may include other assets such as real estate and art, which are not reflected in his stock portfolio.
|
||||
```
|
||||
</CodeGroup>
|
||||
|
||||
@@ -0,0 +1,275 @@
|
||||
---
|
||||
title: 🔬 Evaluation
|
||||
---
|
||||
|
||||
## Overview
|
||||
|
||||
We provide out-of-the-box evaluation metrics for your RAG application. You can use them to evaluate your RAG applications and compare against different settings of your production RAG application.
|
||||
|
||||
Currently, we provide support for following evaluation metrics:
|
||||
|
||||
<CardGroup cols={3}>
|
||||
<Card title="Context Relevancy" href="#context_relevancy"></Card>
|
||||
<Card title="Answer Relevancy" href="#answer_relevancy"></Card>
|
||||
<Card title="Groundedness" href="#groundedness"></Card>
|
||||
<Card title="Custom Metric" href="#custom_metric"></Card>
|
||||
</CardGroup>
|
||||
|
||||
## Quickstart
|
||||
|
||||
Here is a basic example of running evaluation:
|
||||
|
||||
```python example.py
|
||||
from embedchain import App
|
||||
|
||||
app = App()
|
||||
|
||||
# Add data sources
|
||||
app.add("https://www.forbes.com/profile/elon-musk")
|
||||
|
||||
# Run evaluation
|
||||
app.evaluate(["What is the net worth of Elon Musk?", "How many companies Elon Musk owns?"])
|
||||
# {'answer_relevancy': 0.9987286412340826, 'groundedness': 1.0, 'context_relevancy': 0.3571428571428571}
|
||||
```
|
||||
|
||||
Under the hood, Embedchain does the following:
|
||||
|
||||
1. Runs semantic search in the vector database and fetches context
|
||||
2. LLM call with question, context to fetch the answer
|
||||
3. Run evaluation on following metrics: `context relevancy`, `groundedness`, and `answer relevancy` and return result
|
||||
|
||||
## Advanced Usage
|
||||
|
||||
We use OpenAI's `gpt-4` model as default LLM model for automatic evaluation. Hence, we require you to set `OPENAI_API_KEY` as an environment variable.
|
||||
|
||||
### Step-1: Create dataset
|
||||
|
||||
In order to evaluate your RAG application, you have to setup a dataset. A data point in the dataset consists of `questions`, `contexts`, `answer`. Here is an example of how to create a dataset for evaluation:
|
||||
|
||||
```python
|
||||
from embedchain.utils.eval import EvalData
|
||||
|
||||
data = [
|
||||
{
|
||||
"question": "What is the net worth of Elon Musk?",
|
||||
"contexts": [
|
||||
"Elon Musk PROFILEElon MuskCEO, ...",
|
||||
"a Twitter poll on whether the journalists' ...",
|
||||
"2016 and run by Jared Birchall.[335]...",
|
||||
],
|
||||
"answer": "As of the information provided, Elon Musk's net worth is $241.6 billion.",
|
||||
},
|
||||
{
|
||||
"question": "which companies does Elon Musk own?",
|
||||
"contexts": [
|
||||
"of December 2023[update], ...",
|
||||
"ThielCofounderView ProfileTeslaHolds ...",
|
||||
"Elon Musk PROFILEElon MuskCEO, ...",
|
||||
],
|
||||
"answer": "Elon Musk owns several companies, including Tesla, SpaceX, Neuralink, and The Boring Company.",
|
||||
},
|
||||
]
|
||||
|
||||
dataset = []
|
||||
|
||||
for d in data:
|
||||
eval_data = EvalData(question=d["question"], contexts=d["contexts"], answer=d["answer"])
|
||||
dataset.append(eval_data)
|
||||
```
|
||||
|
||||
### Step-2: Run evaluation
|
||||
|
||||
Once you have created your dataset, you can run evaluation on the dataset by picking the metric you want to run evaluation on.
|
||||
|
||||
For example, you can run evaluation on context relevancy metric using the following code:
|
||||
|
||||
```python
|
||||
from embedchain.evaluation.metrics import ContextRelevance
|
||||
metric = ContextRelevance()
|
||||
score = metric.evaluate(dataset)
|
||||
print(score)
|
||||
```
|
||||
|
||||
You can choose a different metric or write your own to run evaluation on. You can check the following links:
|
||||
|
||||
- [Context Relevancy](#context_relevancy)
|
||||
- [Answer relenvancy](#answer_relevancy)
|
||||
- [Groundedness](#groundedness)
|
||||
- [Build your own metric](#custom_metric)
|
||||
|
||||
## Metrics
|
||||
|
||||
### Context Relevancy <a id="context_relevancy"></a>
|
||||
|
||||
Context relevancy is a metric to determine "how relevant the context is to the question". We use OpenAI's `gpt-4` model to determine the relevancy of the context. We achieve this by prompting the model with the question and the context and asking it to return relevant sentences from the context. We then use the following formula to determine the score:
|
||||
|
||||
```
|
||||
context_relevance_score = num_relevant_sentences_in_context / num_of_sentences_in_context
|
||||
```
|
||||
|
||||
#### Examples
|
||||
|
||||
You can run the context relevancy evaluation with the following simple code:
|
||||
|
||||
```python
|
||||
from embedchain.evaluation.metrics import ContextRelevance
|
||||
|
||||
metric = ContextRelevance()
|
||||
score = metric.evaluate(dataset) # 'dataset' is definted in the create dataset section
|
||||
print(score)
|
||||
# 0.27975528364849833
|
||||
```
|
||||
|
||||
In the above example, we used sensible defaults for the evaluation. However, you can also configure the evaluation metric as per your needs using the `ContextRelevanceConfig` class.
|
||||
|
||||
Here is a more advanced example of how to pass a custom evaluation config for evaluating on context relevance metric:
|
||||
|
||||
```python
|
||||
from embedchain.config.evaluation.base import ContextRelevanceConfig
|
||||
from embedchain.evaluation.metrics import ContextRelevance
|
||||
|
||||
eval_config = ContextRelevanceConfig(model="gpt-4", api_key="sk-xxx", language="en")
|
||||
metric = ContextRelevance(config=eval_config)
|
||||
metric.evaluate(dataset)
|
||||
```
|
||||
|
||||
#### `ContextRelevanceConfig`
|
||||
|
||||
<ParamField path="model" type="str" optional>
|
||||
The model to use for the evaluation. Defaults to `gpt-4`. We only support openai's models for now.
|
||||
</ParamField>
|
||||
<ParamField path="api_key" type="str" optional>
|
||||
The openai api key to use for the evaluation. Defaults to `None`. If not provided, we will use the `OPENAI_API_KEY` environment variable.
|
||||
</ParamField>
|
||||
<ParamField path="language" type="str" optional>
|
||||
The language of the dataset being evaluated. We need this to determine the understand the context provided in the dataset. Defaults to `en`.
|
||||
</ParamField>
|
||||
<ParamField path="prompt" type="str" optional>
|
||||
The prompt to extract the relevant sentences from the context. Defaults to `CONTEXT_RELEVANCY_PROMPT`, which can be found at `embedchain.config.evaluation.base` path.
|
||||
</ParamField>
|
||||
|
||||
|
||||
### Answer Relevancy <a id="answer_relevancy"></a>
|
||||
|
||||
Answer relevancy is a metric to determine how relevant the answer is to the question. We prompt the model with the answer and asking it to generate questions from the answer. We then use the cosine similarity between the generated questions and the original question to determine the score.
|
||||
|
||||
```
|
||||
answer_relevancy_score = mean(cosine_similarity(generated_questions, original_question))
|
||||
```
|
||||
|
||||
#### Examples
|
||||
|
||||
You can run the answer relevancy evaluation with the following simple code:
|
||||
|
||||
```python
|
||||
from embedchain.evaluation.metrics import AnswerRelevance
|
||||
|
||||
metric = AnswerRelevance()
|
||||
score = metric.evaluate(dataset)
|
||||
print(score)
|
||||
# 0.9505334177461916
|
||||
```
|
||||
|
||||
In the above example, we used sensible defaults for the evaluation. However, you can also configure the evaluation metric as per your needs using the `AnswerRelevanceConfig` class. Here is a more advanced example where you can provide your own evaluation config:
|
||||
|
||||
```python
|
||||
from embedchain.config.evaluation.base import AnswerRelevanceConfig
|
||||
from embedchain.evaluation.metrics import AnswerRelevance
|
||||
|
||||
eval_config = AnswerRelevanceConfig(
|
||||
model='gpt-4',
|
||||
embedder="text-embedding-ada-002",
|
||||
api_key="sk-xxx",
|
||||
num_gen_questions=2
|
||||
)
|
||||
metric = AnswerRelevance(config=eval_config)
|
||||
score = metric.evaluate(dataset)
|
||||
```
|
||||
|
||||
#### `AnswerRelevanceConfig`
|
||||
|
||||
<ParamField path="model" type="str" optional>
|
||||
The model to use for the evaluation. Defaults to `gpt-4`. We only support openai's models for now.
|
||||
</ParamField>
|
||||
<ParamField path="embedder" type="str" optional>
|
||||
The embedder to use for embedding the text. Defaults to `text-embedding-ada-002`. We only support openai's embedders for now.
|
||||
</ParamField>
|
||||
<ParamField path="api_key" type="str" optional>
|
||||
The openai api key to use for the evaluation. Defaults to `None`. If not provided, we will use the `OPENAI_API_KEY` environment variable.
|
||||
</ParamField>
|
||||
<ParamField path="num_gen_questions" type="int" optional>
|
||||
The number of questions to generate for each answer. We use the generated questions to compare the similarity with the original question to determine the score. Defaults to `1`.
|
||||
</ParamField>
|
||||
<ParamField path="prompt" type="str" optional>
|
||||
The prompt to extract the `num_gen_questions` number of questions from the provided answer. Defaults to `ANSWER_RELEVANCY_PROMPT`, which can be found at `embedchain.config.evaluation.base` path.
|
||||
</ParamField>
|
||||
|
||||
## Groundedness <a id="groundedness"></a>
|
||||
|
||||
Groundedness is a metric to determine how grounded the answer is to the context. We use OpenAI's `gpt-4` model to determine the groundedness of the answer. We achieve this by prompting the model with the answer and asking it to generate claims from the answer. We then again prompt the model with the context and the generated claims to determine the verdict on the claims. We then use the following formula to determine the score:
|
||||
|
||||
```
|
||||
groundedness_score = (sum of all verdicts) / (total # of claims)
|
||||
```
|
||||
|
||||
You can run the groundedness evaluation with the following simple code:
|
||||
|
||||
```python
|
||||
from embedchain.evaluation.metrics import Groundedness
|
||||
metric = Groundedness()
|
||||
score = metric.evaluate(dataset) # dataset from above
|
||||
print(score)
|
||||
# 1.0
|
||||
```
|
||||
|
||||
In the above example, we used sensible defaults for the evaluation. However, you can also configure the evaluation metric as per your needs using the `GroundednessConfig` class. Here is a more advanced example where you can configure the evaluation config:
|
||||
|
||||
```python
|
||||
from embedchain.config.evaluation.base import GroundednessConfig
|
||||
from embedchain.evaluation.metrics import Groundedness
|
||||
|
||||
eval_config = GroundednessConfig(model='gpt-4', api_key="sk-xxx")
|
||||
metric = Groundedness(config=eval_config)
|
||||
score = metric.evaluate(dataset)
|
||||
```
|
||||
|
||||
|
||||
#### `GroundednessConfig`
|
||||
|
||||
<ParamField path="model" type="str" optional>
|
||||
The model to use for the evaluation. Defaults to `gpt-4`. We only support openai's models for now.
|
||||
</ParamField>
|
||||
<ParamField path="api_key" type="str" optional>
|
||||
The openai api key to use for the evaluation. Defaults to `None`. If not provided, we will use the `OPENAI_API_KEY` environment variable.
|
||||
</ParamField>
|
||||
<ParamField path="answer_claims_prompt" type="str" optional>
|
||||
The prompt to extract the claims from the provided answer. Defaults to `GROUNDEDNESS_ANSWER_CLAIMS_PROMPT`, which can be found at `embedchain.config.evaluation.base` path.
|
||||
</ParamField>
|
||||
<ParamField path="claims_inference_prompt" type="str" optional>
|
||||
The prompt to get verdicts on the claims from the answer from the given context. Defaults to `GROUNDEDNESS_CLAIMS_INFERENCE_PROMPT`, which can be found at `embedchain.config.evaluation.base` path.
|
||||
</ParamField>
|
||||
|
||||
## Custom <a id="custom_metric"></a>
|
||||
|
||||
You can also create your own evaluation metric by extending the `BaseMetric` class. You can find the source code for the existing metrics at `embedchain.evaluation.metrics` path.
|
||||
|
||||
<Note>
|
||||
You must provide the `name` of your custom metric in the `__init__` method of your class. This name will be used to identify your metric in the evaluation report.
|
||||
</Note>
|
||||
|
||||
```python
|
||||
from typing import Optional
|
||||
|
||||
from embedchain.config.base_config import BaseConfig
|
||||
from embedchain.evaluation.metrics import BaseMetric
|
||||
from embedchain.utils.eval import EvalData
|
||||
|
||||
class MyCustomMetric(BaseMetric):
|
||||
def __init__(self, config: Optional[BaseConfig] = None):
|
||||
super().__init__(name="my_custom_metric")
|
||||
|
||||
def evaluate(self, dataset: list[EvalData]):
|
||||
score = 0.0
|
||||
# write your evaluation logic here
|
||||
return score
|
||||
```
|
||||
@@ -0,0 +1,13 @@
|
||||
---
|
||||
title: 🧩 Introduction
|
||||
---
|
||||
|
||||
## Overview
|
||||
|
||||
You can configure following components
|
||||
|
||||
* [Data Source](/components/data-sources/overview)
|
||||
* [LLM](/components/llms)
|
||||
* [Embedding Model](/components/embedding-models)
|
||||
* [Vector Database](/components/vector-databases)
|
||||
* [Evaluation](/components/evaluation)
|
||||
+497
-34
@@ -8,14 +8,22 @@ Embedchain comes with built-in support for various popular large language models
|
||||
|
||||
<CardGroup cols={4}>
|
||||
<Card title="OpenAI" href="#openai"></Card>
|
||||
<Card title="Google AI" href="#google-ai"></Card>
|
||||
<Card title="Azure OpenAI" href="#azure-openai"></Card>
|
||||
<Card title="Anthropic" href="#anthropic"></Card>
|
||||
<Card title="Cohere" href="#cohere"></Card>
|
||||
<Card title="Together" href="#together"></Card>
|
||||
<Card title="Ollama" href="#ollama"></Card>
|
||||
<Card title="vLLM" href="#vllm"></Card>
|
||||
<Card title="GPT4All" href="#gpt4all"></Card>
|
||||
<Card title="JinaChat" href="#jinachat"></Card>
|
||||
<Card title="Hugging Face" href="#hugging-face"></Card>
|
||||
<Card title="Llama2" href="#llama2"></Card>
|
||||
<Card title="Vertex AI" href="#vertex-ai"></Card>
|
||||
<Card title="Mistral AI" href="#mistral-ai"></Card>
|
||||
<Card title="AWS Bedrock" href="#aws-bedrock"></Card>
|
||||
<Card title="Groq" href="#groq"></Card>
|
||||
<Card title="NVIDIA AI" href="#nvidia-ai"></Card>
|
||||
</CardGroup>
|
||||
|
||||
## OpenAI
|
||||
@@ -26,7 +34,7 @@ Once you have obtained the key, you can use it like this:
|
||||
|
||||
```python
|
||||
import os
|
||||
from embedchain import Pipeline as App
|
||||
from embedchain import App
|
||||
|
||||
os.environ['OPENAI_API_KEY'] = 'xxx'
|
||||
|
||||
@@ -41,12 +49,12 @@ If you are looking to configure the different parameters of the LLM, you can do
|
||||
|
||||
```python main.py
|
||||
import os
|
||||
from embedchain import Pipeline as App
|
||||
from embedchain import App
|
||||
|
||||
os.environ['OPENAI_API_KEY'] = 'xxx'
|
||||
|
||||
# load llm configuration from config.yaml file
|
||||
app = App.from_config(yaml_path="config.yaml")
|
||||
app = App.from_config(config_path="config.yaml")
|
||||
```
|
||||
|
||||
```yaml config.yaml
|
||||
@@ -59,9 +67,120 @@ llm:
|
||||
top_p: 1
|
||||
stream: false
|
||||
```
|
||||
|
||||
</CodeGroup>
|
||||
|
||||
### Function Calling
|
||||
Embedchain supports OpenAI [Function calling](https://platform.openai.com/docs/guides/function-calling) with a single function. It accepts inputs in accordance with the [Langchain interface](https://python.langchain.com/docs/modules/model_io/chat/function_calling#legacy-args-functions-and-function_call).
|
||||
|
||||
<Accordion title="Pydantic Model">
|
||||
```python
|
||||
from pydantic import BaseModel
|
||||
|
||||
class multiply(BaseModel):
|
||||
"""Multiply two integers together."""
|
||||
|
||||
a: int = Field(..., description="First integer")
|
||||
b: int = Field(..., description="Second integer")
|
||||
```
|
||||
</Accordion>
|
||||
|
||||
<Accordion title="Python function">
|
||||
```python
|
||||
def multiply(a: int, b: int) -> int:
|
||||
"""Multiply two integers together.
|
||||
|
||||
Args:
|
||||
a: First integer
|
||||
b: Second integer
|
||||
"""
|
||||
return a * b
|
||||
```
|
||||
</Accordion>
|
||||
<Accordion title="OpenAI tool dictionary">
|
||||
```python
|
||||
multiply = {
|
||||
"type": "function",
|
||||
"function": {
|
||||
"name": "multiply",
|
||||
"description": "Multiply two integers together.",
|
||||
"parameters": {
|
||||
"type": "object",
|
||||
"properties": {
|
||||
"a": {
|
||||
"description": "First integer",
|
||||
"type": "integer"
|
||||
},
|
||||
"b": {
|
||||
"description": "Second integer",
|
||||
"type": "integer"
|
||||
}
|
||||
},
|
||||
"required": [
|
||||
"a",
|
||||
"b"
|
||||
]
|
||||
}
|
||||
}
|
||||
}
|
||||
```
|
||||
</Accordion>
|
||||
|
||||
With any of the previous inputs, the OpenAI LLM can be queried to provide the appropriate arguments for the function.
|
||||
|
||||
```python
|
||||
import os
|
||||
from embedchain import App
|
||||
from embedchain.llm.openai import OpenAILlm
|
||||
|
||||
os.environ["OPENAI_API_KEY"] = "sk-xxx"
|
||||
|
||||
llm = OpenAILlm(tools=multiply)
|
||||
app = App(llm=llm)
|
||||
|
||||
result = app.query("What is the result of 125 multiplied by fifteen?")
|
||||
```
|
||||
|
||||
## Google AI
|
||||
|
||||
To use Google AI model, you have to set the `GOOGLE_API_KEY` environment variable. You can obtain the Google API key from the [Google Maker Suite](https://makersuite.google.com/app/apikey)
|
||||
|
||||
<CodeGroup>
|
||||
```python main.py
|
||||
import os
|
||||
from embedchain import App
|
||||
|
||||
os.environ["GOOGLE_API_KEY"] = "xxx"
|
||||
|
||||
app = App.from_config(config_path="config.yaml")
|
||||
|
||||
app.add("https://www.forbes.com/profile/elon-musk")
|
||||
|
||||
response = app.query("What is the net worth of Elon Musk?")
|
||||
if app.llm.config.stream: # if stream is enabled, response is a generator
|
||||
for chunk in response:
|
||||
print(chunk)
|
||||
else:
|
||||
print(response)
|
||||
```
|
||||
|
||||
```yaml config.yaml
|
||||
llm:
|
||||
provider: google
|
||||
config:
|
||||
model: gemini-pro
|
||||
max_tokens: 1000
|
||||
temperature: 0.5
|
||||
top_p: 1
|
||||
stream: false
|
||||
|
||||
embedder:
|
||||
provider: google
|
||||
config:
|
||||
model: 'models/embedding-001'
|
||||
task_type: "retrieval_document"
|
||||
title: "Embeddings for Embedchain"
|
||||
```
|
||||
</CodeGroup>
|
||||
|
||||
## Azure OpenAI
|
||||
|
||||
@@ -71,21 +190,21 @@ To use Azure OpenAI model, you have to set some of the azure openai related envi
|
||||
|
||||
```python main.py
|
||||
import os
|
||||
from embedchain import Pipeline as App
|
||||
from embedchain import App
|
||||
|
||||
os.environ["OPENAI_API_TYPE"] = "azure"
|
||||
os.environ["OPENAI_API_BASE"] = "https://xxx.openai.azure.com/"
|
||||
os.environ["OPENAI_API_KEY"] = "xxx"
|
||||
os.environ["OPENAI_API_VERSION"] = "xxx"
|
||||
|
||||
app = App.from_config(yaml_path="config.yaml")
|
||||
app = App.from_config(config_path="config.yaml")
|
||||
```
|
||||
|
||||
```yaml config.yaml
|
||||
llm:
|
||||
provider: azure_openai
|
||||
config:
|
||||
model: gpt-35-turbo
|
||||
model: gpt-3.5-turbo
|
||||
deployment_name: your_llm_deployment_name
|
||||
temperature: 0.5
|
||||
max_tokens: 1000
|
||||
@@ -110,12 +229,12 @@ To use anthropic's model, please set the `ANTHROPIC_API_KEY` which you find on t
|
||||
|
||||
```python main.py
|
||||
import os
|
||||
from embedchain import Pipeline as App
|
||||
from embedchain import App
|
||||
|
||||
os.environ["ANTHROPIC_API_KEY"] = "xxx"
|
||||
|
||||
# load llm configuration from config.yaml file
|
||||
app = App.from_config(yaml_path="config.yaml")
|
||||
app = App.from_config(config_path="config.yaml")
|
||||
```
|
||||
|
||||
```yaml config.yaml
|
||||
@@ -147,12 +266,12 @@ Once you have the API key, you are all set to use it with Embedchain.
|
||||
|
||||
```python main.py
|
||||
import os
|
||||
from embedchain import Pipeline as App
|
||||
from embedchain import App
|
||||
|
||||
os.environ["COHERE_API_KEY"] = "xxx"
|
||||
|
||||
# load llm configuration from config.yaml file
|
||||
app = App.from_config(yaml_path="config.yaml")
|
||||
app = App.from_config(config_path="config.yaml")
|
||||
```
|
||||
|
||||
```yaml config.yaml
|
||||
@@ -167,6 +286,97 @@ llm:
|
||||
|
||||
</CodeGroup>
|
||||
|
||||
## Together
|
||||
|
||||
Install related dependencies using the following command:
|
||||
|
||||
```bash
|
||||
pip install --upgrade 'embedchain[together]'
|
||||
```
|
||||
|
||||
Set the `TOGETHER_API_KEY` as environment variable which you can find on their [Account settings page](https://api.together.xyz/settings/api-keys).
|
||||
|
||||
Once you have the API key, you are all set to use it with Embedchain.
|
||||
|
||||
<CodeGroup>
|
||||
|
||||
```python main.py
|
||||
import os
|
||||
from embedchain import App
|
||||
|
||||
os.environ["TOGETHER_API_KEY"] = "xxx"
|
||||
|
||||
# load llm configuration from config.yaml file
|
||||
app = App.from_config(config_path="config.yaml")
|
||||
```
|
||||
|
||||
```yaml config.yaml
|
||||
llm:
|
||||
provider: together
|
||||
config:
|
||||
model: togethercomputer/RedPajama-INCITE-7B-Base
|
||||
temperature: 0.5
|
||||
max_tokens: 1000
|
||||
top_p: 1
|
||||
```
|
||||
|
||||
</CodeGroup>
|
||||
|
||||
## Ollama
|
||||
|
||||
Setup Ollama using https://github.com/jmorganca/ollama
|
||||
|
||||
<CodeGroup>
|
||||
|
||||
```python main.py
|
||||
import os
|
||||
from embedchain import App
|
||||
|
||||
# load llm configuration from config.yaml file
|
||||
app = App.from_config(config_path="config.yaml")
|
||||
```
|
||||
|
||||
```yaml config.yaml
|
||||
llm:
|
||||
provider: ollama
|
||||
config:
|
||||
model: 'llama2'
|
||||
temperature: 0.5
|
||||
top_p: 1
|
||||
stream: true
|
||||
```
|
||||
|
||||
</CodeGroup>
|
||||
|
||||
|
||||
## vLLM
|
||||
|
||||
Setup vLLM by following instructions given in [their docs](https://docs.vllm.ai/en/latest/getting_started/installation.html).
|
||||
|
||||
<CodeGroup>
|
||||
|
||||
```python main.py
|
||||
import os
|
||||
from embedchain import App
|
||||
|
||||
# load llm configuration from config.yaml file
|
||||
app = App.from_config(config_path="config.yaml")
|
||||
```
|
||||
|
||||
```yaml config.yaml
|
||||
llm:
|
||||
provider: vllm
|
||||
config:
|
||||
model: 'meta-llama/Llama-2-70b-hf'
|
||||
temperature: 0.5
|
||||
top_p: 1
|
||||
top_k: 10
|
||||
stream: true
|
||||
trust_remote_code: true
|
||||
```
|
||||
|
||||
</CodeGroup>
|
||||
|
||||
## GPT4ALL
|
||||
|
||||
Install related dependencies using the following command:
|
||||
@@ -180,10 +390,10 @@ GPT4all is a free-to-use, locally running, privacy-aware chatbot. No GPU or inte
|
||||
<CodeGroup>
|
||||
|
||||
```python main.py
|
||||
from embedchain import Pipeline as App
|
||||
from embedchain import App
|
||||
|
||||
# load llm configuration from config.yaml file
|
||||
app = App.from_config(yaml_path="config.yaml")
|
||||
app = App.from_config(config_path="config.yaml")
|
||||
```
|
||||
|
||||
```yaml config.yaml
|
||||
@@ -212,11 +422,11 @@ Once you have the key, load the app using the config yaml file:
|
||||
|
||||
```python main.py
|
||||
import os
|
||||
from embedchain import Pipeline as App
|
||||
from embedchain import App
|
||||
|
||||
os.environ["JINACHAT_API_KEY"] = "xxx"
|
||||
# load llm configuration from config.yaml file
|
||||
app = App.from_config(yaml_path="config.yaml")
|
||||
app = App.from_config(config_path="config.yaml")
|
||||
```
|
||||
|
||||
```yaml config.yaml
|
||||
@@ -237,37 +447,101 @@ llm:
|
||||
Install related dependencies using the following command:
|
||||
|
||||
```bash
|
||||
pip install --upgrade 'embedchain[huggingface_hub]'
|
||||
pip install --upgrade 'embedchain[huggingface-hub]'
|
||||
```
|
||||
|
||||
First, set `HUGGINGFACE_ACCESS_TOKEN` in environment variable which you can obtain from [their platform](https://huggingface.co/settings/tokens).
|
||||
|
||||
Once you have the token, load the app using the config yaml file:
|
||||
You can load the LLMs from Hugging Face using three ways:
|
||||
|
||||
- [Hugging Face Hub](#hugging-face-hub)
|
||||
- [Hugging Face Local Pipelines](#hugging-face-local-pipelines)
|
||||
- [Hugging Face Inference Endpoint](#hugging-face-inference-endpoint)
|
||||
|
||||
### Hugging Face Hub
|
||||
|
||||
To load the model from Hugging Face Hub, use the following code:
|
||||
|
||||
<CodeGroup>
|
||||
|
||||
```python main.py
|
||||
import os
|
||||
from embedchain import Pipeline as App
|
||||
from embedchain import App
|
||||
|
||||
os.environ["HUGGINGFACE_ACCESS_TOKEN"] = "xxx"
|
||||
|
||||
# load llm configuration from config.yaml file
|
||||
app = App.from_config(yaml_path="config.yaml")
|
||||
```
|
||||
config = {
|
||||
"app": {"config": {"id": "my-app"}},
|
||||
"llm": {
|
||||
"provider": "huggingface",
|
||||
"config": {
|
||||
"model": "bigscience/bloom-1b7",
|
||||
"top_p": 0.5,
|
||||
"max_length": 200,
|
||||
"temperature": 0.1,
|
||||
},
|
||||
},
|
||||
}
|
||||
|
||||
```yaml config.yaml
|
||||
llm:
|
||||
provider: huggingface
|
||||
config:
|
||||
model: 'google/flan-t5-xxl'
|
||||
temperature: 0.5
|
||||
max_tokens: 1000
|
||||
top_p: 0.5
|
||||
stream: false
|
||||
app = App.from_config(config=config)
|
||||
```
|
||||
</CodeGroup>
|
||||
|
||||
### Hugging Face Local Pipelines
|
||||
|
||||
If you want to load the locally downloaded model from Hugging Face, you can do so by following the code provided below:
|
||||
|
||||
<CodeGroup>
|
||||
```python main.py
|
||||
from embedchain import App
|
||||
|
||||
config = {
|
||||
"app": {"config": {"id": "my-app"}},
|
||||
"llm": {
|
||||
"provider": "huggingface",
|
||||
"config": {
|
||||
"model": "Trendyol/Trendyol-LLM-7b-chat-v0.1",
|
||||
"local": True, # Necessary if you want to run model locally
|
||||
"top_p": 0.5,
|
||||
"max_tokens": 1000,
|
||||
"temperature": 0.1,
|
||||
},
|
||||
}
|
||||
}
|
||||
app = App.from_config(config=config)
|
||||
```
|
||||
</CodeGroup>
|
||||
|
||||
### Hugging Face Inference Endpoint
|
||||
|
||||
You can also use [Hugging Face Inference Endpoints](https://huggingface.co/docs/inference-endpoints/index#-inference-endpoints) to access custom endpoints. First, set the `HUGGINGFACE_ACCESS_TOKEN` as above.
|
||||
|
||||
Then, load the app using the config yaml file:
|
||||
|
||||
<CodeGroup>
|
||||
|
||||
```python main.py
|
||||
from embedchain import App
|
||||
|
||||
config = {
|
||||
"app": {"config": {"id": "my-app"}},
|
||||
"llm": {
|
||||
"provider": "huggingface",
|
||||
"config": {
|
||||
"endpoint": "https://api-inference.huggingface.co/models/gpt2",
|
||||
"model_params": {"temprature": 0.1, "max_new_tokens": 100}
|
||||
},
|
||||
},
|
||||
}
|
||||
app = App.from_config(config=config)
|
||||
|
||||
```
|
||||
</CodeGroup>
|
||||
|
||||
Currently only supports `text-generation` and `text2text-generation` for now [[ref](https://api.python.langchain.com/en/latest/llms/langchain_community.llms.huggingface_endpoint.HuggingFaceEndpoint.html?highlight=huggingfaceendpoint#)].
|
||||
|
||||
See langchain's [hugging face endpoint](https://python.langchain.com/docs/integrations/chat/huggingface#huggingfaceendpoint) for more information.
|
||||
|
||||
## Llama2
|
||||
|
||||
Llama2 is integrated through [Replicate](https://replicate.com/). Set `REPLICATE_API_TOKEN` in environment variable which you can obtain from [their platform](https://replicate.com/account/api-tokens).
|
||||
@@ -278,12 +552,12 @@ Once you have the token, load the app using the config yaml file:
|
||||
|
||||
```python main.py
|
||||
import os
|
||||
from embedchain import Pipeline as App
|
||||
from embedchain import App
|
||||
|
||||
os.environ["REPLICATE_API_TOKEN"] = "xxx"
|
||||
|
||||
# load llm configuration from config.yaml file
|
||||
app = App.from_config(yaml_path="config.yaml")
|
||||
app = App.from_config(config_path="config.yaml")
|
||||
```
|
||||
|
||||
```yaml config.yaml
|
||||
@@ -305,10 +579,10 @@ Setup Google Cloud Platform application credentials by following the instruction
|
||||
<CodeGroup>
|
||||
|
||||
```python main.py
|
||||
from embedchain import Pipeline as App
|
||||
from embedchain import App
|
||||
|
||||
# load llm configuration from config.yaml file
|
||||
app = App.from_config(yaml_path="config.yaml")
|
||||
app = App.from_config(config_path="config.yaml")
|
||||
```
|
||||
|
||||
```yaml config.yaml
|
||||
@@ -321,5 +595,194 @@ llm:
|
||||
```
|
||||
</CodeGroup>
|
||||
|
||||
|
||||
## Mistral AI
|
||||
|
||||
Obtain the Mistral AI api key from their [console](https://console.mistral.ai/).
|
||||
|
||||
<CodeGroup>
|
||||
|
||||
```python main.py
|
||||
os.environ["MISTRAL_API_KEY"] = "xxx"
|
||||
|
||||
app = App.from_config(config_path="config.yaml")
|
||||
|
||||
app.add("https://www.forbes.com/profile/elon-musk")
|
||||
|
||||
response = app.query("what is the net worth of Elon Musk?")
|
||||
# As of January 16, 2024, Elon Musk's net worth is $225.4 billion.
|
||||
|
||||
response = app.chat("which companies does elon own?")
|
||||
# Elon Musk owns Tesla, SpaceX, Boring Company, Twitter, and X.
|
||||
|
||||
response = app.chat("what question did I ask you already?")
|
||||
# You have asked me several times already which companies Elon Musk owns, specifically Tesla, SpaceX, Boring Company, Twitter, and X.
|
||||
```
|
||||
|
||||
```yaml config.yaml
|
||||
llm:
|
||||
provider: mistralai
|
||||
config:
|
||||
model: mistral-tiny
|
||||
temperature: 0.5
|
||||
max_tokens: 1000
|
||||
top_p: 1
|
||||
embedder:
|
||||
provider: mistralai
|
||||
config:
|
||||
model: mistral-embed
|
||||
```
|
||||
</CodeGroup>
|
||||
|
||||
|
||||
## AWS Bedrock
|
||||
|
||||
### Setup
|
||||
- Before using the AWS Bedrock LLM, make sure you have the appropriate model access from [Bedrock Console](https://us-east-1.console.aws.amazon.com/bedrock/home?region=us-east-1#/modelaccess).
|
||||
- You will also need to authenticate the `boto3` client by using a method in the [AWS documentation](https://boto3.amazonaws.com/v1/documentation/api/latest/guide/credentials.html#configuring-credentials)
|
||||
- You can optionally export an `AWS_REGION`
|
||||
|
||||
|
||||
### Usage
|
||||
|
||||
<CodeGroup>
|
||||
|
||||
```python main.py
|
||||
import os
|
||||
from embedchain import App
|
||||
|
||||
os.environ["AWS_ACCESS_KEY_ID"] = "xxx"
|
||||
os.environ["AWS_SECRET_ACCESS_KEY"] = "xxx"
|
||||
os.environ["AWS_REGION"] = "us-west-2"
|
||||
|
||||
app = App.from_config(config_path="config.yaml")
|
||||
```
|
||||
|
||||
```yaml config.yaml
|
||||
llm:
|
||||
provider: aws_bedrock
|
||||
config:
|
||||
model: amazon.titan-text-express-v1
|
||||
# check notes below for model_kwargs
|
||||
model_kwargs:
|
||||
temperature: 0.5
|
||||
topP: 1
|
||||
maxTokenCount: 1000
|
||||
```
|
||||
</CodeGroup>
|
||||
|
||||
<br />
|
||||
<Note>
|
||||
The model arguments are different for each providers. Please refer to the [AWS Bedrock Documentation](https://us-east-1.console.aws.amazon.com/bedrock/home?region=us-east-1#/providers) to find the appropriate arguments for your model.
|
||||
</Note>
|
||||
|
||||
<br/ >
|
||||
|
||||
## Groq
|
||||
|
||||
[Groq](https://groq.com/) is the creator of the world's first Language Processing Unit (LPU), providing exceptional speed performance for AI workloads running on their LPU Inference Engine.
|
||||
|
||||
|
||||
### Usage
|
||||
|
||||
In order to use LLMs from Groq, go to their [platform](https://console.groq.com/keys) and get the API key.
|
||||
|
||||
Set the API key as `GROQ_API_KEY` environment variable or pass in your app configuration to use the model as given below in the example.
|
||||
|
||||
<CodeGroup>
|
||||
|
||||
```python main.py
|
||||
import os
|
||||
from embedchain import App
|
||||
|
||||
# Set your API key here or pass as the environment variable
|
||||
groq_api_key = "gsk_xxxx"
|
||||
|
||||
config = {
|
||||
"llm": {
|
||||
"provider": "groq",
|
||||
"config": {
|
||||
"model": "mixtral-8x7b-32768",
|
||||
"api_key": groq_api_key,
|
||||
"stream": True
|
||||
}
|
||||
}
|
||||
}
|
||||
|
||||
app = App.from_config(config=config)
|
||||
# Add your data source here
|
||||
app.add("https://docs.embedchain.ai/sitemap.xml", data_type="sitemap")
|
||||
app.query("Write a poem about Embedchain")
|
||||
|
||||
# In the realm of data, vast and wide,
|
||||
# Embedchain stands with knowledge as its guide.
|
||||
# A platform open, for all to try,
|
||||
# Building bots that can truly fly.
|
||||
|
||||
# With REST API, data in reach,
|
||||
# Deployment a breeze, as easy as a speech.
|
||||
# Updating data sources, anytime, anyday,
|
||||
# Embedchain's power, never sway.
|
||||
|
||||
# A knowledge base, an assistant so grand,
|
||||
# Connecting to platforms, near and far.
|
||||
# Discord, WhatsApp, Slack, and more,
|
||||
# Embedchain's potential, never a bore.
|
||||
```
|
||||
</CodeGroup>
|
||||
|
||||
## NVIDIA AI
|
||||
|
||||
[NVIDIA AI Foundation Endpoints](https://www.nvidia.com/en-us/ai-data-science/foundation-models/) let you quickly use NVIDIA's AI models, such as Mixtral 8x7B, Llama 2 etc, through our API. These models are available in the [NVIDIA NGC catalog](https://catalog.ngc.nvidia.com/ai-foundation-models), fully optimized and ready to use on NVIDIA's AI platform. They are designed for high speed and easy customization, ensuring smooth performance on any accelerated setup.
|
||||
|
||||
|
||||
### Usage
|
||||
|
||||
In order to use LLMs from NVIDIA AI, create an account on [NVIDIA NGC Service](https://catalog.ngc.nvidia.com/).
|
||||
|
||||
Generate an API key from their dashboard. Set the API key as `NVIDIA_API_KEY` environment variable. Note that the `NVIDIA_API_KEY` will start with `nvapi-`.
|
||||
|
||||
Below is an example of how to use LLM model and embedding model from NVIDIA AI:
|
||||
|
||||
<CodeGroup>
|
||||
|
||||
```python main.py
|
||||
import os
|
||||
from embedchain import App
|
||||
|
||||
os.environ['NVIDIA_API_KEY'] = 'nvapi-xxxx'
|
||||
|
||||
config = {
|
||||
"app": {
|
||||
"config": {
|
||||
"id": "my-app",
|
||||
},
|
||||
},
|
||||
"llm": {
|
||||
"provider": "nvidia",
|
||||
"config": {
|
||||
"model": "nemotron_steerlm_8b",
|
||||
},
|
||||
},
|
||||
"embedder": {
|
||||
"provider": "nvidia",
|
||||
"config": {
|
||||
"model": "nvolveqa_40k",
|
||||
"vector_dimension": 1024,
|
||||
},
|
||||
},
|
||||
}
|
||||
|
||||
app = App.from_config(config=config)
|
||||
|
||||
app.add("https://www.forbes.com/profile/elon-musk")
|
||||
answer = app.query("What is the net worth of Elon Musk today?")
|
||||
# Answer: The net worth of Elon Musk is subject to fluctuations based on the market value of his holdings in various companies.
|
||||
# As of March 1, 2024, his net worth is estimated to be approximately $210 billion. However, this figure can change rapidly due to stock market fluctuations and other factors.
|
||||
# Additionally, his net worth may include other assets such as real estate and art, which are not reflected in his stock portfolio.
|
||||
```
|
||||
</CodeGroup>
|
||||
|
||||
<br/ >
|
||||
|
||||
<Snippet file="missing-llm-tip.mdx" />
|
||||
|
||||
@@ -17,208 +17,4 @@ Utilizing a vector database alongside Embedchain is a seamless process. All you
|
||||
<Card title="Weaviate" href="#weaviate"></Card>
|
||||
</CardGroup>
|
||||
|
||||
## ChromaDB
|
||||
|
||||
<CodeGroup>
|
||||
|
||||
```python main.py
|
||||
from embedchain import Pipeline as App
|
||||
|
||||
# load chroma configuration from yaml file
|
||||
app = App.from_config(yaml_path="config1.yaml")
|
||||
```
|
||||
|
||||
```yaml config1.yaml
|
||||
vectordb:
|
||||
provider: chroma
|
||||
config:
|
||||
collection_name: 'my-collection'
|
||||
dir: db
|
||||
allow_reset: true
|
||||
```
|
||||
|
||||
```yaml config2.yaml
|
||||
vectordb:
|
||||
provider: chroma
|
||||
config:
|
||||
collection_name: 'my-collection'
|
||||
host: localhost
|
||||
port: 5200
|
||||
allow_reset: true
|
||||
```
|
||||
|
||||
</CodeGroup>
|
||||
|
||||
|
||||
## Elasticsearch
|
||||
|
||||
Install related dependencies using the following command:
|
||||
|
||||
```bash
|
||||
pip install --upgrade 'embedchain[elasticsearch]'
|
||||
```
|
||||
|
||||
<CodeGroup>
|
||||
|
||||
```python main.py
|
||||
from embedchain import Pipeline as App
|
||||
|
||||
# load elasticsearch configuration from yaml file
|
||||
app = App.from_config(yaml_path="config.yaml")
|
||||
```
|
||||
|
||||
```yaml config.yaml
|
||||
vectordb:
|
||||
provider: elasticsearch
|
||||
config:
|
||||
collection_name: 'es-index'
|
||||
es_url: http://localhost:9200
|
||||
allow_reset: true
|
||||
api_key: xxx
|
||||
```
|
||||
</CodeGroup>
|
||||
|
||||
## OpenSearch
|
||||
|
||||
Install related dependencies using the following command:
|
||||
|
||||
```bash
|
||||
pip install --upgrade 'embedchain[opensearch]'
|
||||
```
|
||||
|
||||
<CodeGroup>
|
||||
|
||||
```python main.py
|
||||
from embedchain import Pipeline as App
|
||||
|
||||
# load opensearch configuration from yaml file
|
||||
app = App.from_config(yaml_path="config.yaml")
|
||||
```
|
||||
|
||||
```yaml config.yaml
|
||||
vectordb:
|
||||
provider: opensearch
|
||||
config:
|
||||
opensearch_url: 'https://localhost:9200'
|
||||
http_auth:
|
||||
- admin
|
||||
- admin
|
||||
vector_dimension: 1536
|
||||
collection_name: 'my-app'
|
||||
use_ssl: false
|
||||
verify_certs: false
|
||||
```
|
||||
|
||||
</CodeGroup>
|
||||
|
||||
## Zilliz
|
||||
|
||||
Install related dependencies using the following command:
|
||||
|
||||
```bash
|
||||
pip install --upgrade 'embedchain[milvus]'
|
||||
```
|
||||
|
||||
Set the Zilliz environment variables `ZILLIZ_CLOUD_URI` and `ZILLIZ_CLOUD_TOKEN` which you can find it on their [cloud platform](https://cloud.zilliz.com/).
|
||||
|
||||
<CodeGroup>
|
||||
|
||||
```python main.py
|
||||
import os
|
||||
from embedchain import Pipeline as App
|
||||
|
||||
os.environ['ZILLIZ_CLOUD_URI'] = 'https://xxx.zillizcloud.com'
|
||||
os.environ['ZILLIZ_CLOUD_TOKEN'] = 'xxx'
|
||||
|
||||
# load zilliz configuration from yaml file
|
||||
app = App.from_config(yaml_path="config.yaml")
|
||||
```
|
||||
|
||||
```yaml config.yaml
|
||||
vectordb:
|
||||
provider: zilliz
|
||||
config:
|
||||
collection_name: 'zilliz_app'
|
||||
uri: https://xxxx.api.gcp-region.zillizcloud.com
|
||||
token: xxx
|
||||
vector_dim: 1536
|
||||
metric_type: L2
|
||||
```
|
||||
|
||||
</CodeGroup>
|
||||
|
||||
## LanceDB
|
||||
|
||||
_Coming soon_
|
||||
|
||||
## Pinecone
|
||||
|
||||
Install pinecone related dependencies using the following command:
|
||||
|
||||
```bash
|
||||
pip install --upgrade 'embedchain[pinecone]'
|
||||
```
|
||||
|
||||
In order to use Pinecone as vector database, set the environment variables `PINECONE_API_KEY` and `PINECONE_ENV` which you can find on [Pinecone dashboard](https://app.pinecone.io/).
|
||||
|
||||
<CodeGroup>
|
||||
|
||||
```python main.py
|
||||
from embedchain import Pipeline as App
|
||||
|
||||
# load pinecone configuration from yaml file
|
||||
app = App.from_config(yaml_path="config.yaml")
|
||||
```
|
||||
|
||||
```yaml config.yaml
|
||||
vectordb:
|
||||
provider: pinecone
|
||||
config:
|
||||
metric: cosine
|
||||
vector_dimension: 1536
|
||||
collection_name: my-pinecone-index
|
||||
```
|
||||
|
||||
</CodeGroup>
|
||||
|
||||
## Qdrant
|
||||
|
||||
In order to use Qdrant as a vector database, set the environment variables `QDRANT_URL` and `QDRANT_API_KEY` which you can find on [Qdrant Dashboard](https://cloud.qdrant.io/).
|
||||
|
||||
<CodeGroup>
|
||||
```python main.py
|
||||
from embedchain import Pipeline as App
|
||||
|
||||
# load qdrant configuration from yaml file
|
||||
app = App.from_config(yaml_path="config.yaml")
|
||||
```
|
||||
|
||||
```yaml config.yaml
|
||||
vectordb:
|
||||
provider: qdrant
|
||||
config:
|
||||
collection_name: my_qdrant_index
|
||||
```
|
||||
</CodeGroup>
|
||||
|
||||
## Weaviate
|
||||
|
||||
In order to use Weaviate as a vector database, set the environment variables `WEAVIATE_ENDPOINT` and `WEAVIATE_API_KEY` which you can find on [Weaviate dashboard](https://console.weaviate.cloud/dashboard).
|
||||
|
||||
<CodeGroup>
|
||||
```python main.py
|
||||
from embedchain import Pipeline as App
|
||||
|
||||
# load weaviate configuration from yaml file
|
||||
app = App.from_config(yaml_path="config.yaml")
|
||||
```
|
||||
|
||||
```yaml config.yaml
|
||||
vectordb:
|
||||
provider: weaviate
|
||||
config:
|
||||
collection_name: my_weaviate_index
|
||||
```
|
||||
</CodeGroup>
|
||||
|
||||
<Snippet file="missing-vector-db-tip.mdx" />
|
||||
|
||||
@@ -0,0 +1,35 @@
|
||||
---
|
||||
title: ChromaDB
|
||||
---
|
||||
|
||||
<CodeGroup>
|
||||
|
||||
```python main.py
|
||||
from embedchain import App
|
||||
|
||||
# load chroma configuration from yaml file
|
||||
app = App.from_config(config_path="config1.yaml")
|
||||
```
|
||||
|
||||
```yaml config1.yaml
|
||||
vectordb:
|
||||
provider: chroma
|
||||
config:
|
||||
collection_name: 'my-collection'
|
||||
dir: db
|
||||
allow_reset: true
|
||||
```
|
||||
|
||||
```yaml config2.yaml
|
||||
vectordb:
|
||||
provider: chroma
|
||||
config:
|
||||
collection_name: 'my-collection'
|
||||
host: localhost
|
||||
port: 5200
|
||||
allow_reset: true
|
||||
```
|
||||
|
||||
</CodeGroup>
|
||||
|
||||
<Snippet file="missing-vector-db-tip.mdx" />
|
||||
@@ -0,0 +1,39 @@
|
||||
---
|
||||
title: Elasticsearch
|
||||
---
|
||||
|
||||
Install related dependencies using the following command:
|
||||
|
||||
```bash
|
||||
pip install --upgrade 'embedchain[elasticsearch]'
|
||||
```
|
||||
|
||||
<Note>
|
||||
You can configure the Elasticsearch connection by providing either `es_url` or `cloud_id`. If you are using the Elasticsearch Service on Elastic Cloud, you can find the `cloud_id` on the [Elastic Cloud dashboard](https://cloud.elastic.co/deployments).
|
||||
</Note>
|
||||
|
||||
You can authorize the connection to Elasticsearch by providing either `basic_auth`, `api_key`, or `bearer_auth`.
|
||||
|
||||
<CodeGroup>
|
||||
|
||||
```python main.py
|
||||
from embedchain import App
|
||||
|
||||
# load elasticsearch configuration from yaml file
|
||||
app = App.from_config(config_path="config.yaml")
|
||||
```
|
||||
|
||||
```yaml config.yaml
|
||||
vectordb:
|
||||
provider: elasticsearch
|
||||
config:
|
||||
collection_name: 'es-index'
|
||||
cloud_id: 'deployment-name:xxxx'
|
||||
basic_auth:
|
||||
- elastic
|
||||
- <your_password>
|
||||
verify_certs: false
|
||||
```
|
||||
</CodeGroup>
|
||||
|
||||
<Snippet file="missing-vector-db-tip.mdx" />
|
||||
@@ -0,0 +1,36 @@
|
||||
---
|
||||
title: OpenSearch
|
||||
---
|
||||
|
||||
Install related dependencies using the following command:
|
||||
|
||||
```bash
|
||||
pip install --upgrade 'embedchain[opensearch]'
|
||||
```
|
||||
|
||||
<CodeGroup>
|
||||
|
||||
```python main.py
|
||||
from embedchain import App
|
||||
|
||||
# load opensearch configuration from yaml file
|
||||
app = App.from_config(config_path="config.yaml")
|
||||
```
|
||||
|
||||
```yaml config.yaml
|
||||
vectordb:
|
||||
provider: opensearch
|
||||
config:
|
||||
collection_name: 'my-app'
|
||||
opensearch_url: 'https://localhost:9200'
|
||||
http_auth:
|
||||
- admin
|
||||
- admin
|
||||
vector_dimension: 1536
|
||||
use_ssl: false
|
||||
verify_certs: false
|
||||
```
|
||||
|
||||
</CodeGroup>
|
||||
|
||||
<Snippet file="missing-vector-db-tip.mdx" />
|
||||
@@ -0,0 +1,106 @@
|
||||
---
|
||||
title: Pinecone
|
||||
---
|
||||
|
||||
## Overview
|
||||
|
||||
Install pinecone related dependencies using the following command:
|
||||
|
||||
```bash
|
||||
pip install --upgrade 'pinecone-client pinecone-text'
|
||||
```
|
||||
|
||||
In order to use Pinecone as vector database, set the environment variable `PINECONE_API_KEY` which you can find on [Pinecone dashboard](https://app.pinecone.io/).
|
||||
|
||||
<CodeGroup>
|
||||
|
||||
```python main.py
|
||||
from embedchain import App
|
||||
|
||||
# Load pinecone configuration from yaml file
|
||||
app = App.from_config(config_path="pod_config.yaml")
|
||||
# Or
|
||||
app = App.from_config(config_path="serverless_config.yaml")
|
||||
```
|
||||
|
||||
```yaml pod_config.yaml
|
||||
vectordb:
|
||||
provider: pinecone
|
||||
config:
|
||||
metric: cosine
|
||||
vector_dimension: 1536
|
||||
index_name: my-pinecone-index
|
||||
pod_config:
|
||||
environment: gcp-starter
|
||||
metadata_config:
|
||||
indexed:
|
||||
- "url"
|
||||
- "hash"
|
||||
```
|
||||
|
||||
```yaml serverless_config.yaml
|
||||
vectordb:
|
||||
provider: pinecone
|
||||
config:
|
||||
metric: cosine
|
||||
vector_dimension: 1536
|
||||
index_name: my-pinecone-index
|
||||
serverless_config:
|
||||
cloud: aws
|
||||
region: us-west-2
|
||||
```
|
||||
|
||||
</CodeGroup>
|
||||
|
||||
<br />
|
||||
<Note>
|
||||
You can find more information about Pinecone configuration [here](https://docs.pinecone.io/docs/manage-indexes#create-a-pod-based-index).
|
||||
You can also optionally provide `index_name` as a config param in yaml file to specify the index name. If not provided, the index name will be `{collection_name}-{vector_dimension}`.
|
||||
</Note>
|
||||
|
||||
## Usage
|
||||
|
||||
### Hybrid search
|
||||
|
||||
Here is an example of how you can do hybrid search using Pinecone as a vector database through Embedchain.
|
||||
|
||||
```python
|
||||
import os
|
||||
|
||||
from embedchain import App
|
||||
|
||||
config = {
|
||||
'app': {
|
||||
"config": {
|
||||
"id": "ec-docs-hybrid-search"
|
||||
}
|
||||
},
|
||||
'vectordb': {
|
||||
'provider': 'pinecone',
|
||||
'config': {
|
||||
'metric': 'dotproduct',
|
||||
'vector_dimension': 1536,
|
||||
'index_name': 'my-index',
|
||||
'serverless_config': {
|
||||
'cloud': 'aws',
|
||||
'region': 'us-west-2'
|
||||
},
|
||||
'hybrid_search': True, # Remember to set this for hybrid search
|
||||
}
|
||||
}
|
||||
}
|
||||
|
||||
# Initialize app
|
||||
app = App.from_config(config=config)
|
||||
|
||||
# Add documents
|
||||
app.add("/path/to/file.pdf", data_type="pdf_file", namespace="my-namespace")
|
||||
|
||||
# Query
|
||||
app.query("<YOUR QUESTION HERE>", namespace="my-namespace")
|
||||
```
|
||||
|
||||
Under the hood, Embedchain fetches the relevant chunks from the documents you added by doing hybrid search on the pinecone index.
|
||||
If you have questions on how pinecone hybrid search works, please refer to their [offical documentation here](https://docs.pinecone.io/docs/hybrid-search).
|
||||
|
||||
<Snippet file="missing-vector-db-tip.mdx" />
|
||||
@@ -0,0 +1,23 @@
|
||||
---
|
||||
title: Qdrant
|
||||
---
|
||||
|
||||
In order to use Qdrant as a vector database, set the environment variables `QDRANT_URL` and `QDRANT_API_KEY` which you can find on [Qdrant Dashboard](https://cloud.qdrant.io/).
|
||||
|
||||
<CodeGroup>
|
||||
```python main.py
|
||||
from embedchain import App
|
||||
|
||||
# load qdrant configuration from yaml file
|
||||
app = App.from_config(config_path="config.yaml")
|
||||
```
|
||||
|
||||
```yaml config.yaml
|
||||
vectordb:
|
||||
provider: qdrant
|
||||
config:
|
||||
collection_name: my_qdrant_index
|
||||
```
|
||||
</CodeGroup>
|
||||
|
||||
<Snippet file="missing-vector-db-tip.mdx" />
|
||||
@@ -0,0 +1,24 @@
|
||||
---
|
||||
title: Weaviate
|
||||
---
|
||||
|
||||
|
||||
In order to use Weaviate as a vector database, set the environment variables `WEAVIATE_ENDPOINT` and `WEAVIATE_API_KEY` which you can find on [Weaviate dashboard](https://console.weaviate.cloud/dashboard).
|
||||
|
||||
<CodeGroup>
|
||||
```python main.py
|
||||
from embedchain import App
|
||||
|
||||
# load weaviate configuration from yaml file
|
||||
app = App.from_config(config_path="config.yaml")
|
||||
```
|
||||
|
||||
```yaml config.yaml
|
||||
vectordb:
|
||||
provider: weaviate
|
||||
config:
|
||||
collection_name: my_weaviate_index
|
||||
```
|
||||
</CodeGroup>
|
||||
|
||||
<Snippet file="missing-vector-db-tip.mdx" />
|
||||
@@ -0,0 +1,39 @@
|
||||
---
|
||||
title: Zilliz
|
||||
---
|
||||
|
||||
Install related dependencies using the following command:
|
||||
|
||||
```bash
|
||||
pip install --upgrade 'embedchain[milvus]'
|
||||
```
|
||||
|
||||
Set the Zilliz environment variables `ZILLIZ_CLOUD_URI` and `ZILLIZ_CLOUD_TOKEN` which you can find it on their [cloud platform](https://cloud.zilliz.com/).
|
||||
|
||||
<CodeGroup>
|
||||
|
||||
```python main.py
|
||||
import os
|
||||
from embedchain import App
|
||||
|
||||
os.environ['ZILLIZ_CLOUD_URI'] = 'https://xxx.zillizcloud.com'
|
||||
os.environ['ZILLIZ_CLOUD_TOKEN'] = 'xxx'
|
||||
|
||||
# load zilliz configuration from yaml file
|
||||
app = App.from_config(config_path="config.yaml")
|
||||
```
|
||||
|
||||
```yaml config.yaml
|
||||
vectordb:
|
||||
provider: zilliz
|
||||
config:
|
||||
collection_name: 'zilliz_app'
|
||||
uri: https://xxxx.api.gcp-region.zillizcloud.com
|
||||
token: xxx
|
||||
vector_dim: 1536
|
||||
metric_type: L2
|
||||
```
|
||||
|
||||
</CodeGroup>
|
||||
|
||||
<Snippet file="missing-vector-db-tip.mdx" />
|
||||
@@ -22,23 +22,12 @@ make lint format
|
||||
|
||||
5. **Create a pull request**: When you are ready to contribute your changes, submit a pull request to the EmbedChain repository. Provide a clear and descriptive title for your pull request, along with a detailed description of the changes you have made.
|
||||
|
||||
# Tech Stack
|
||||
|
||||
embedchain is built on the following stack:
|
||||
|
||||
- [Langchain](https://github.com/hwchase17/langchain) as an LLM framework to load, chunk and index data
|
||||
- [OpenAI's Ada embedding model](https://platform.openai.com/docs/guides/embeddings) to create embeddings
|
||||
- [OpenAI's ChatGPT API](https://platform.openai.com/docs/guides/gpt/chat-completions-api) as LLM to get answers given the context
|
||||
- [Chroma](https://github.com/chroma-core/chroma) as the vector database to store embeddings
|
||||
- [gpt4all](https://github.com/nomic-ai/gpt4all) as an open source LLM
|
||||
- [sentence-transformers](https://huggingface.co/sentence-transformers) as open source embedding model
|
||||
|
||||
## Team
|
||||
|
||||
### Authors
|
||||
|
||||
- Taranjeet Singh ([@taranjeetio](https://twitter.com/taranjeetio))
|
||||
- Deshraj Yadav ([@deshrajdry](https://twitter.com/taranjeetio))
|
||||
- Deshraj Yadav ([@deshrajdry](https://twitter.com/deshrajdry))
|
||||
|
||||
### Citation
|
||||
|
||||
@@ -47,7 +36,7 @@ If you utilize this repository, please consider citing it with:
|
||||
```
|
||||
@misc{embedchain,
|
||||
author = {Taranjeet Singh, Deshraj Yadav},
|
||||
title = {Embechain: Data platform for LLMs - Load, index, retrieve and sync any unstructured data},
|
||||
title = {Embechain: The Open Source RAG Framework},
|
||||
year = {2023},
|
||||
publisher = {GitHub},
|
||||
journal = {GitHub repository},
|
||||
|
||||
@@ -1,19 +0,0 @@
|
||||
---
|
||||
title: '📊 CSV'
|
||||
---
|
||||
|
||||
To add any csv file, use the data_type as `csv`. `csv` allows remote urls and conventional file paths. Headers are included for each line, so if you have an `age` column, `18` will be added as `age: 18`. Eg:
|
||||
|
||||
```python
|
||||
from embedchain import Pipeline as App
|
||||
|
||||
app = App()
|
||||
app.add('https://people.sc.fsu.edu/~jburkardt/data/csv/airtravel.csv', data_type="csv")
|
||||
# Or add using the local file path
|
||||
# app.add('/path/to/file.csv', data_type="csv")
|
||||
|
||||
app.query("Summarize the air travel data")
|
||||
# Answer: The air travel data shows the number of flights for the months of July in the years 1958, 1959, and 1960. In July 1958, there were 491 flights, in July 1959 there were 548 flights, and in July 1960 there were 622 flights.
|
||||
```
|
||||
|
||||
Note: There is a size limit allowed for csv file beyond which it can throw error. This limit is set by the LLMs. Please consider chunking large csv files into smaller csv files.
|
||||
@@ -1,28 +0,0 @@
|
||||
---
|
||||
title: Overview
|
||||
---
|
||||
|
||||
Embedchain comes with built-in support for various data sources. We handle the complexity of loading unstructured data from these data sources, allowing you to easily customize your app through a user-friendly interface.
|
||||
|
||||
<CardGroup cols={4}>
|
||||
<Card title="📊 csv" href="/data-sources/csv"></Card>
|
||||
<Card title="📃 JSON" href="/data-sources/json"></Card>
|
||||
<Card title="📚🌐 docs site" href="/data-sources/docs-site"></Card>
|
||||
<Card title="📄 docx" href="/data-sources/docx"></Card>
|
||||
<Card title="📝 mdx" href="/data-sources/mdx"></Card>
|
||||
<Card title="📓 notion" href="/data-sources/notion"></Card>
|
||||
<Card title="📰 pdf" href="/data-sources/pdf-file"></Card>
|
||||
<Card title="❓💬 q&a pair" href="/data-sources/qna"></Card>
|
||||
<Card title="🗺️ sitemap" href="/data-sources/sitemap"></Card>
|
||||
<Card title="📝 text" href="/data-sources/text"></Card>
|
||||
<Card title="🌐📄 web page" href="/data-sources/web-page"></Card>
|
||||
<Card title="🧾 xml" href="/data-sources/xml"></Card>
|
||||
<Card title="🙌 OpenAPI" href="/data-sources/openapi"></Card>
|
||||
<Card title="🎥📺 youtube video" href="/data-sources/youtube-video"></Card>
|
||||
<Card title="📬 Gmail" href="/data-sources/gmail"></Card>
|
||||
<Card title="🐘 Postgres" href="/data-sources/postgres"></Card>
|
||||
</CardGroup>
|
||||
|
||||
<br/ >
|
||||
|
||||
<Snippet file="missing-data-source-tip.mdx" />
|
||||
@@ -1,17 +0,0 @@
|
||||
---
|
||||
title: '📰 PDF file'
|
||||
---
|
||||
|
||||
To add any pdf file, use the data_type as `pdf_file`. Eg:
|
||||
|
||||
```python
|
||||
from embedchain import Pipeline as App
|
||||
|
||||
app = App()
|
||||
|
||||
app.add('https://arxiv.org/pdf/1706.03762.pdf', data_type='pdf_file')
|
||||
app.query("What is the paper 'attention is all you need' about?")
|
||||
# Answer: The paper "Attention Is All You Need" proposes a new network architecture called the Transformer, which is based solely on attention mechanisms. It suggests moving away from complex recurrent or convolutional neural networks and instead using attention mechanisms to connect the encoder and decoder in sequence transduction models.
|
||||
```
|
||||
|
||||
Note that we do not support password protected pdfs.
|
||||
@@ -1,13 +0,0 @@
|
||||
---
|
||||
title: '🎥📺 Youtube video'
|
||||
---
|
||||
|
||||
|
||||
To add any youtube video to your app, use the data_type (first argument to `.add()` method) as `youtube_video`. Eg:
|
||||
|
||||
```python
|
||||
from embedchain import Pipeline as App
|
||||
|
||||
app = App()
|
||||
app.add('a_valid_youtube_url_here', data_type='youtube_video')
|
||||
```
|
||||
@@ -0,0 +1,17 @@
|
||||
---
|
||||
title: 'Embedchain.ai'
|
||||
description: 'Deploy your RAG application to embedchain.ai platform'
|
||||
---
|
||||
|
||||
## Deploy on Embedchain Platform
|
||||
|
||||
Embedchain enables developers to deploy their LLM-powered apps in production using the Embedchain platform. The platform offers free access to context on your data through its REST API. Once the pipeline is deployed, you can update your data sources anytime after deployment.
|
||||
|
||||
Deployment to Embedchain Platform is currently available on an invitation-only basis. To request access, please submit your information via the provided [Google Form](https://forms.gle/vigN11h7b4Ywat668). We will review your request and respond promptly.
|
||||
|
||||
|
||||
## Seeking help?
|
||||
|
||||
If you run into issues with deployment, please feel free to reach out to us via any of the following methods:
|
||||
|
||||
<Snippet file="get-help.mdx" />
|
||||
@@ -0,0 +1,101 @@
|
||||
---
|
||||
title: 'Fly.io'
|
||||
description: 'Deploy your RAG application to fly.io platform'
|
||||
---
|
||||
|
||||
Embedchain has a nice and simple abstraction on top of the [Fly.io](https://fly.io/) tools to let developers deploy RAG application to fly.io platform seamlessly.
|
||||
|
||||
Follow the instructions given below to deploy your first application quickly:
|
||||
|
||||
|
||||
## Step-1: Install flyctl command line
|
||||
|
||||
<CodeGroup>
|
||||
```bash OSX
|
||||
brew install flyctl
|
||||
```
|
||||
|
||||
```bash Linux
|
||||
curl -L https://fly.io/install.sh | sh
|
||||
```
|
||||
|
||||
```bash Windows
|
||||
pwsh -Command "iwr https://fly.io/install.ps1 -useb | iex"
|
||||
```
|
||||
</CodeGroup>
|
||||
|
||||
Once you have installed the fly.io cli tool, signup/login to their platform using the following command:
|
||||
|
||||
<CodeGroup>
|
||||
```bash Sign up
|
||||
fly auth signup
|
||||
```
|
||||
|
||||
```bash Sign in
|
||||
fly auth login
|
||||
```
|
||||
</CodeGroup>
|
||||
|
||||
In case you run into issues, refer to official [fly.io docs](https://fly.io/docs/hands-on/install-flyctl/).
|
||||
|
||||
## Step-2: Create RAG app
|
||||
|
||||
We provide a command line utility called `ec` in embedchain that inherits the template for `fly.io` platform and help you deploy the app. Follow the instructions to create a fly.io app using the template provided:
|
||||
|
||||
```bash Install embedchain
|
||||
pip install embedchain
|
||||
```
|
||||
|
||||
```bash Create application
|
||||
mkdir my-rag-app
|
||||
ec create --template=fly.io
|
||||
```
|
||||
|
||||
This will generate a directory structure like this:
|
||||
|
||||
```bash
|
||||
├── Dockerfile
|
||||
├── app.py
|
||||
├── fly.toml
|
||||
├── .env
|
||||
├── .env.example
|
||||
├── embedchain.json
|
||||
└── requirements.txt
|
||||
```
|
||||
|
||||
Feel free to edit the files as required.
|
||||
- `Dockerfile`: Defines the steps to setup the application
|
||||
- `app.py`: Contains API app code
|
||||
- `fly.toml`: fly.io config file
|
||||
- `.env`: Contains environment variables for production
|
||||
- `.env.example`: Contains dummy environment variables (can ignore this file)
|
||||
- `embedchain.json`: Contains embedchain specific configuration for deployment (you don't need to configure this)
|
||||
- `requirements.txt`: Contains python dependencies for your application
|
||||
|
||||
## Step-3: Test app locally
|
||||
|
||||
You can run the app locally by simply doing:
|
||||
|
||||
```bash Run locally
|
||||
pip install -r requirements.txt
|
||||
ec dev
|
||||
```
|
||||
|
||||
## Step-4: Deploy to fly.io
|
||||
|
||||
You can deploy to fly.io using the following command:
|
||||
```bash Deploy app
|
||||
ec deploy
|
||||
```
|
||||
|
||||
Once this step finished, it will provide you with the deployment endpoint where you can access the app live. It will look something like this (Swagger docs):
|
||||
|
||||
You can also check the logs, monitor app status etc on their dashboard by running command `fly dashboard`.
|
||||
|
||||
<img src="/images/fly_io.png" />
|
||||
|
||||
## Seeking help?
|
||||
|
||||
If you run into issues with deployment, please feel free to reach out to us via any of the following methods:
|
||||
|
||||
<Snippet file="get-help.mdx" />
|
||||
@@ -0,0 +1,59 @@
|
||||
---
|
||||
title: 'Gradio.app'
|
||||
description: 'Deploy your RAG application to gradio.app platform'
|
||||
---
|
||||
|
||||
Embedchain offers a Streamlit template to facilitate the development of RAG chatbot applications in just three easy steps.
|
||||
|
||||
Follow the instructions given below to deploy your first application quickly:
|
||||
|
||||
## Step-1: Create RAG app
|
||||
|
||||
We provide a command line utility called `ec` in embedchain that inherits the template for `gradio.app` platform and help you deploy the app. Follow the instructions to create a gradio.app app using the template provided:
|
||||
|
||||
```bash Install embedchain
|
||||
pip install embedchain
|
||||
```
|
||||
|
||||
```bash Create application
|
||||
mkdir my-rag-app
|
||||
ec create --template=gradio.app
|
||||
```
|
||||
|
||||
This will generate a directory structure like this:
|
||||
|
||||
```bash
|
||||
├── app.py
|
||||
├── embedchain.json
|
||||
└── requirements.txt
|
||||
```
|
||||
|
||||
Feel free to edit the files as required.
|
||||
- `app.py`: Contains API app code
|
||||
- `embedchain.json`: Contains embedchain specific configuration for deployment (you don't need to configure this)
|
||||
- `requirements.txt`: Contains python dependencies for your application
|
||||
|
||||
## Step-2: Test app locally
|
||||
|
||||
You can run the app locally by simply doing:
|
||||
|
||||
```bash Run locally
|
||||
pip install -r requirements.txt
|
||||
ec dev
|
||||
```
|
||||
|
||||
## Step-3: Deploy to gradio.app
|
||||
|
||||
```bash Deploy to gradio.app
|
||||
ec deploy
|
||||
```
|
||||
|
||||
This will run `gradio deploy` which will prompt you questions and deploy your app directly to huggingface spaces.
|
||||
|
||||
<img src="/images/gradio_app.png" alt="gradio app" />
|
||||
|
||||
## Seeking help?
|
||||
|
||||
If you run into issues with deployment, please feel free to reach out to us via any of the following methods:
|
||||
|
||||
<Snippet file="get-help.mdx" />
|
||||
@@ -0,0 +1,103 @@
|
||||
---
|
||||
title: 'Huggingface.co'
|
||||
description: 'Deploy your RAG application to huggingface.co platform'
|
||||
---
|
||||
|
||||
With Embedchain, you can directly host your apps in just three steps to huggingface spaces where you can view and deploy your app to the world.
|
||||
|
||||
We support two types of deployment to huggingface spaces:
|
||||
|
||||
<CardGroup cols={2}>
|
||||
<Card title="" href="#using-streamlit-io">
|
||||
Streamlit.io
|
||||
</Card>
|
||||
<Card title="" href="#using-gradio-app">
|
||||
Gradio.app
|
||||
</Card>
|
||||
</CardGroup>
|
||||
|
||||
## Using streamlit.io
|
||||
|
||||
### Step 1: Create a new RAG app
|
||||
|
||||
Create a new RAG app using the following command:
|
||||
|
||||
```bash
|
||||
mkdir my-rag-app
|
||||
ec create --template=hf/streamlit.io # inside my-rag-app directory
|
||||
```
|
||||
|
||||
When you run this for the first time, you'll be asked to login to huggingface.co. Once you login, you'll need to create a **write** token. You can create a write token by going to [huggingface.co settings](https://huggingface.co/settings/token). Once you create a token, you'll be asked to enter the token in the terminal.
|
||||
|
||||
This will also create an `embedchain.json` file in your app directory. Add a `name` key into the `embedchain.json` file. This will be the "repo-name" of your app in huggingface spaces.
|
||||
|
||||
```json embedchain.json
|
||||
{
|
||||
"name": "my-rag-app",
|
||||
"provider": "hf/streamlit.io"
|
||||
}
|
||||
```
|
||||
|
||||
### Step-2: Test app locally
|
||||
|
||||
You can run the app locally by simply doing:
|
||||
|
||||
```bash Run locally
|
||||
pip install -r requirements.txt
|
||||
ec dev
|
||||
```
|
||||
|
||||
### Step-3: Deploy to huggingface spaces
|
||||
|
||||
```bash Deploy to huggingface spaces
|
||||
ec deploy
|
||||
```
|
||||
|
||||
This will deploy your app to huggingface spaces. You can view your app at `https://huggingface.co/spaces/<your-username>/my-rag-app`. This will get prompted in the terminal once the app is deployed.
|
||||
|
||||
## Using gradio.app
|
||||
|
||||
Similar to streamlit.io, you can deploy your app to gradio.app in just three steps.
|
||||
|
||||
### Step 1: Create a new RAG app
|
||||
|
||||
Create a new RAG app using the following command:
|
||||
|
||||
```bash
|
||||
mkdir my-rag-app
|
||||
ec create --template=hf/gradio.app # inside my-rag-app directory
|
||||
```
|
||||
|
||||
When you run this for the first time, you'll be asked to login to huggingface.co. Once you login, you'll need to create a **write** token. You can create a write token by going to [huggingface.co settings](https://huggingface.co/settings/token). Once you create a token, you'll be asked to enter the token in the terminal.
|
||||
|
||||
This will also create an `embedchain.json` file in your app directory. Add a `name` key into the `embedchain.json` file. This will be the "repo-name" of your app in huggingface spaces.
|
||||
|
||||
```json embedchain.json
|
||||
{
|
||||
"name": "my-rag-app",
|
||||
"provider": "hf/gradio.app"
|
||||
}
|
||||
```
|
||||
|
||||
### Step-2: Test app locally
|
||||
|
||||
You can run the app locally by simply doing:
|
||||
|
||||
```bash Run locally
|
||||
pip install -r requirements.txt
|
||||
ec dev
|
||||
```
|
||||
|
||||
### Step-3: Deploy to huggingface spaces
|
||||
|
||||
```bash Deploy to huggingface spaces
|
||||
ec deploy
|
||||
```
|
||||
|
||||
This will deploy your app to huggingface spaces. You can view your app at `https://huggingface.co/spaces/<your-username>/my-rag-app`. This will get prompted in the terminal once the app is deployed.
|
||||
|
||||
## Seeking help?
|
||||
|
||||
If you run into issues with deployment, please feel free to reach out to us via any of the following methods:
|
||||
|
||||
<Snippet file="get-help.mdx" />
|
||||
@@ -0,0 +1,63 @@
|
||||
---
|
||||
title: 'Modal.com'
|
||||
description: 'Deploy your RAG application to modal.com platform'
|
||||
---
|
||||
|
||||
Embedchain has a nice and simple abstraction on top of the [Modal.com](https://modal.com/) tools to let developers deploy RAG application to modal.com platform seamlessly.
|
||||
|
||||
Follow the instructions given below to deploy your first application quickly:
|
||||
|
||||
|
||||
## Step-1 Create RAG application:
|
||||
|
||||
We provide a command line utility called `ec` in embedchain that inherits the template for `modal.com` platform and help you deploy the app. Follow the instructions to create a modal.com app using the template provided:
|
||||
|
||||
|
||||
```bash Create application
|
||||
pip install embedchain[modal]
|
||||
mkdir my-rag-app
|
||||
ec create --template=modal.com
|
||||
```
|
||||
|
||||
This `create` command will open a browser window and ask you to login to your modal.com account and will generate a directory structure like this:
|
||||
|
||||
```bash
|
||||
├── app.py
|
||||
├── .env
|
||||
├── .env.example
|
||||
├── embedchain.json
|
||||
└── requirements.txt
|
||||
```
|
||||
|
||||
Feel free to edit the files as required.
|
||||
- `app.py`: Contains API app code
|
||||
- `.env`: Contains environment variables for production
|
||||
- `.env.example`: Contains dummy environment variables (can ignore this file)
|
||||
- `embedchain.json`: Contains embedchain specific configuration for deployment (you don't need to configure this)
|
||||
- `requirements.txt`: Contains python dependencies for your FastAPI application
|
||||
|
||||
## Step-2: Test app locally
|
||||
|
||||
You can run the app locally by simply doing:
|
||||
|
||||
```bash Run locally
|
||||
pip install -r requirements.txt
|
||||
ec dev
|
||||
```
|
||||
|
||||
## Step-3: Deploy to modal.com
|
||||
|
||||
You can deploy to modal.com using the following command:
|
||||
```bash Deploy app
|
||||
ec deploy
|
||||
```
|
||||
|
||||
Once this step finished, it will provide you with the deployment endpoint where you can access the app live. It will look something like this (Swagger docs):
|
||||
|
||||
<img src="/images/fly_io.png" />
|
||||
|
||||
## Seeking help?
|
||||
|
||||
If you run into issues with deployment, please feel free to reach out to us via any of the following methods:
|
||||
|
||||
<Snippet file="get-help.mdx" />
|
||||
@@ -0,0 +1,86 @@
|
||||
---
|
||||
title: 'Railway.app'
|
||||
description: 'Deploy your RAG application to railway.app'
|
||||
---
|
||||
|
||||
It's easy to host your Embedchain-powered apps and APIs on railway.
|
||||
|
||||
Follow the instructions given below to deploy your first application quickly:
|
||||
|
||||
## Step-1: Create RAG app
|
||||
|
||||
```bash Install embedchain
|
||||
pip install embedchain
|
||||
```
|
||||
|
||||
<Tip>
|
||||
**Create a full stack app using Embedchain CLI**
|
||||
|
||||
To use your hosted embedchain RAG app, you can easily set up a FastAPI server that can be used anywhere.
|
||||
To easily set up a FastAPI server, check out [Get started with Full stack](https://docs.embedchain.ai/get-started/full-stack) page.
|
||||
|
||||
Hosting this server on railway is super easy!
|
||||
|
||||
</Tip>
|
||||
|
||||
## Step-2: Set up your project
|
||||
|
||||
### With Docker
|
||||
|
||||
You can create a `Dockerfile` in the root of the project, with all the instructions. However, this method is sometimes slower in deployment.
|
||||
|
||||
### Without Docker
|
||||
|
||||
By default, Railway uses Python 3.7. Embedchain requires the python version to be >3.9 in order to install.
|
||||
|
||||
To fix this, create a `.python-version` file in the root directory of your project and specify the correct version
|
||||
|
||||
```bash .python-version
|
||||
3.10
|
||||
```
|
||||
|
||||
You also need to create a `requirements.txt` file to specify the requirements.
|
||||
|
||||
```bash requirements.txt
|
||||
python-dotenv
|
||||
embedchain
|
||||
fastapi==0.108.0
|
||||
uvicorn==0.25.0
|
||||
embedchain
|
||||
beautifulsoup4
|
||||
sentence-transformers
|
||||
```
|
||||
|
||||
## Step-3: Deploy to Railway 🚀
|
||||
|
||||
1. Go to https://railway.app and create an account.
|
||||
2. Create a project by clicking on the "Start a new project" button
|
||||
|
||||
### With Github
|
||||
|
||||
Select `Empty Project` or `Deploy from Github Repo`.
|
||||
|
||||
You should be all set!
|
||||
|
||||
### Without Github
|
||||
|
||||
You can also use the railway CLI to deploy your apps from the terminal, if you don't want to connect a git repository.
|
||||
|
||||
To do this, just run this command in your terminal
|
||||
|
||||
```bash Install and set up railway CLI
|
||||
npm i -g @railway/cli
|
||||
railway login
|
||||
railway link [projectID]
|
||||
```
|
||||
|
||||
Finally, run `railway up` to deploy your app.
|
||||
```bash Deploy
|
||||
railway up
|
||||
```
|
||||
|
||||
## Seeking help?
|
||||
|
||||
If you run into issues with deployment, please feel free to reach out to us via any of the following methods:
|
||||
|
||||
<Snippet file="get-help.mdx" />
|
||||
@@ -0,0 +1,93 @@
|
||||
---
|
||||
title: 'Render.com'
|
||||
description: 'Deploy your RAG application to render.com platform'
|
||||
---
|
||||
|
||||
Embedchain has a nice and simple abstraction on top of the [render.com](https://render.com/) tools to let developers deploy RAG application to render.com platform seamlessly.
|
||||
|
||||
Follow the instructions given below to deploy your first application quickly:
|
||||
|
||||
## Step-1: Install `render` command line
|
||||
|
||||
<CodeGroup>
|
||||
```bash OSX
|
||||
brew tap render-oss/render
|
||||
brew install render
|
||||
```
|
||||
|
||||
```bash Linux
|
||||
# Make sure you have deno installed -> https://docs.render.com/docs/cli#from-source-unsupported-operating-systems
|
||||
git clone https://github.com/render-oss/render-cli
|
||||
cd render-cli
|
||||
make deps
|
||||
deno task run
|
||||
deno compile
|
||||
```
|
||||
|
||||
```bash Windows
|
||||
choco install rendercli
|
||||
```
|
||||
</CodeGroup>
|
||||
|
||||
In case you run into issues, refer to official [render.com docs](https://docs.render.com/docs/cli).
|
||||
|
||||
## Step-2 Create RAG application:
|
||||
|
||||
We provide a command line utility called `ec` in embedchain that inherits the template for `render.com` platform and help you deploy the app. Follow the instructions to create a render.com app using the template provided:
|
||||
|
||||
|
||||
```bash Create application
|
||||
pip install embedchain
|
||||
mkdir my-rag-app
|
||||
ec create --template=render.com
|
||||
```
|
||||
|
||||
This `create` command will open a browser window and ask you to login to your render.com account and will generate a directory structure like this:
|
||||
|
||||
```bash
|
||||
├── app.py
|
||||
├── .env
|
||||
├── render.yaml
|
||||
├── embedchain.json
|
||||
└── requirements.txt
|
||||
```
|
||||
|
||||
Feel free to edit the files as required.
|
||||
- `app.py`: Contains API app code
|
||||
- `.env`: Contains environment variables for production
|
||||
- `render.yaml`: Contains render.com specific configuration for deployment (configure this according to your needs, follow [this](https://docs.render.com/docs/blueprint-spec) for more info)
|
||||
- `embedchain.json`: Contains embedchain specific configuration for deployment (you don't need to configure this)
|
||||
- `requirements.txt`: Contains python dependencies for your application
|
||||
|
||||
## Step-3: Test app locally
|
||||
|
||||
You can run the app locally by simply doing:
|
||||
|
||||
```bash Run locally
|
||||
pip install -r requirements.txt
|
||||
ec dev
|
||||
```
|
||||
|
||||
## Step-4: Deploy to render.com
|
||||
|
||||
Before deploying to render.com, you only have to set up one thing.
|
||||
|
||||
In the render.yaml file, make sure to modify the repo key by inserting the URL of your Git repository where your application will be hosted. You can create a repository from [GitHub](https://github.com) or [GitLab](https://gitlab.com/users/sign_in).
|
||||
|
||||
After that, you're ready to deploy on render.com.
|
||||
|
||||
```bash Deploy app
|
||||
ec deploy
|
||||
```
|
||||
|
||||
When you run this, it should open up your render dashboard and you can see the app being deployed. You can find your hosted link over there only.
|
||||
|
||||
You can also check the logs, monitor app status etc on their dashboard by running command `render dashboard`.
|
||||
|
||||
<img src="/images/fly_io.png" />
|
||||
|
||||
## Seeking help?
|
||||
|
||||
If you run into issues with deployment, please feel free to reach out to us via any of the following methods:
|
||||
|
||||
<Snippet file="get-help.mdx" />
|
||||
@@ -0,0 +1,62 @@
|
||||
---
|
||||
title: 'Streamlit.io'
|
||||
description: 'Deploy your RAG application to streamlit.io platform'
|
||||
---
|
||||
|
||||
Embedchain offers a Streamlit template to facilitate the development of RAG chatbot applications in just three easy steps.
|
||||
|
||||
Follow the instructions given below to deploy your first application quickly:
|
||||
|
||||
## Step-1: Create RAG app
|
||||
|
||||
We provide a command line utility called `ec` in embedchain that inherits the template for `streamlit.io` platform and help you deploy the app. Follow the instructions to create a streamlit.io app using the template provided:
|
||||
|
||||
```bash Install embedchain
|
||||
pip install embedchain
|
||||
```
|
||||
|
||||
```bash Create application
|
||||
mkdir my-rag-app
|
||||
ec create --template=streamlit.io
|
||||
```
|
||||
|
||||
This will generate a directory structure like this:
|
||||
|
||||
```bash
|
||||
├── .streamlit
|
||||
│ └── secrets.toml
|
||||
├── app.py
|
||||
├── embedchain.json
|
||||
└── requirements.txt
|
||||
```
|
||||
|
||||
Feel free to edit the files as required.
|
||||
- `app.py`: Contains API app code
|
||||
- `.streamlit/secrets.toml`: Contains secrets for your application
|
||||
- `embedchain.json`: Contains embedchain specific configuration for deployment (you don't need to configure this)
|
||||
- `requirements.txt`: Contains python dependencies for your application
|
||||
|
||||
Add your `OPENAI_API_KEY` in `.streamlit/secrets.toml` file to run and deploy the app.
|
||||
|
||||
## Step-2: Test app locally
|
||||
|
||||
You can run the app locally by simply doing:
|
||||
|
||||
```bash Run locally
|
||||
pip install -r requirements.txt
|
||||
ec dev
|
||||
```
|
||||
|
||||
## Step-3: Deploy to streamlit.io
|
||||
|
||||
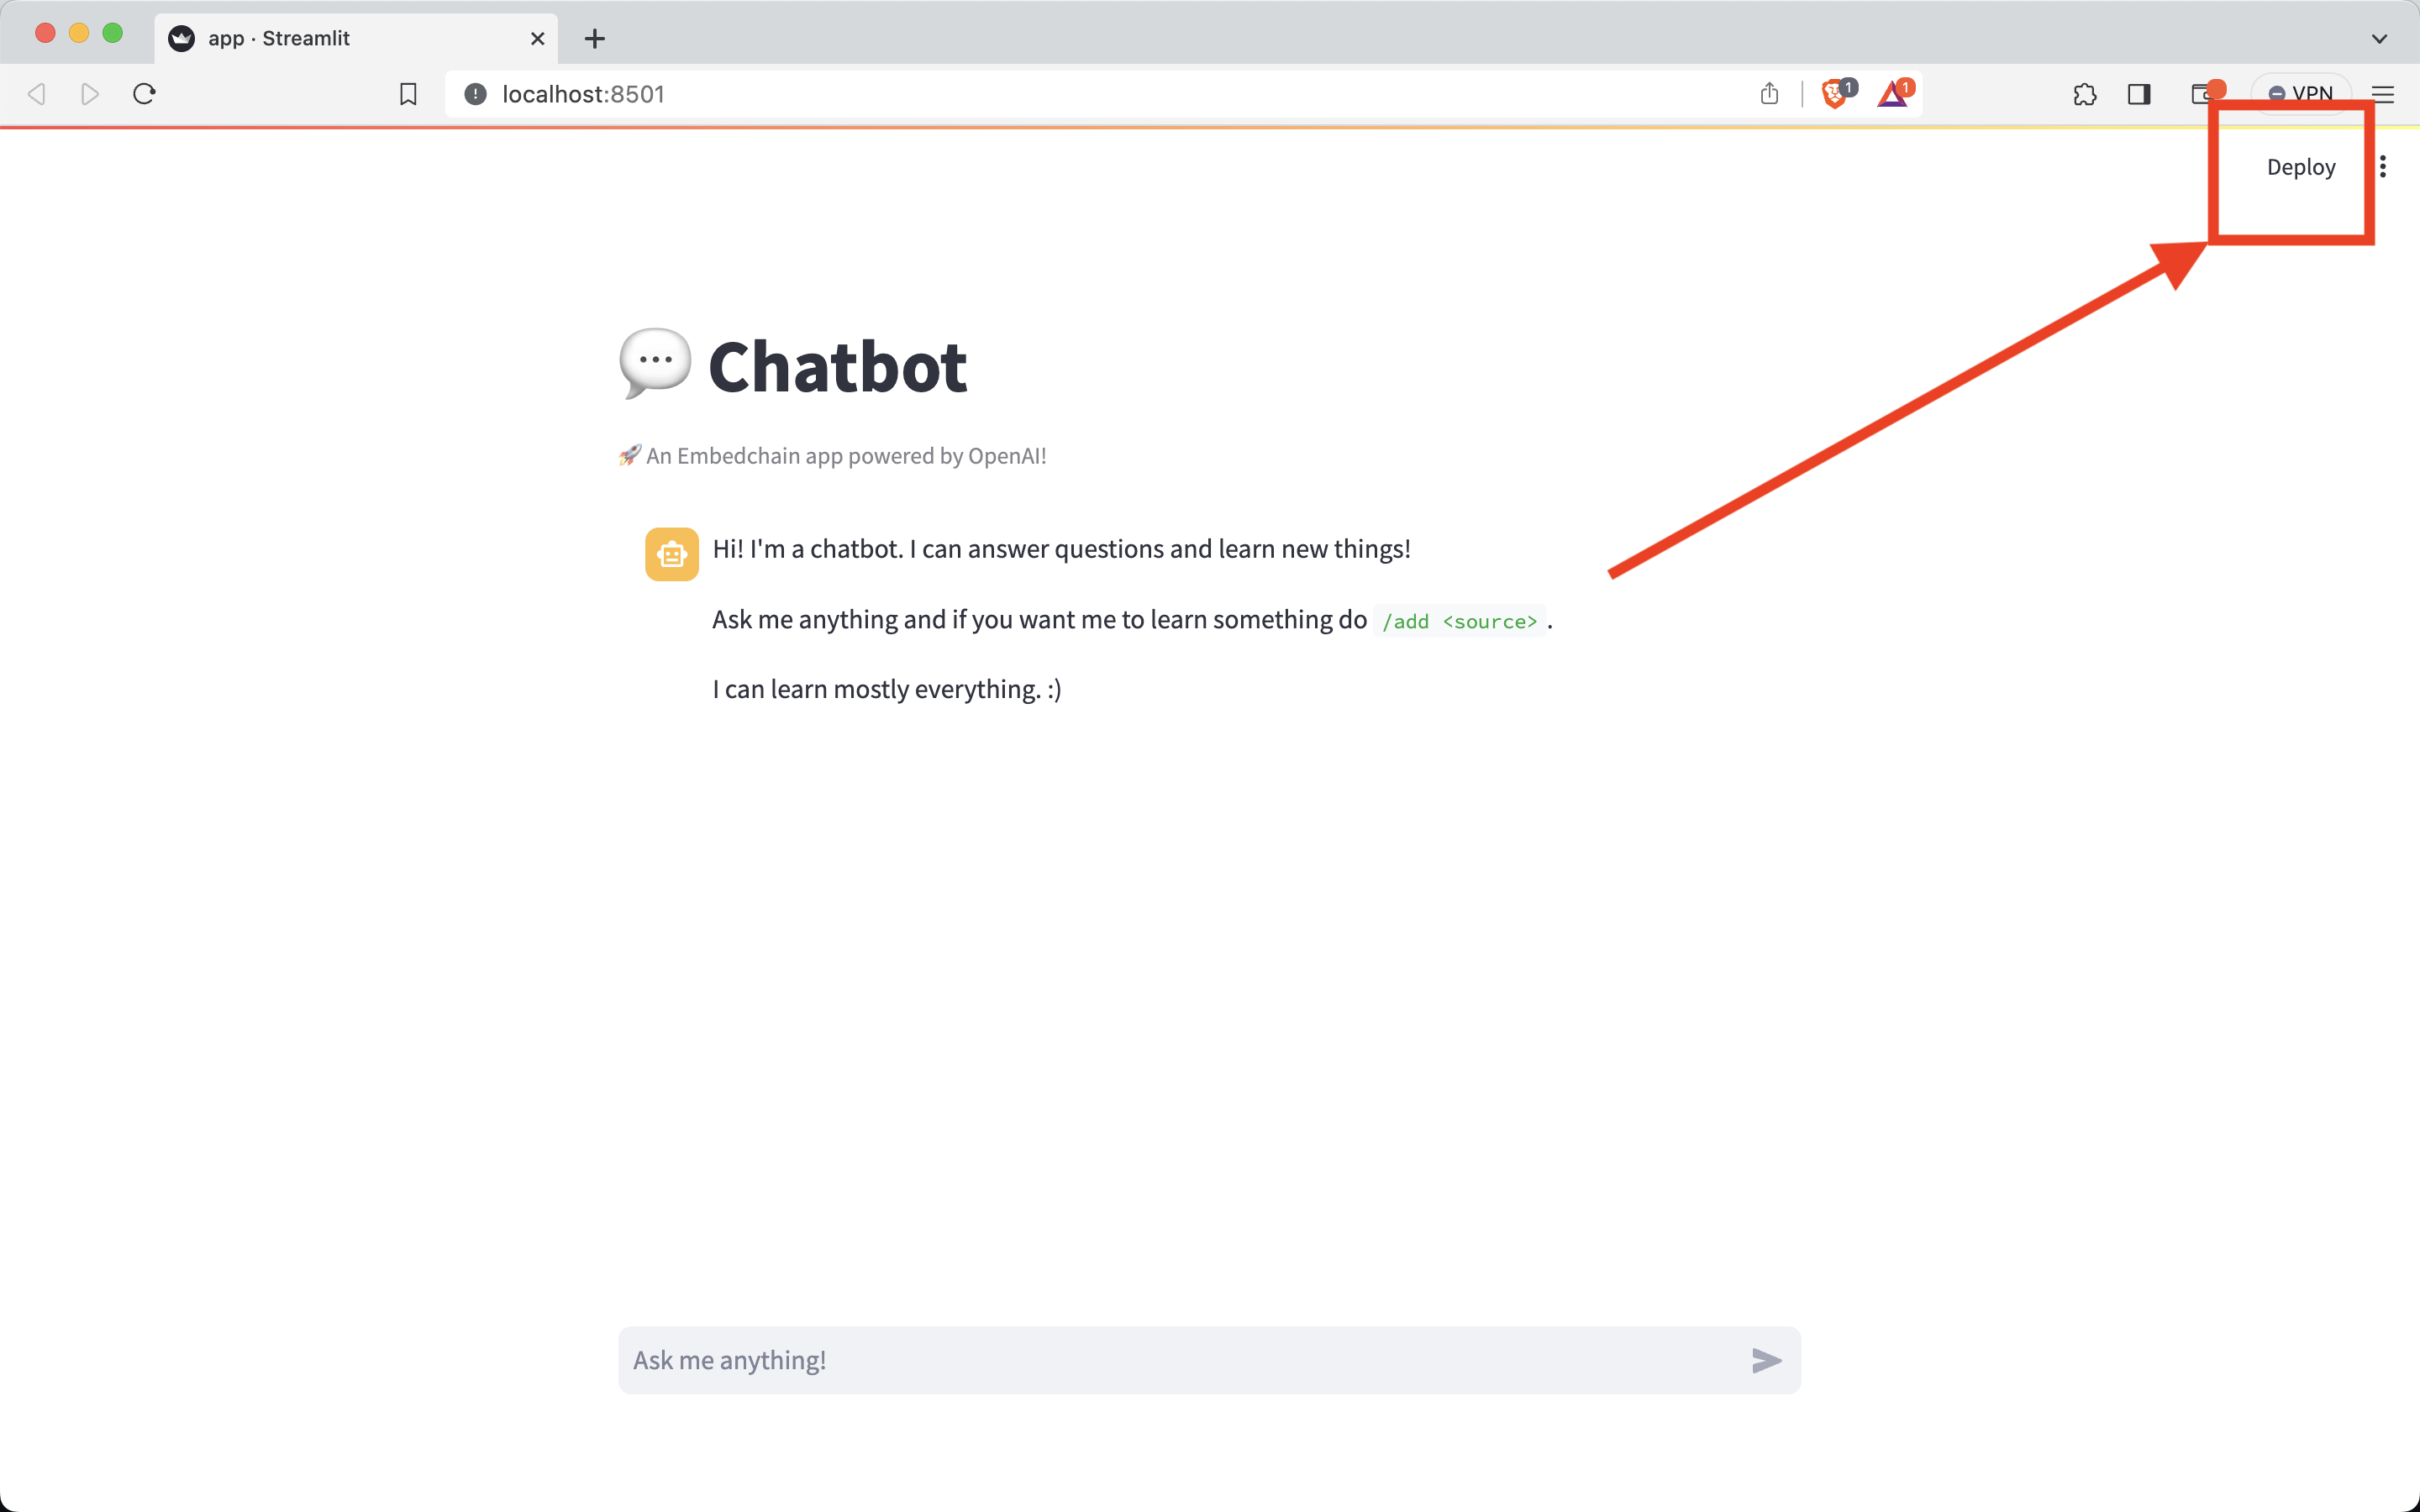
|
||||
|
||||
Use the deploy button from the streamlit website to deploy your app.
|
||||
|
||||
You can refer this [guide](https://docs.streamlit.io/streamlit-community-cloud/deploy-your-app) if you run into any problems.
|
||||
|
||||
## Seeking help?
|
||||
|
||||
If you run into issues with deployment, please feel free to reach out to us via any of the following methods:
|
||||
|
||||
<Snippet file="get-help.mdx" />
|
||||
@@ -0,0 +1,32 @@
|
||||
### Embedchain Chat with PDF App
|
||||
|
||||
You can easily create and deploy your own `chat-pdf` App using Embedchain.
|
||||
|
||||
Here are few simple steps for you to create and deploy your app:
|
||||
|
||||
1. Fork the embedchain repo from [Github](https://github.com/embedchain/embedchain).
|
||||
|
||||
<Note>
|
||||
If you run into problems with forking, please refer to [github docs](https://docs.github.com/en/pull-requests/collaborating-with-pull-requests/working-with-forks/fork-a-repo) for forking a repo.
|
||||
</Note>
|
||||
|
||||
2. Navigate to `chat-pdf` example app from your forked repo:
|
||||
|
||||
```bash
|
||||
cd <your_fork_repo>/examples/chat-pdf
|
||||
```
|
||||
|
||||
3. Run your app in development environment with simple commands
|
||||
|
||||
```bash
|
||||
pip install -r requirements.txt
|
||||
ec dev
|
||||
```
|
||||
|
||||
Feel free to improve our simple `chat-pdf` streamlit app and create pull request to showcase your app [here](https://docs.embedchain.ai/examples/showcase)
|
||||
|
||||
4. You can easily deploy your app using Streamlit interface
|
||||
|
||||
Connect your Github account with Streamlit and refer this [guide](https://docs.streamlit.io/streamlit-community-cloud/deploy-your-app) to deploy your app.
|
||||
|
||||
You can also use the deploy button from your streamlit website you see when running `ec dev` command.
|
||||
@@ -1,5 +1,5 @@
|
||||
---
|
||||
title: '🌐 Full Stack'
|
||||
title: 'Full Stack'
|
||||
---
|
||||
|
||||
The Full Stack app example can be found [here](https://github.com/embedchain/embedchain/tree/main/examples/full_stack).
|
||||
|
||||
@@ -0,0 +1,124 @@
|
||||
Fork the Embedchain repo on [Github](https://github.com/embedchain/embedchain) to create your own NextJS discord and slack bot powered by Embedchain.
|
||||
|
||||
If you run into problems with forking, please refer to [github docs](https://docs.github.com/en/pull-requests/collaborating-with-pull-requests/working-with-forks/fork-a-repo) for forking a repo.
|
||||
|
||||
We will work from the `examples/nextjs` folder so change your current working directory by running the command - `cd <your_forked_repo>/examples/nextjs`
|
||||
|
||||
# Installation
|
||||
|
||||
First, lets start by install all the required packages and dependencies.
|
||||
|
||||
- Install all the required python packages by running ```pip install -r requirements.txt```
|
||||
|
||||
- We will use [Fly.io](https://fly.io/) to deploy our embedchain app, discord and slack bot. Follow the step one to install [Fly.io CLI](https://docs.embedchain.ai/deployment/fly_io#step-1-install-flyctl-command-line)
|
||||
|
||||
# Developement
|
||||
|
||||
## Embedchain App
|
||||
|
||||
First, we need an Embedchain app powered with the knowledge of NextJS. We have already created an embedchain app using FastAPI in `ec_app` folder for you. Feel free to ingest data of your choice to power the App.
|
||||
|
||||
<Note>
|
||||
Navigate to `ec_app` folder and create `.env` file in this folder and set your OpenAI API key as shown in `.env.example` file. If you want to use other open-source models, feel free to use the app config in `app.py`. More details for using custom configuration for Embedchain app is [available here](https://docs.embedchain.ai/api-reference/advanced/configuration).
|
||||
</Note>
|
||||
|
||||
Before running the ec commands to develope the app, open `fly.toml` file and update the `name` variable to something unique. This is important as `fly.io` requires users to provide a globally unique deployment app names.
|
||||
|
||||
Now, we need to launch this application with fly.io. You can see your app on [fly.io dashboard](https://fly.io/dashboard). Run the following command to launch your app on fly.io:
|
||||
```bash
|
||||
fly launch --no-deploy
|
||||
```
|
||||
|
||||
To run the app in development, run the following command:
|
||||
|
||||
```bash
|
||||
ec dev
|
||||
```
|
||||
|
||||
Run `ec deploy` to deploy your app on Fly.io. Once you deploy your app, save the endpoint on which our discord and slack bot will send requests.
|
||||
|
||||
|
||||
## Discord bot
|
||||
|
||||
For discord bot, you will need to create the bot on discord developer portal and get the discord bot token and your discord bot name.
|
||||
|
||||
While keeping in mind the following note, create the discord bot by following the instructions from our [discord bot docs](https://docs.embedchain.ai/examples/discord_bot) and get discord bot token.
|
||||
|
||||
<Note>
|
||||
You do not need to set `OPENAI_API_KEY` to run this discord bot. Follow the remaining instructions to create a discord bot app. We recommend you to give the following sets of bot permissions to run the discord bot without errors:
|
||||
|
||||
```
|
||||
(General Permissions)
|
||||
Read Message/View Channels
|
||||
|
||||
(Text Permissions)
|
||||
Send Messages
|
||||
Create Public Thread
|
||||
Create Private Thread
|
||||
Send Messages in Thread
|
||||
Manage Threads
|
||||
Embed Links
|
||||
Read Message History
|
||||
```
|
||||
</Note>
|
||||
|
||||
Once you have your discord bot token and discord app name. Navigate to `nextjs_discord` folder and create `.env` file and define your discord bot token, discord bot name and endpoint of your embedchain app as shown in `.env.example` file.
|
||||
|
||||
To run the app in development:
|
||||
|
||||
```bash
|
||||
python app.py
|
||||
```
|
||||
|
||||
Before deploying the app, open `fly.toml` file and update the `name` variable to something unique. This is important as `fly.io` requires users to provide a globally unique deployment app names.
|
||||
|
||||
Now, we need to launch this application with fly.io. You can see your app on [fly.io dashboard](https://fly.io/dashboard). Run the following command to launch your app on fly.io:
|
||||
```bash
|
||||
fly launch --no-deploy
|
||||
```
|
||||
|
||||
Run `ec deploy` to deploy your app on Fly.io. Once you deploy your app, your discord bot will be live!
|
||||
|
||||
|
||||
## Slack bot
|
||||
|
||||
For Slack bot, you will need to create the bot on slack developer portal and get the slack bot token and slack app token.
|
||||
|
||||
### Setup
|
||||
|
||||
- Create a workspace on Slack if you don't have one already by clicking [here](https://slack.com/intl/en-in/).
|
||||
- Create a new App on your Slack account by going [here](https://api.slack.com/apps).
|
||||
- Select `From Scratch`, then enter the Bot Name and select your workspace.
|
||||
- Go to `App Credentials` section on the `Basic Information` tab from the left sidebar, create your app token and save it in your `.env` file as `SLACK_APP_TOKEN`.
|
||||
- Go to `Socket Mode` tab from the left sidebar and enable the socket mode to listen to slack message from your workspace.
|
||||
- (Optional) Under the `App Home` tab you can change your App display name and default name.
|
||||
- Navigate to `Event Subscription` tab, and enable the event subscription so that we can listen to slack events.
|
||||
- Once you enable the event subscription, you will need to subscribe to bot events to authorize the bot to listen to app mention events of the bot. Do that by tapping on `Add Bot User Event` button and select `app_mention`.
|
||||
- On the left Sidebar, go to `OAuth and Permissions` and add the following scopes under `Bot Token Scopes`:
|
||||
```text
|
||||
app_mentions:read
|
||||
channels:history
|
||||
channels:read
|
||||
chat:write
|
||||
emoji:read
|
||||
reactions:write
|
||||
reactions:read
|
||||
```
|
||||
- Now select the option `Install to Workspace` and after it's done, copy the `Bot User OAuth Token` and set it in your `.env` file as `SLACK_BOT_TOKEN`.
|
||||
|
||||
Once you have your slack bot token and slack app token. Navigate to `nextjs_slack` folder and create `.env` file and define your slack bot token, slack app token and endpoint of your embedchain app as shown in `.env.example` file.
|
||||
|
||||
To run the app in development:
|
||||
|
||||
```bash
|
||||
python app.py
|
||||
```
|
||||
|
||||
Before deploying the app, open `fly.toml` file and update the `name` variable to something unique. This is important as `fly.io` requires users to provide a globally unique deployment app names.
|
||||
|
||||
Now, we need to launch this application with fly.io. You can see your app on [fly.io dashboard](https://fly.io/dashboard). Run the following command to launch your app on fly.io:
|
||||
```bash
|
||||
fly launch --no-deploy
|
||||
```
|
||||
|
||||
Run `ec deploy` to deploy your app on Fly.io. Once you deploy your app, your slack bot will be live!
|
||||
@@ -1,8 +1,15 @@
|
||||
---
|
||||
title: 🔎 Examples
|
||||
description: 'Collection of Google colab notebook and Replit links for users'
|
||||
title: Notebooks & Replits
|
||||
---
|
||||
|
||||
# Explore awesome apps
|
||||
|
||||
Check out the remarkable work accomplished using [Embedchain](https://app.embedchain.ai/custom-gpts/).
|
||||
|
||||
## Collection of Google colab notebook and Replit links for users
|
||||
|
||||
Get started with Embedchain by trying out the examples below. You can run the examples in your browser using Google Colab or Replit.
|
||||
|
||||
<table>
|
||||
<thead>
|
||||
<tr>
|
||||
@@ -37,6 +44,14 @@ description: 'Collection of Google colab notebook and Replit links for users'
|
||||
<td className="align-middle"><a target="_blank" href="https://colab.research.google.com/github/embedchain/embedchain/blob/main/notebooks/cohere.ipynb"><img src="https://colab.research.google.com/assets/colab-badge.svg" noZoom alt="Open In Colab"/></a></td>
|
||||
<td className="align-middle"><a target="_blank" href="https://replit.com/@taranjeetio/cohere#main.py"><img src="https://replit.com/badge?caption=Try%20with%20Replit&variant=small" noZoom alt="Try with Replit Badge"/></a></td>
|
||||
</tr>
|
||||
<tr>
|
||||
<td className="align-middle">Together</td>
|
||||
<td className="align-middle"><a target="_blank" href="https://colab.research.google.com/github/embedchain/embedchain/blob/main/notebooks/together.ipynb"><img src="https://colab.research.google.com/assets/colab-badge.svg" noZoom alt="Open In Colab"/></a></td>
|
||||
</tr>
|
||||
<tr>
|
||||
<td className="align-middle">Ollama</td>
|
||||
<td className="align-middle"><a target="_blank" href="https://colab.research.google.com/github/embedchain/embedchain/blob/main/notebooks/ollama.ipynb"><img src="https://colab.research.google.com/assets/colab-badge.svg" noZoom alt="Open In Colab"/></a></td>
|
||||
</tr>
|
||||
<tr>
|
||||
<td className="align-middle">Hugging Face</td>
|
||||
<td className="align-middle"><a target="_blank" href="https://colab.research.google.com/github/embedchain/embedchain/blob/main/notebooks/hugging_face_hub.ipynb"><img src="https://colab.research.google.com/assets/colab-badge.svg" noZoom alt="Open In Colab"/></a></td>
|
||||
@@ -1,5 +1,5 @@
|
||||
---
|
||||
title: '🤖 OpenAI Assistant'
|
||||
title: 'OpenAI Assistant'
|
||||
---
|
||||
|
||||
<img src="https://blogs.swarthmore.edu/its/wp-content/uploads/2022/05/openai.jpg" align="center" width="500" alt="OpenAI Logo"/>
|
||||
@@ -38,40 +38,6 @@ assistant = OpenAIAssistant(assistant_id="asst_xxx")
|
||||
assistant = OpenAIAssistant(assistant_id="asst_xxx", thread_id="thread_xxx")
|
||||
```
|
||||
|
||||
### Arguments
|
||||
|
||||
<ResponseField name="name" type="string">
|
||||
Name for your AI assistant
|
||||
</ResponseField>
|
||||
|
||||
<ResponseField name="instructions" type="string">
|
||||
how the Assistant and model should behave or respond
|
||||
</ResponseField>
|
||||
|
||||
<ResponseField name="assistant_id" type="string">
|
||||
Load existing OpenAI Assistant. If you pass this, you don't have to pass other arguments.
|
||||
</ResponseField>
|
||||
|
||||
<ResponseField name="thread_id" type="string">
|
||||
Existing OpenAI thread id if exists
|
||||
</ResponseField>
|
||||
|
||||
<ResponseField name="model" type="str" default="gpt-4-1106-preview">
|
||||
OpenAI model to use
|
||||
</ResponseField>
|
||||
|
||||
<ResponseField name="tools" type="list">
|
||||
OpenAI tools to use. Default set to `[{"type": "retrieval"}]`
|
||||
</ResponseField>
|
||||
|
||||
<ResponseField name="data_sources" type="list" default="[]">
|
||||
Add data sources to your assistant. You can add in the following format: `[{"source": "https://example.com", "data_type": "web_page"}]`
|
||||
</ResponseField>
|
||||
|
||||
<ResponseField name="telemetry" type="boolean" default="True">
|
||||
Anonymous telemetry (doesn't collect any user information or user's files). Used to improve the Embedchain package utilization. Default is `True`.
|
||||
</ResponseField>
|
||||
|
||||
## Step-2: Add data to thread
|
||||
|
||||
You can add any custom data source that is supported by Embedchain. Else, you can directly pass the file path on your local system and Embedchain propagates it to OpenAI Assistant.
|
||||
@@ -92,4 +58,3 @@ You can try it out yourself using the following Google Colab notebook:
|
||||
<a href="https://colab.research.google.com/drive/1BKlXZYSl6AFRgiHZ5XIzXrXC_24kDYHQ?usp=sharing">
|
||||
<img src="https://camo.githubusercontent.com/84f0493939e0c4de4e6dbe113251b4bfb5353e57134ffd9fcab6b8714514d4d1/68747470733a2f2f636f6c61622e72657365617263682e676f6f676c652e636f6d2f6173736574732f636f6c61622d62616467652e737667" alt="Open in Colab" />
|
||||
</a>
|
||||
|
||||
@@ -0,0 +1,51 @@
|
||||
---
|
||||
title: 'Open-Source AI Assistant'
|
||||
---
|
||||
|
||||
Embedchain also provides support for creating Open-Source AI Assistants (similar to [OpenAI Assistants API](https://platform.openai.com/docs/assistants/overview)) which allows you to build AI assistants within your own applications using any LLM (OpenAI or otherwise). An Assistant has instructions and can leverage models, tools, and knowledge to respond to user queries.
|
||||
|
||||
At a high level, the Open-Source AI Assistants API has the following flow:
|
||||
|
||||
1. Create an AI Assistant by picking a model
|
||||
2. Create a Thread when a user starts a conversation
|
||||
3. Add Messages to the Thread as the user ask questions
|
||||
4. Run the Assistant on the Thread to trigger responses. This automatically calls the relevant tools.
|
||||
|
||||
Creating an Open-Source AI Assistant is a simple 3 step process.
|
||||
|
||||
## Step 1: Instantiate AI Assistant
|
||||
|
||||
```python Initialize
|
||||
from embedchain.store.assistants import AIAssistant
|
||||
|
||||
assistant = AIAssistant(
|
||||
name="My Assistant",
|
||||
data_sources=[{"source": "https://www.youtube.com/watch?v=U9mJuUkhUzk"}])
|
||||
```
|
||||
|
||||
If you want to use the existing assistant, you can do something like this:
|
||||
|
||||
```python Initialize
|
||||
# Load an assistant and create a new thread
|
||||
assistant = AIAssistant(assistant_id="asst_xxx")
|
||||
|
||||
# Load a specific thread for an assistant
|
||||
assistant = AIAssistant(assistant_id="asst_xxx", thread_id="thread_xxx")
|
||||
```
|
||||
|
||||
## Step-2: Add data to thread
|
||||
|
||||
You can add any custom data source that is supported by Embedchain. Else, you can directly pass the file path on your local system and Embedchain propagates it to OpenAI Assistant.
|
||||
|
||||
```python Add data
|
||||
assistant.add("/path/to/file.pdf")
|
||||
assistant.add("https://www.youtube.com/watch?v=U9mJuUkhUzk")
|
||||
assistant.add("https://openai.com/blog/new-models-and-developer-products-announced-at-devday")
|
||||
```
|
||||
|
||||
## Step-3: Chat with your AI Assistant
|
||||
|
||||
```python Chat
|
||||
assistant.chat("How much OpenAI credits were offered to attendees during OpenAI DevDay?")
|
||||
# Response: 'Every attendee of OpenAI DevDay 2023 was offered $500 in OpenAI credits.'
|
||||
```
|
||||
Some files were not shown because too many files have changed in this diff Show More
Reference in New Issue
Block a user