Compare commits
460 Commits
| Author | SHA1 | Date | |
|---|---|---|---|
 Sidharth Mohanty Sidharth Mohanty
|
210fe9bb80 | ||
|
Sidharth Mohanty
|
ec8549d0e1 | ||
|
Deven Patel
|
b77d9d750f | ||
|
Deshraj Yadav
|
a10823d309 | ||
|
Sidharth Mohanty
|
3a09c2bd62 | ||
|
Sidharth Mohanty
|
a1394ce32e | ||
|
Sidharth Mohanty
|
1020a4121f | ||
|
Sidharth Mohanty
|
737837ae0b | ||
|
Deshraj Yadav
|
7ee2d0653b | ||
|
Deshraj Yadav
|
43926fb527 | ||
|
Deshraj Yadav
|
7bcc9e35dd | ||
|
Deshraj Yadav
|
6437661837 | ||
|
Sidharth Mohanty
|
b5f84f27ff | ||
|
Sidharth Mohanty
|
48c38b5dc3 | ||
|
Sidharth Mohanty
|
b4f3bbbbc9 | ||
|
Deshraj Yadav
|
3cd50c4cd9 | ||
|
Sidharth Mohanty
|
cd2c40a9c4 | ||
|
Sidharth Mohanty
|
33dcfe42b5 | ||
|
Deven Patel
|
db37b2ac15 | ||
|
Sidharth Mohanty
|
bee4e834b1 | ||
|
Sidharth Mohanty
|
0272459435 | ||
|
Deven Patel
|
c0b5e93967 | ||
|
Sidharth Mohanty
|
6983ebba49 | ||
|
Sidharth Mohanty
|
9943d1e015 | ||
|
Sidharth Mohanty
|
b348251484 | ||
|
xuxiang
|
e719b5bac3 | ||
|
Sidharth Mohanty
|
54f43215cd | ||
|
Deven Patel
|
b246d9823e | ||
|
Deven Patel
|
65c8dd445b | ||
|
Deven Patel
|
0efbc80ac9 | ||
|
Deven Patel
|
151746beec | ||
|
Deven Patel
|
c0ee680546 | ||
|
Sidharth Mohanty
|
9303a1bf81 | ||
|
Deshraj Yadav
|
d54cdc5b00 | ||
|
Sidharth Mohanty
|
b7a44ef472 | ||
|
Deven Patel
|
ae6f866901 | ||
|
Sidharth Mohanty
|
7910cee259 | ||
|
Deshraj Yadav
|
d66e647f99 | ||
|
Deven Patel
|
ff4a333be7 | ||
|
Deshraj Yadav
|
111749a95d | ||
|
Deshraj Yadav
|
adde398b65 | ||
|
Sidharth Mohanty
|
d8897ce356 | ||
|
Deven Patel
|
0ea8ab228c | ||
|
Sidharth Mohanty
|
d62a23edf6 | ||
|
Sidharth Mohanty
|
51ebf3439b | ||
|
Deven Patel
|
4a5ed1dd8d | ||
|
Deven Patel
|
e84b5034ea | ||
|
Deven Patel
|
a4831d6ed9 | ||
|
Deven Patel
|
51b4966801 | ||
|
atkinsh
|
1d4e00ccef | ||
|
Deven Patel
|
c9fbc2e7d6 | ||
|
Deshraj Yadav
|
fa34788df6 | ||
|
Deven Patel
|
0f4f220119 | ||
|
Deven Patel
|
512cfc9466 | ||
|
Deshraj Yadav
|
541b1cb7c7 | ||
|
Deven Patel
|
36af1a7615 | ||
|
Deshraj Yadav
|
b02e8feeda | ||
|
Deven Patel
|
406c46e7f4 | ||
|
Sidharth Mohanty
|
e35eaf1bfc | ||
|
Sidharth Mohanty
|
38426a7af1 | ||
|
Deshraj Yadav
|
141a23fb1e | ||
|
Sidharth Mohanty
|
bb28569abf | ||
|
Deshraj Yadav
|
1df46b2bb3 | ||
|
Deshraj Yadav
|
58f72e1ffe | ||
|
Deshraj Yadav
|
33409140b4 | ||
|
Deshraj Yadav
|
f6b80e01a1 | ||
|
Sidharth Mohanty
|
798d3fcc5a | ||
|
Sidharth Mohanty
|
85f3ac428b | ||
|
Deshraj Yadav
|
9fcf2130b5 | ||
|
Taranjeet Singh
|
51df00729e | ||
|
Deven Patel
|
023a61446f | ||
|
Deshraj Yadav
|
e0b73e6a5a | ||
|
Deven Patel
|
28460f725c | ||
|
Deshraj Yadav
|
c93e49d2b8 | ||
|
Deven Patel
|
07fb6bee54 | ||
|
Deshraj Yadav
|
3fa7db8420 | ||
|
Deven Patel
|
c14bd7b73b | ||
|
Sidharth Mohanty
|
5201beaab0 | ||
|
Sidharth Mohanty
|
122313d8a5 | ||
|
Deven Patel
|
82fd595306 | ||
|
Deven Patel
|
95c0d47236 | ||
|
Deven Patel
|
919cc74e94 | ||
|
Deshraj Yadav
|
d839991acb | ||
|
Deven Patel
|
539286aafd | ||
|
Sidharth Mohanty
|
23522b7b55 | ||
|
UnMonsieur
|
bf3fac56e4 | ||
|
Deshraj Yadav
|
a5bf8e9075 | ||
|
Deshraj Yadav
|
1d31b8f7e4 | ||
|
Deshraj Yadav
|
b144c7dccc | ||
|
Deshraj Yadav
|
1364975396 | ||
|
Deven Patel
|
deaa7f50f8 | ||
|
Sidharth Mohanty
|
744ab5156f | ||
|
Sidharth Mohanty
|
c45413969a | ||
|
Deshraj Yadav
|
b314e5e080 | ||
|
Deshraj Yadav
|
17129e2eaa | ||
|
Deven Patel
|
654fd8d74c | ||
|
Sidharth Mohanty
|
9d3568ef75 | ||
|
Sidharth Mohanty
|
14712cac88 | ||
|
Deshraj Yadav
|
0d568c758b | ||
|
Deshraj Yadav
|
7c6b88c7c5 | ||
|
Deshraj Yadav
|
32c93be46e | ||
|
Deven Patel
|
7de8d85199 | ||
|
Deshraj Yadav
|
f7dd65a3de | ||
|
Sidharth Mohanty
|
d8cdbe0041 | ||
|
Sidharth Mohanty
|
2b8b6d3ea9 | ||
|
Sidharth Mohanty
|
936c7e389f | ||
|
Sidharth Mohanty
|
6864b4207b | ||
|
Deshraj Yadav
|
98eb5b54be | ||
|
Deshraj Yadav
|
3332e6e236 | ||
|
Deven Patel
|
0533da72d7 | ||
|
Sidharth Mohanty
|
a1de238716 | ||
|
Deshraj Yadav
|
f0d112254b | ||
|
Sidharth Mohanty
|
830a7397ef | ||
|
Deven Patel
|
5428765329 | ||
|
Sidharth Mohanty
|
23c912f2b7 | ||
|
Sidharth Mohanty
|
9c4b023297 | ||
|
Deven Patel
|
53037b5ed8 | ||
|
Sidharth Mohanty
|
e2546a653d | ||
|
Deshraj Yadav
|
4b8cada873 | ||
|
Deshraj Yadav
|
fa3ca1d08a | ||
|
Sidharth Mohanty
|
8dd5cb9602 | ||
|
Deven Patel
|
a054f7be9c | ||
|
Deven Patel
|
df314dc6d1 | ||
|
Deven Patel
|
930280f4ce | ||
|
Deshraj Yadav
|
5022c1ae29 | ||
|
Deshraj Yadav
|
6ced756a6b | ||
|
Deshraj Yadav
|
b17268db50 | ||
|
Deshraj Yadav
|
476da37009 | ||
|
Deshraj Yadav
|
455f059c6f | ||
|
Deven Patel
|
5255a37c93 | ||
|
Deven Patel
|
68dc274f72 | ||
|
Deshraj Yadav
|
30228f7f8e | ||
|
Sidharth Mohanty
|
e15ef79ca9 | ||
|
Deshraj Yadav
|
bc012a7518 | ||
|
Sidharth Mohanty
|
3b4409cfad | ||
|
Deshraj Yadav
|
d3726134b2 | ||
|
anujshandillya
|
5acb7f1c55 | ||
|
Deshraj Yadav
|
81336668b3 | ||
|
Deshraj Yadav
|
35c2b83015 | ||
|
Deshraj Yadav
|
cc1ee1deaa | ||
|
Deshraj Yadav
|
29bd038579 | ||
|
Deshraj Yadav
|
f6c4f86986 | ||
|
Deven Patel
|
68183e9dce | ||
|
Deshraj Yadav
|
78ec91a3a9 | ||
|
Deven Patel
|
c95d458e52 | ||
|
Deshraj Yadav
|
191ae3ec1e | ||
|
Deshraj Yadav
|
ab9598d00a | ||
|
Deven Patel
|
0f8a2e624a | ||
|
Deven Patel
|
d77e8da3f3 | ||
|
Sidharth Mohanty
|
a27eeb3255 | ||
|
Deshraj Yadav
|
413ccb83e6 | ||
|
Deven Patel
|
797bb567c6 | ||
|
Deshraj Yadav
|
f2a5dc40ee | ||
|
Deshraj Yadav
|
3979480532 | ||
|
Abhinesh
|
76f1993e7a | ||
|
Deshraj Yadav
|
d783fa2b89 | ||
|
Sidharth Mohanty
|
bbce18caac | ||
|
Deshraj Yadav
|
3ce2d8a656 | ||
|
Deshraj Yadav
|
a5c86a2f5c | ||
|
Deshraj Yadav
|
d18e533adf | ||
|
Sidharth Mohanty
|
2b881aaad0 | ||
|
Sidharth Mohanty
|
39cc07608f | ||
|
Sidharth Mohanty
|
9894cfcced | ||
|
Sidharth Mohanty
|
b5d80be037 | ||
|
Sidharth Mohanty
|
b7870fbd9b | ||
|
Sidharth Mohanty
|
36e6d486fc | ||
|
Sidharth Mohanty
|
2d5dc84f1a | ||
|
Deshraj Yadav
|
b47405e1bd | ||
|
Muhammad Muzammil
|
8b64deab40 | ||
|
Rupesh Bansal
|
c8846e0e93 | ||
|
Deven Patel
|
7641cba01d | ||
|
Sidharth Mohanty
|
4dc1785ef1 | ||
|
Sidharth Mohanty
|
b2286f3e34 | ||
|
Sidharth Mohanty
|
65a20aa457 | ||
|
Rupesh Bansal
|
d8a7d71344 | ||
|
Deshraj Yadav
|
bb490df9a6 | ||
|
Rupesh Bansal
|
cdfd6519c8 | ||
|
Sidharth Mohanty
|
e8a2846449 | ||
|
Sidharth Mohanty
|
d065cbf934 | ||
|
Sidharth Mohanty
|
413b107b9a | ||
|
Deshraj Yadav
|
c336292346 | ||
|
Deshraj Yadav
|
adf50f1e81 | ||
|
Deshraj Yadav
|
636bc0a99d | ||
|
Rupesh Bansal
|
a7a61fae1d | ||
|
Sidharth Mohanty
|
5ec12212e4 | ||
|
Deshraj Yadav
|
77c90a308e | ||
|
Deshraj Yadav
|
4a8c50f886 | ||
|
Deshraj Yadav
|
a86d7f52e9 | ||
|
Sidharth Mohanty
|
4820ea15d6 | ||
|
Deshraj Yadav
|
b5de605e2b | ||
|
LuciAkirami
|
d6ed2050d4 | ||
|
Deshraj Yadav
|
16e123b7bb | ||
|
Deshraj Yadav
|
4eb91683a9 | ||
|
Sidharth Mohanty
|
0cb78b9067 | ||
|
Sidharth Mohanty
|
e226a89637 | ||
|
SerSamgy
|
431f8c2c6a | ||
|
Rupesh Bansal
|
19a9141c2d | ||
|
Rupesh Bansal
|
bc649b9a85 | ||
|
Shreya Shrivastava
|
702067e521 | ||
|
Sidharth Mohanty
|
03a84daf9d | ||
|
Sidharth Mohanty
|
b91d922600 | ||
|
Prikshit
|
ed02aebf9a | ||
|
Prikshit
|
1a048390fd | ||
|
Richard Awoyemi
|
1741d3bef6 | ||
|
Ojuswi Rastogi
|
540a0a3685 | ||
|
SerSamgy
|
d2fd3ce434 | ||
|
Deshraj Yadav
|
ea76868d65 | ||
|
Deshraj Yadav
|
f31351bedb | ||
|
Deshraj Yadav
|
8863983c7b | ||
|
Deshraj Yadav
|
64a34cac32 | ||
|
Deshraj Yadav
|
352e71461d | ||
|
Deshraj Yadav
|
87d0b5c76f | ||
|
Rupesh Bansal
|
d0af018b8d | ||
|
Taranjeet Singh
|
55e9a1cbd6 | ||
|
Taranjeet Singh
|
65bafb75b1 | ||
|
Taranjeet Singh
|
01fd1c2437 | ||
|
Taranjeet Singh
|
78ba4468b0 | ||
|
Taranjeet Singh
|
8581c7ecce | ||
|
Taranjeet Singh
|
9be6fe6bc3 | ||
|
Taranjeet Singh
|
8c506da21e | ||
|
Taranjeet Singh
|
c02002eb4b | ||
|
Rajat Gupta
|
57ecfca862 | ||
|
Taranjeet Singh
|
28d41e9397 | ||
|
Prikshit
|
7a1866d280 | ||
|
Rhythm Sharma
|
d229b108c3 | ||
|
Taranjeet Singh
|
39640cb697 | ||
|
cachho
|
9ecf2e9feb | ||
|
Taranjeet Singh
|
2db07cdb1f | ||
|
Taranjeet Singh
|
faa29ef285 | ||
|
Prikshit
|
16b0d5b829 | ||
|
Deshraj Yadav
|
6ae33d04b8 | ||
|
Deshraj Yadav
|
333eb8d60f | ||
|
Deshraj Yadav
|
414c69fd62 | ||
|
Prikshit
|
9951b58005 | ||
|
Osama Nabih
|
e73ed82ae9 | ||
|
Tushar kalsi
|
8bde34a24f | ||
|
Taranjeet Singh
|
b58380e505 | ||
|
Ayush Mishra
|
16f8de810c | ||
|
Taranjeet Singh
|
70f2de4fd3 | ||
|
Subhajit Ghosh
|
a5d5e5825f | ||
|
Taranjeet Singh
|
0f16c72762 | ||
|
Subhajit Ghosh
|
9ca7a0d6d1 | ||
|
Subhajit Ghosh
|
7d5bfd8c9f | ||
|
Taranjeet Singh
|
cc9a06b116 | ||
|
Subhajit Ghosh
|
b8fc7b0c9e | ||
|
Subhajit Ghosh
|
3999f2a373 | ||
|
Subhajit Ghosh
|
4eb2c0e123 | ||
|
Ayush Mishra
|
b8a838aee1 | ||
|
Kapil Mirchandani
|
84e5932ea5 | ||
|
Shubham Pal
|
e41573ca74 | ||
|
Kapil Mirchandani
|
4c5c99e6ae | ||
|
Shivam Menda
|
dcb940ba95 | ||
|
Subhajit Ghosh
|
8d3b66f7e3 | ||
|
Deshraj Yadav
|
bc89b6ea74 | ||
|
sw8fbar
|
f0742dffa2 | ||
|
cachho
|
6c71a1020d | ||
|
Dev Khant
|
1db3e43adf | ||
|
Ayush Mishra
|
cb59b0b5e4 | ||
|
Dev Khant
|
8e0f05055e | ||
|
Naman Jain
|
4768bacf1c | ||
|
Raghav Tyagi
|
dc206c0999 | ||
|
Dev Khant
|
77e1983b2e | ||
|
Dev Khant
|
d344ee226c | ||
|
cachho
|
3d0e4141bf | ||
|
Dev Khant
|
01fb216ff7 | ||
|
David Talson
|
a662b2a6c6 | ||
|
Subhadip Mandal
|
b1af82eba8 | ||
|
Taranjeet Singh
|
378ef5246e | ||
|
Lovepreet Singh
|
606814f10e | ||
|
David Talson
|
5e06a0d001 | ||
|
cachho
|
c0e3274375 | ||
|
cachho
|
119ec5e405 | ||
|
cachho
|
79efa51941 | ||
|
Deshraj Yadav
|
701d0b21ef | ||
|
Taranjeet Singh
|
0f23d5f967 | ||
|
Taranjeet Singh
|
36b26e08c3 | ||
|
cachho
|
ac08638a63 | ||
|
cachho
|
03146946fa | ||
|
cachho
|
0f9a10c598 | ||
|
Taranjeet Singh
|
2bd6881361 | ||
|
Taranjeet Singh
|
ba208f5b48 | ||
|
Dev Khant
|
bdef85f7db | ||
|
cachho
|
2cb47938fd | ||
|
cachho
|
dfe0b414ac | ||
|
cachho
|
1864f4cb38 | ||
|
Dev Khant
|
7c39d9f0c1 | ||
|
Deshraj Yadav
|
79f5a1d052 | ||
|
Deshraj Yadav
|
6fed75bb45 | ||
|
Taranjeet Singh
|
352ed3b6a1 | ||
|
Taranjeet Singh
|
b37691711c | ||
|
Dev Khant
|
13fda2efe1 | ||
|
Taranjeet Singh
|
3c3d98b9c3 | ||
|
Taranjeet Singh
|
f582d70031 | ||
|
cachho
|
1ac8aef4de | ||
|
Dev Khant
|
4754372fcd | ||
|
cachho
|
eac85779eb | ||
|
cachho
|
b0d8711b65 | ||
|
cachho
|
f0844ed923 | ||
|
Dev Khant
|
129242534d | ||
|
Taranjeet Singh
|
6481b555b4 | ||
|
Taranjeet Singh
|
794e51494e | ||
|
cachho
|
3059e96041 | ||
|
cachho
|
bd595f84e8 | ||
|
cachho
|
344e7470f6 | ||
|
Taranjeet Singh
|
387b042a49 | ||
|
Taranjeet Singh
|
b3837572be | ||
|
Taranjeet Singh
|
d4e6462e4d | ||
|
omahs
|
60d5daaaf5 | ||
|
sw8fbar
|
3e66ddf69a | ||
|
Tarun Jain
|
202fd2d5b6 | ||
|
wangJm
|
eecdbc5e06 | ||
|
cachho
|
433c4157e0 | ||
|
cachho
|
8be8990507 | ||
|
Taranjeet Singh
|
2cfeb5ed80 | ||
|
cachho
|
0d4ad07d7b | ||
|
Qihang
|
2aa25a5169 | ||
|
Joseph Chancey
|
c07fbc07b1 | ||
|
Taranjeet Singh
|
12eb16d60b | ||
|
Dev Khant
|
ec9f454ad1 | ||
|
Ikko Eltociear Ashimine
|
9f1f17a611 | ||
|
aryankhanna475
|
94369657ef | ||
|
Taranjeet Singh
|
490d7db601 | ||
|
Taranjeet Singh
|
ea18b80f90 | ||
|
Deshraj Yadav
|
70077f4e46 | ||
|
cachho
|
85106c7c7e | ||
|
Taranjeet Singh
|
1b19d0d19c | ||
|
Taranjeet Singh
|
13f01e399c | ||
|
Taranjeet Singh
|
261e2d088c | ||
|
Taranjeet Singh
|
b0ae3e95c7 | ||
|
cachho
|
fc633dadeb | ||
|
Taranjeet Singh
|
aafb334916 | ||
|
Taranjeet Singh
|
04d851e802 | ||
|
Taranjeet Singh
|
de31c63dac | ||
|
Deshraj Yadav
|
c068f58543 | ||
|
Deshraj Yadav
|
70df373807 | ||
|
Deshraj Yadav
|
4388f6bfc2 | ||
|
Taranjeet Singh
|
d0956a0dc1 | ||
|
cachho
|
ccf515cadd | ||
|
Taranjeet Singh
|
a6e4235bb0 | ||
|
Taranjeet Singh
|
9ba408086e | ||
|
cachho
|
bbb3bca1c7 | ||
|
Taranjeet Singh
|
564036a166 | ||
|
cachho
|
abf99ce5ea | ||
|
Taranjeet Singh
|
f0f5c34acb | ||
|
cachho
|
ed319531bf | ||
|
Dev Khant
|
d8d0e0e5d1 | ||
|
Girish S
|
27c91bbd2d | ||
|
Taranjeet Singh
|
f76d9740c6 | ||
|
Deshraj Yadav
|
f29443a0fc | ||
|
Taranjeet Singh
|
35b022d6bc | ||
|
Taranjeet Singh
|
0dd1faf57f | ||
|
Taranjeet Singh
|
b57f096b27 | ||
|
cachho
|
4c8876f032 | ||
|
Taranjeet Singh
|
f92e890aa1 | ||
|
cachho
|
849de5e8ab | ||
|
Dev Khant
|
7585bc557b | ||
|
cachho
|
4021d93168 | ||
|
Jonas
|
28e06be26f | ||
|
cachho
|
39861ec1e8 | ||
|
Sahil Kumar Yadav
|
e3ae84b80d | ||
|
Taranjeet Singh
|
09c02954ba | ||
|
cachho
|
66b661660b | ||
|
cachho
|
c26559a2d3 | ||
|
Taranjeet Singh
|
c5da46f8b0 | ||
|
Sahil Kumar Yadav
|
0b72269e18 | ||
|
cachho
|
a232d1b779 | ||
|
Taranjeet Singh
|
3cab4415b7 | ||
|
Taranjeet Singh
|
d494d99c06 | ||
|
cachho
|
163f437582 | ||
|
cachho
|
1e0d967bb5 | ||
|
Sahil Kumar Yadav
|
a86deb2675 | ||
|
Taranjeet Singh
|
d51c508b40 | ||
|
aryankhanna475
|
af8b3081fa | ||
|
Taranjeet Singh
|
1dbe7daac1 | ||
|
Taranjeet Singh
|
e56f91a239 | ||
|
Prashant Chaudhary
|
0179141b2e | ||
|
cachho
|
f0abfea55d | ||
|
Taranjeet Singh
|
77e223be52 | ||
|
Taranjeet Singh
|
c96df72cd0 | ||
|
cachho
|
ce6eb39009 | ||
|
Jonas
|
eeac84e2d9 | ||
|
Taranjeet Singh
|
1ee1e671d1 | ||
|
cachho
|
2ef7c0b736 | ||
|
aryankhanna475
|
f2b563e42a | ||
|
Taranjeet Singh
|
7a718643a3 | ||
|
Taranjeet Singh
|
1f0f0c93b7 | ||
|
Taranjeet Singh
|
030e3521a9 | ||
|
cachho
|
fdf5d1928d | ||
|
cachho
|
65011a67d4 | ||
|
Sahil Kumar Yadav
|
ec09a8a6fc | ||
|
cachho
|
5e94980aaa | ||
|
aryankhanna475
|
8b619756b6 | ||
|
cachho
|
35b43edb20 | ||
|
cachho
|
02cbde2fc1 | ||
|
cachho
|
a868fce036 | ||
|
cachho
|
079e35b205 | ||
|
Deshraj Yadav
|
8c91b75b98 | ||
|
cachho
|
55bfd7cafe | ||
|
cachho
|
a8552686b4 | ||
|
Alessandro Panzieri
|
12a2f78dcb | ||
|
aaishikdutta
|
cce6d5ddab | ||
|
cachho
|
088346c4fc | ||
|
aaishikdutta
|
7fa7b9e199 | ||
|
aaishikdutta
|
cac15c147f | ||
|
aaishikdutta
|
c54dd1e7bb | ||
|
aaishikdutta
|
c9c56a4b26 | ||
|
Taranjeet Singh
|
acbdb800d3 | ||
|
Taranjeet Singh
|
49711c92b7 | ||
|
aaishikdutta
|
c4797eb121 | ||
|
Taranjeet Singh
|
bea4e9e6d1 | ||
|
Taranjeet Singh
|
9687ec2c1a | ||
|
Taranjeet Singh
|
09da4a3002 | ||
|
Taranjeet Singh
|
93004306f2 | ||
|
juaneloDev
|
aed894246f | ||
|
Taranjeet Singh
|
fa63a16591 | ||
|
Taranjeet Singh
|
40643663cb | ||
|
Candido Sales Gomes
|
d590e4423b | ||
|
Taranjeet Singh
|
cdbf75e0ec | ||
|
Taranjeet Singh
|
8216e05784 | ||
|
Deshraj Yadav
|
2d4c51aa16 | ||
|
Deshraj Yadav
|
cc43846d42 | ||
|
Sahil Kumar Yadav
|
3bdec3b71a | ||
|
cachho
|
a22a435690 | ||
|
cachho
|
a681d47bce | ||
|
aaishikdutta
|
4bb06147c1 | ||
|
cachho
|
6b61b7e9c1 | ||
|
cachho
|
91033c7221 | ||
|
Taranjeet Singh
|
ab9f005885 | ||
|
cachho
|
3da5724853 | ||
|
aaishikdutta
|
c12362486f | ||
|
cachho
|
d16eafae05 | ||
|
cachho
|
bb1fbba161 | ||
|
cachho
|
adb7206639 | ||
|
cachho
|
96143ac496 | ||
|
cachho
|
1df804e7df | ||
|
cachho
|
0ea278f633 | ||
|
Taranjeet Singh
|
7ed46260b3 | ||
|
cachho
|
9c58627372 | ||
|
cachho
|
07ba65d88d | ||
|
Deshraj Yadav
|
cf9638e7b2 | ||
|
Deshraj Yadav
|
a548863a09 | ||
|
Sahil Kumar Yadav
|
d5e40e1853 | ||
|
Taranjeet Singh
|
a4708b3b86 | ||
|
Taranjeet Singh
|
81c8cc62a2 | ||
|
Taranjeet Singh
|
e8b3d53faf | ||
|
Taranjeet Singh
|
2889799f10 | ||
|
Deshraj Yadav
|
e24063caff | ||
|
Deshraj Yadav
|
c595003481 | ||
|
Deshraj Yadav
|
05a4eef6ae | ||
|
ma-raza
|
ac68986404 | ||
|
cachho
|
3f71050c47 | ||
|
cachho
|
d12aeec1ff | ||
|
cachho
|
addf1c0666 | ||
|
Shashank Srivastava
|
d4b8542207 | ||
|
Deshraj Yadav
|
fd97fb268a | ||
|
Rayhan Patel
|
4f722621fd | ||
|
Taranjeet Singh
|
8ad6a5b5e7 | ||
|
Taranjeet Singh
|
2d6e860175 | ||
|
Taranjeet Singh
|
86e4146126 | ||
|
cachho
|
cd0c7bc971 |
@@ -0,0 +1 @@
|
||||
OPENAI_API_KEY="your-openai-api-key"
|
||||
@@ -0,0 +1,41 @@
|
||||
name: 🐛 Bug Report
|
||||
description: Create a report to help us reproduce and fix the bug
|
||||
|
||||
body:
|
||||
- type: markdown
|
||||
attributes:
|
||||
value: >
|
||||
#### Before submitting a bug, please make sure the issue hasn't been already addressed by searching through [the existing and past issues](https://github.com/gventuri/pandas-ai/issues?q=is%3Aissue+sort%3Acreated-desc+).
|
||||
- type: textarea
|
||||
attributes:
|
||||
label: 🐛 Describe the bug
|
||||
description: |
|
||||
Please provide a clear and concise description of what the bug is.
|
||||
|
||||
If relevant, add a minimal example so that we can reproduce the error by running the code. It is very important for the snippet to be as succinct (minimal) as possible, so please take time to trim down any irrelevant code to help us debug efficiently. We are going to copy-paste your code and we expect to get the same result as you did: avoid any external data, and include the relevant imports, etc. For example:
|
||||
|
||||
```python
|
||||
# All necessary imports at the beginning
|
||||
import embedchain as ec
|
||||
# Your code goes here
|
||||
|
||||
|
||||
```
|
||||
|
||||
Please also paste or describe the results you observe instead of the expected results. If you observe an error, please paste the error message including the **full** traceback of the exception. It may be relevant to wrap error messages in ```` ```triple quotes blocks``` ````.
|
||||
placeholder: |
|
||||
A clear and concise description of what the bug is.
|
||||
|
||||
```python
|
||||
Sample code to reproduce the problem
|
||||
```
|
||||
|
||||
```
|
||||
The error message you got, with the full traceback.
|
||||
````
|
||||
validations:
|
||||
required: true
|
||||
- type: markdown
|
||||
attributes:
|
||||
value: >
|
||||
Thanks for contributing 🎉!
|
||||
@@ -0,0 +1,8 @@
|
||||
blank_issues_enabled: true
|
||||
contact_links:
|
||||
- name: 1-on-1 Session
|
||||
url: https://cal.com/taranjeetio/ec
|
||||
about: Speak directly with Taranjeet, the founder, to discuss issues, share feedback, or explore improvements for Embedchain
|
||||
- name: Discord
|
||||
url: https://discord.gg/6PzXDgEjG5
|
||||
about: General community discussions
|
||||
@@ -0,0 +1,11 @@
|
||||
name: Documentation
|
||||
description: Report an issue related to the Embedchain docs.
|
||||
title: "DOC: <Please write a comprehensive title after the 'DOC: ' prefix>"
|
||||
|
||||
body:
|
||||
- type: textarea
|
||||
attributes:
|
||||
label: "Issue with current documentation:"
|
||||
description: >
|
||||
Please make sure to leave a reference to the document/code you're
|
||||
referring to.
|
||||
@@ -0,0 +1,23 @@
|
||||
name: 🚀 Feature request
|
||||
description: Submit a proposal/request for a new Embedchain feature
|
||||
|
||||
body:
|
||||
- type: textarea
|
||||
id: feature-request
|
||||
attributes:
|
||||
label: 🚀 The feature
|
||||
description: >
|
||||
A clear and concise description of the feature proposal
|
||||
validations:
|
||||
required: true
|
||||
- type: textarea
|
||||
attributes:
|
||||
label: Motivation, pitch
|
||||
description: >
|
||||
Please outline the motivation for the proposal. Is your feature request related to a specific problem? e.g., *"I'm working on X and would like Y to be possible"*. If this is related to another GitHub issue, please link here too.
|
||||
validations:
|
||||
required: true
|
||||
- type: markdown
|
||||
attributes:
|
||||
value: >
|
||||
Thanks for contributing 🎉!
|
||||
@@ -0,0 +1,41 @@
|
||||
## Description
|
||||
|
||||
Please include a summary of the change and which issue is fixed. Please also include relevant motivation and context. List any dependencies that are required for this change.
|
||||
|
||||
Fixes # (issue)
|
||||
|
||||
## Type of change
|
||||
|
||||
Please delete options that are not relevant.
|
||||
|
||||
- [ ] Bug fix (non-breaking change which fixes an issue)
|
||||
- [ ] New feature (non-breaking change which adds functionality)
|
||||
- [ ] Breaking change (fix or feature that would cause existing functionality to not work as expected)
|
||||
- [ ] Refactor (does not change functionality, e.g. code style improvements, linting)
|
||||
- [ ] Documentation update
|
||||
|
||||
## How Has This Been Tested?
|
||||
|
||||
Please describe the tests that you ran to verify your changes. Provide instructions so we can reproduce. Please also list any relevant details for your test configuration
|
||||
|
||||
Please delete options that are not relevant.
|
||||
|
||||
- [ ] Unit Test
|
||||
- [ ] Test Script (please provide)
|
||||
|
||||
## Checklist:
|
||||
|
||||
- [ ] My code follows the style guidelines of this project
|
||||
- [ ] I have performed a self-review of my own code
|
||||
- [ ] I have commented my code, particularly in hard-to-understand areas
|
||||
- [ ] I have made corresponding changes to the documentation
|
||||
- [ ] My changes generate no new warnings
|
||||
- [ ] I have added tests that prove my fix is effective or that my feature works
|
||||
- [ ] New and existing unit tests pass locally with my changes
|
||||
- [ ] Any dependent changes have been merged and published in downstream modules
|
||||
- [ ] I have checked my code and corrected any misspellings
|
||||
|
||||
## Maintainer Checklist
|
||||
|
||||
- [ ] closes #xxxx (Replace xxxx with the GitHub issue number)
|
||||
- [ ] Made sure Checks passed
|
||||
@@ -0,0 +1,40 @@
|
||||
name: Publish Python 🐍 distributions 📦 to PyPI and TestPyPI
|
||||
|
||||
on:
|
||||
release:
|
||||
types: [published] # This will trigger the workflow when you create a new release
|
||||
|
||||
jobs:
|
||||
build-n-publish:
|
||||
name: Build and publish Python 🐍 distributions 📦 to PyPI and TestPyPI
|
||||
runs-on: ubuntu-latest
|
||||
permissions:
|
||||
# IMPORTANT: this permission is mandatory for trusted publishing
|
||||
id-token: write
|
||||
steps:
|
||||
- uses: actions/checkout@v2
|
||||
|
||||
- name: Set up Python
|
||||
uses: actions/setup-python@v2
|
||||
with:
|
||||
python-version: '3.11'
|
||||
|
||||
- name: Install Poetry
|
||||
run: |
|
||||
curl -sSL https://install.python-poetry.org | python3 -
|
||||
echo "$HOME/.local/bin" >> $GITHUB_PATH
|
||||
|
||||
- name: Install dependencies
|
||||
run: poetry install
|
||||
|
||||
- name: Build a binary wheel and a source tarball
|
||||
run: poetry build
|
||||
|
||||
- name: Publish distribution 📦 to Test PyPI
|
||||
uses: pypa/gh-action-pypi-publish@release/v1
|
||||
with:
|
||||
repository_url: https://test.pypi.org/legacy/
|
||||
|
||||
- name: Publish distribution 📦 to PyPI
|
||||
if: startsWith(github.ref, 'refs/tags')
|
||||
uses: pypa/gh-action-pypi-publish@release/v1
|
||||
@@ -0,0 +1,53 @@
|
||||
name: ci
|
||||
|
||||
on:
|
||||
push:
|
||||
branches: [main]
|
||||
paths:
|
||||
- 'embedchain/**'
|
||||
- 'tests/**'
|
||||
- 'examples/**'
|
||||
pull_request:
|
||||
paths:
|
||||
- 'embedchain/**'
|
||||
- 'tests/**'
|
||||
- 'examples/**'
|
||||
|
||||
jobs:
|
||||
build:
|
||||
runs-on: ubuntu-latest
|
||||
strategy:
|
||||
matrix:
|
||||
python-version: ["3.9", "3.10", "3.11"]
|
||||
|
||||
steps:
|
||||
- uses: actions/checkout@v3
|
||||
- name: Set up Python ${{ matrix.python-version }}
|
||||
uses: actions/setup-python@v4
|
||||
with:
|
||||
python-version: ${{ matrix.python-version }}
|
||||
- name: Install poetry
|
||||
uses: snok/install-poetry@v1
|
||||
with:
|
||||
version: 1.4.2
|
||||
virtualenvs-create: true
|
||||
virtualenvs-in-project: true
|
||||
- name: Load cached venv
|
||||
id: cached-poetry-dependencies
|
||||
uses: actions/cache@v2
|
||||
with:
|
||||
path: .venv
|
||||
key: venv-${{ runner.os }}-${{ hashFiles('**/poetry.lock') }}
|
||||
- name: Install dependencies
|
||||
run: poetry install --all-extras
|
||||
if: steps.cached-poetry-dependencies.outputs.cache-hit != 'true'
|
||||
- name: Lint with ruff
|
||||
run: make lint
|
||||
- name: Run tests and generate coverage report
|
||||
run: make coverage
|
||||
- name: Upload coverage reports to Codecov
|
||||
uses: codecov/codecov-action@v3
|
||||
with:
|
||||
file: coverage.xml
|
||||
env:
|
||||
CODECOV_TOKEN: ${{ secrets.CODECOV_TOKEN }}
|
||||
+10
-2
@@ -76,7 +76,6 @@ docs/_build/
|
||||
target/
|
||||
|
||||
# Jupyter Notebook
|
||||
.ipynb_checkpoints
|
||||
|
||||
# IPython
|
||||
profile_default/
|
||||
@@ -165,5 +164,14 @@ cython_debug/
|
||||
|
||||
# Database
|
||||
db
|
||||
test-db
|
||||
|
||||
.vscode
|
||||
.vscode
|
||||
.idea/
|
||||
|
||||
.DS_Store
|
||||
|
||||
notebooks/*.yaml
|
||||
.ipynb_checkpoints/
|
||||
|
||||
!configs/*.yaml
|
||||
|
||||
@@ -0,0 +1,20 @@
|
||||
repos:
|
||||
- repo: https://github.com/psf/black
|
||||
rev: 23.3.0
|
||||
hooks:
|
||||
- id: black
|
||||
- repo: https://github.com/charliermarsh/ruff-pre-commit
|
||||
rev: 'v0.0.220'
|
||||
hooks:
|
||||
- id: ruff
|
||||
name: ruff
|
||||
# Respect `exclude` and `extend-exclude` settings.
|
||||
args: ["--force-exclude"]
|
||||
- repo: local
|
||||
hooks:
|
||||
- id: pytest-check
|
||||
name: pytest-check
|
||||
entry: poetry run pytest
|
||||
language: system
|
||||
pass_filenames: false
|
||||
always_run: true
|
||||
@@ -0,0 +1,74 @@
|
||||
# Contributing to embedchain
|
||||
|
||||
Let us make contribution easy, collaborative and fun.
|
||||
|
||||
## Submit your Contribution through PR
|
||||
|
||||
To make a contribution, follow these steps:
|
||||
|
||||
1. Fork and clone this repository
|
||||
2. Do the changes on your fork with dedicated feature branch `feature/f1`
|
||||
3. If you modified the code (new feature or bug-fix), please add tests for it
|
||||
4. Include proper documentation / docstring and examples to run the feature
|
||||
5. Check the linting
|
||||
6. Ensure that all tests pass
|
||||
7. Submit a pull request
|
||||
|
||||
For more details about pull requests, please read [GitHub's guides](https://docs.github.com/en/pull-requests/collaborating-with-pull-requests/proposing-changes-to-your-work-with-pull-requests/creating-a-pull-request).
|
||||
|
||||
|
||||
### 📦 Package manager
|
||||
|
||||
We use `poetry` as our package manager. You can install poetry by following the instructions [here](https://python-poetry.org/docs/#installation).
|
||||
|
||||
Please DO NOT use pip or conda to install the dependencies. Instead, use poetry:
|
||||
|
||||
```bash
|
||||
poetry install --all-extras
|
||||
or
|
||||
poetry install --with dev
|
||||
|
||||
#activate
|
||||
|
||||
poetry shell
|
||||
```
|
||||
|
||||
### 📌 Pre-commit
|
||||
|
||||
To ensure our standards, make sure to install pre-commit before starting to contribute.
|
||||
|
||||
```bash
|
||||
pre-commit install
|
||||
```
|
||||
|
||||
### 🧹 Linting
|
||||
|
||||
We use `ruff` to lint our code. You can run the linter by running the following command:
|
||||
|
||||
```bash
|
||||
make lint
|
||||
```
|
||||
|
||||
Make sure that the linter does not report any errors or warnings before submitting a pull request.
|
||||
|
||||
### Code Formatting with `black`
|
||||
|
||||
We use `black` to reformat the code by running the following command:
|
||||
|
||||
```bash
|
||||
make format
|
||||
```
|
||||
|
||||
### 🧪 Testing
|
||||
|
||||
We use `pytest` to test our code. You can run the tests by running the following command:
|
||||
|
||||
```bash
|
||||
poetry run pytest
|
||||
```
|
||||
|
||||
Make sure that all tests pass before submitting a pull request.
|
||||
|
||||
## 🚀 Release Process
|
||||
|
||||
At the moment, the release process is manual. We try to make frequent releases. Usually, we release a new version when we have a new feature or bugfix. A developer with admin rights to the repository will create a new release on GitHub, and then publish the new version to PyPI.
|
||||
@@ -4,21 +4,42 @@ PIP := $(PYTHON) -m pip
|
||||
PROJECT_NAME := embedchain
|
||||
|
||||
# Targets
|
||||
.PHONY: install format lint clean test
|
||||
.PHONY: install format lint clean test ci_lint ci_test coverage
|
||||
|
||||
install:
|
||||
$(PIP) install --upgrade pip
|
||||
$(PIP) install -e .[dev]
|
||||
poetry install
|
||||
|
||||
install_all:
|
||||
poetry install --all-extras
|
||||
|
||||
install_es:
|
||||
poetry install --extras elasticsearch
|
||||
|
||||
install_opensearch:
|
||||
poetry install --extras opensearch
|
||||
|
||||
install_milvus:
|
||||
poetry install --extras milvus
|
||||
|
||||
shell:
|
||||
poetry shell
|
||||
|
||||
py_shell:
|
||||
poetry run python
|
||||
|
||||
format:
|
||||
$(PYTHON) -m black .
|
||||
$(PYTHON) -m isort .
|
||||
|
||||
lint:
|
||||
$(PYTHON) -m ruff .
|
||||
|
||||
clean:
|
||||
rm -rf dist build *.egg-info
|
||||
|
||||
lint:
|
||||
poetry run ruff .
|
||||
|
||||
# for example: make test file=tests/test_factory.py
|
||||
test:
|
||||
$(PYTHON) -m pytest
|
||||
poetry run pytest $(file)
|
||||
|
||||
coverage:
|
||||
poetry run pytest --cov=$(PROJECT_NAME) --cov-report=xml
|
||||
|
||||
@@ -1,623 +1,113 @@
|
||||
# embedchain
|
||||
<p align="center">
|
||||
<img src="docs/logo/dark.svg" width="400px" alt="Embedchain Logo">
|
||||
</p>
|
||||
|
||||
[](https://pypi.org/project/embedchain/)
|
||||
[](https://discord.gg/6PzXDgEjG5)
|
||||
[](https://twitter.com/embedchain)
|
||||
[](https://embedchain.substack.com/)
|
||||
<p align="center">
|
||||
<a href="https://runacap.com/ross-index/q3-2023/" target="_blank" rel="noopener"><img style="width: 260px; height: 56px" src="https://runacap.com/wp-content/uploads/2023/10/ROSS_badge_black_Q3_2023.svg" alt="ROSS Index - Fastest Growing Open-Source Startups in Q3 2023 | Runa Capital" width="260" height="56"/></a>
|
||||
</p>
|
||||
|
||||
embedchain is a framework to easily create LLM powered bots over any dataset. If you want a javascript version, check out [embedchain-js](https://github.com/embedchain/embedchainjs)
|
||||
<p align="center">
|
||||
<a href="https://pypi.org/project/embedchain/">
|
||||
<img src="https://img.shields.io/pypi/v/embedchain" alt="PyPI">
|
||||
</a>
|
||||
<a href="https://pepy.tech/project/embedchain">
|
||||
<img src="https://static.pepy.tech/badge/embedchain" alt="Downloads">
|
||||
</a>
|
||||
<a href="https://join.slack.com/t/embedchain/shared_invite/zt-22uwz3c46-Zg7cIh5rOBteT_xe1jwLDw">
|
||||
<img src="https://img.shields.io/badge/slack-embedchain-brightgreen.svg?logo=slack" alt="Slack">
|
||||
</a>
|
||||
<a href="https://discord.gg/CUU9FPhRNt">
|
||||
<img src="https://dcbadge.vercel.app/api/server/6PzXDgEjG5?style=flat" alt="Discord">
|
||||
</a>
|
||||
<a href="https://twitter.com/embedchain">
|
||||
<img src="https://img.shields.io/twitter/follow/embedchain" alt="Twitter">
|
||||
</a>
|
||||
<a href="https://colab.research.google.com/drive/138lMWhENGeEu7Q1-6lNbNTHGLZXBBz_B?usp=sharing">
|
||||
<img src="https://camo.githubusercontent.com/84f0493939e0c4de4e6dbe113251b4bfb5353e57134ffd9fcab6b8714514d4d1/68747470733a2f2f636f6c61622e72657365617263682e676f6f676c652e636f6d2f6173736574732f636f6c61622d62616467652e737667" alt="Open in Colab">
|
||||
</a>
|
||||
<a href="https://codecov.io/gh/embedchain/embedchain">
|
||||
<img src="https://codecov.io/gh/embedchain/embedchain/graph/badge.svg?token=EMRRHZXW1Q" alt="codecov">
|
||||
</a>
|
||||
</p>
|
||||
|
||||
# Table of Contents
|
||||
<hr />
|
||||
|
||||
- [Latest Updates](#latest-updates)
|
||||
- [What is embedchain?](#what-is-embedchain)
|
||||
- [Getting Started](#getting-started)
|
||||
- [Installation](#installation)
|
||||
- [Usage](#usage)
|
||||
- [App Types](#app-types)
|
||||
- [1. App (uses OpenAI models, paid)](#1-app-uses-openai-models-paid)
|
||||
- [2. OpenSourceApp (uses opensource models, free)](#2-opensourceapp-uses-opensource-models-free)
|
||||
- [3. PersonApp (uses OpenAI models, paid)](#3-personapp-uses-openai-models-paid)
|
||||
- [Add Dataset](#add-dataset)
|
||||
- [Interface Types](#interface-types)
|
||||
- [Query Interface](#query-interface)
|
||||
- [Chat Interface](#chat-interface)
|
||||
- [Format supported](#format-supported)
|
||||
- [Youtube Video](#youtube-video)
|
||||
- [PDF File](#pdf-file)
|
||||
- [Web Page](#web-page)
|
||||
- [Doc File](#doc-file)
|
||||
- [Text](#text)
|
||||
- [QnA Pair](#qna-pair)
|
||||
- [Reusing a Vector DB](#reusing-a-vector-db)
|
||||
- [More Formats coming soon](#more-formats-coming-soon)
|
||||
- [Testing](#testing)
|
||||
- [Advanced](#advanced)
|
||||
- [Configuration](#configuration)
|
||||
- [Example](#example)
|
||||
- [Configs](#configs)
|
||||
- [InitConfig](#initconfig)
|
||||
- [Add Config](#add-config)
|
||||
- [Query Config](#query-config)
|
||||
- [Chat Config](#chat-config)
|
||||
- [Other methods](#other-methods)
|
||||
- [Reset](#reset)
|
||||
- [Count](#count)
|
||||
- [How does it work?](#how-does-it-work)
|
||||
- [Contribution Guidelines](#contribution-guidelines)
|
||||
- [Tech Stack](#tech-stack)
|
||||
- [Team](#team)
|
||||
- [Author](#author)
|
||||
- [Maintainer](#maintainer)
|
||||
- [Citation](#citation)
|
||||
|
||||
# Latest Updates
|
||||
> ### Checkout our latest [Sadhguru AI app](https://sadhguru-ai.streamlit.app/) built using Embedchain.
|
||||
|
||||
- Introduce a new interface called `chat`. It remembers the history (last 5 messages) and can be used to powerful stateful bots. You can use it by calling `.chat` on any app instance. Works for both OpenAI and OpenSourceApp.
|
||||
## What is Embedchain?
|
||||
|
||||
- Introduce a new app type called `OpenSourceApp`. It uses `gpt4all` as the LLM and `sentence transformers` all-MiniLM-L6-v2 as the embedding model. If you use this app, you dont have to pay for anything.
|
||||
Embedchain is an Open Source RAG Framework that makes it easy to create and deploy AI apps. At its core, Embedchain follows the design principle of being *"Conventional but Configurable"* to serve both software engineers and machine learning engineers.
|
||||
|
||||
# What is embedchain?
|
||||
Embedchain streamlines the creation of RAG applications, offering a seamless process for managing various types of unstructured data. It efficiently segments data into manageable chunks, generates relevant embeddings, and stores them in a vector database for optimized retrieval. With a suite of diverse APIs, it enables users to extract contextual information, find precise answers, or engage in interactive chat conversations, all tailored to their own data.
|
||||
|
||||
Embedchain abstracts the entire process of loading a dataset, chunking it, creating embeddings and then storing in a vector database.
|
||||
|
||||
You can add a single or multiple dataset using `.add` and `.add_local` function and then use `.query` function to find an answer from the added datasets.
|
||||
|
||||
If you want to create a Naval Ravikant bot which has 1 youtube video, 1 book as pdf and 2 of his blog posts, as well as a question and answer pair you supply, all you need to do is add the links to the videos, pdf and blog posts and the QnA pair and embedchain will create a bot for you.
|
||||
|
||||
```python
|
||||
|
||||
from embedchain import App
|
||||
|
||||
naval_chat_bot = App()
|
||||
|
||||
# Embed Online Resources
|
||||
naval_chat_bot.add("youtube_video", "https://www.youtube.com/watch?v=3qHkcs3kG44")
|
||||
naval_chat_bot.add("pdf_file", "https://navalmanack.s3.amazonaws.com/Eric-Jorgenson_The-Almanack-of-Naval-Ravikant_Final.pdf")
|
||||
naval_chat_bot.add("web_page", "https://nav.al/feedback")
|
||||
naval_chat_bot.add("web_page", "https://nav.al/agi")
|
||||
|
||||
# Embed Local Resources
|
||||
naval_chat_bot.add_local("qna_pair", ("Who is Naval Ravikant?", "Naval Ravikant is an Indian-American entrepreneur and investor."))
|
||||
|
||||
naval_chat_bot.query("What unique capacity does Naval argue humans possess when it comes to understanding explanations or concepts?")
|
||||
# answer: Naval argues that humans possess the unique capacity to understand explanations or concepts to the maximum extent possible in this physical reality.
|
||||
```
|
||||
|
||||
# Getting Started
|
||||
|
||||
## Installation
|
||||
|
||||
First make sure that you have the package installed. If not, then install it using `pip`
|
||||
## 🔧 Quick install
|
||||
|
||||
### Python API
|
||||
```bash
|
||||
pip install embedchain
|
||||
```
|
||||
|
||||
## Usage
|
||||
## 🔍 Usage and Demo
|
||||
|
||||
Creating a chatbot involves 3 steps:
|
||||
<!-- Demo GIF or Image -->
|
||||
<p align="center">
|
||||
<img src="docs/images/cover.gif" width="900px" alt="Embedchain Demo">
|
||||
</p>
|
||||
|
||||
- Import the App instance (App Types)
|
||||
- Add Dataset (Add Dataset)
|
||||
- Query or Chat on the dataset and get answers (Interface Types)
|
||||
|
||||
### App Types
|
||||
|
||||
We have three types of App.
|
||||
|
||||
#### 1. App (uses OpenAI models, paid)
|
||||
|
||||
```python
|
||||
from embedchain import App
|
||||
|
||||
naval_chat_bot = App()
|
||||
```
|
||||
|
||||
- `App` uses OpenAI's model, so these are paid models. You will be charged for embedding model usage and LLM usage.
|
||||
|
||||
- `App` uses OpenAI's embedding model to create embeddings for chunks and ChatGPT API as LLM to get answer given the relevant docs. Make sure that you have an OpenAI account and an API key. If you have don't have an API key, you can create one by visiting [this link](https://platform.openai.com/account/api-keys).
|
||||
|
||||
- Once you have the API key, set it in an environment variable called `OPENAI_API_KEY`
|
||||
For example, you can create an Elon Musk bot using the following code:
|
||||
|
||||
```python
|
||||
import os
|
||||
os.environ["OPENAI_API_KEY"] = "sk-xxxx"
|
||||
from embedchain import Pipeline as App
|
||||
|
||||
# Create a bot instance
|
||||
os.environ["OPENAI_API_KEY"] = "YOUR API KEY"
|
||||
elon_bot = App()
|
||||
|
||||
# Embed online resources
|
||||
elon_bot.add("https://en.wikipedia.org/wiki/Elon_Musk")
|
||||
elon_bot.add("https://www.forbes.com/profile/elon-musk")
|
||||
|
||||
# Query the bot
|
||||
elon_bot.query("How many companies does Elon Musk run and name those?")
|
||||
# Answer: Elon Musk currently runs several companies. As of my knowledge, he is the CEO and lead designer of SpaceX, the CEO and product architect of Tesla, Inc., the CEO and founder of Neuralink, and the CEO and founder of The Boring Company. However, please note that this information may change over time, so it's always good to verify the latest updates.
|
||||
```
|
||||
|
||||
#### 2. OpenSourceApp (uses opensource models, free)
|
||||
You can also try it in your browser with Google Colab:
|
||||
|
||||
```python
|
||||
from embedchain import OpenSourceApp
|
||||
[](https://colab.research.google.com/drive/17ON1LPonnXAtLaZEebnOktstB_1cJJmh?usp=sharing)
|
||||
|
||||
naval_chat_bot = OpenSourceApp()
|
||||
```
|
||||
## 📖 Documentation
|
||||
Comprehensive guides and API documentation are available to help you get the most out of Embedchain:
|
||||
|
||||
- `OpenSourceApp` uses open source embedding and LLM model. It uses `all-MiniLM-L6-v2` from Sentence Transformers library as the embedding model and `gpt4all` as the LLM.
|
||||
- [Introduction](https://docs.embedchain.ai/get-started/introduction#what-is-embedchain)
|
||||
- [Getting Started](https://docs.embedchain.ai/get-started/quickstart)
|
||||
- [Examples](https://docs.embedchain.ai/examples)
|
||||
- [Supported data types](https://docs.embedchain.ai/components/data-sources/overview)
|
||||
|
||||
- Here there is no need to setup any api keys. You just need to install embedchain package and these will get automatically installed.
|
||||
## 🔗 Join the Community
|
||||
|
||||
- Once you have imported and instantiated the app, every functionality from here onwards is the same for either type of app.
|
||||
Connect with fellow developers and users by joining our [Slack Workspace](https://join.slack.com/t/embedchain/shared_invite/zt-22uwz3c46-Zg7cIh5rOBteT_xe1jwLDw) or [Discord Community](https://discord.gg/CUU9FPhRNt). Dive into discussions, ask questions, and share your experiences.
|
||||
|
||||
#### 3. PersonApp (uses OpenAI models, paid)
|
||||
## 🤝 Schedule a 1-on-1 Session
|
||||
|
||||
```python
|
||||
from embedchain import PersonApp
|
||||
Book a [1-on-1 Session](https://cal.com/taranjeetio/ec) with the founders, to discuss any issues, provide feedback, or explore how we can improve Embedchain for you.
|
||||
|
||||
naval_chat_bot = PersonApp("name_of_person_or_character") #Like "Yoda"
|
||||
```
|
||||
## 🌐 Contributing
|
||||
|
||||
- `PersonApp` uses OpenAI's model, so these are paid models. You will be charged for embedding model usage and LLM usage.
|
||||
Contributions are welcome! Please check out the issues on the repository, and feel free to open a pull request.
|
||||
For more information, please see the [contributing guidelines](CONTRIBUTING.md).
|
||||
|
||||
- `PersonApp` uses OpenAI's embedding model to create embeddings for chunks and ChatGPT API as LLM to get answer given the relevant docs. Make sure that you have an OpenAI account and an API key. If you have don't have an API key, you can create one by visiting [this link](https://platform.openai.com/account/api-keys).
|
||||
For more reference, please go through [Development Guide](https://docs.embedchain.ai/contribution/dev) and [Documentation Guide](https://docs.embedchain.ai/contribution/docs).
|
||||
|
||||
- Once you have the API key, set it in an environment variable called `OPENAI_API_KEY`
|
||||
<a href="https://github.com/embedchain/embedchain/graphs/contributors">
|
||||
<img src="https://contrib.rocks/image?repo=embedchain/embedchain" />
|
||||
</a>
|
||||
|
||||
```python
|
||||
import os
|
||||
os.environ["OPENAI_API_KEY"] = "sk-xxxx"
|
||||
```
|
||||
## Anonymous Telemetry
|
||||
|
||||
### Add Dataset
|
||||
|
||||
- This step assumes that you have already created an `app` instance by either using `App` or `OpenSourceApp`. We are calling our app instance as `naval_chat_bot`
|
||||
|
||||
- Now use `.add` function to add any dataset.
|
||||
|
||||
```python
|
||||
|
||||
# naval_chat_bot = App() or
|
||||
# naval_chat_bot = OpenSourceApp()
|
||||
|
||||
# Embed Online Resources
|
||||
naval_chat_bot.add("youtube_video", "https://www.youtube.com/watch?v=3qHkcs3kG44")
|
||||
naval_chat_bot.add("pdf_file", "https://navalmanack.s3.amazonaws.com/Eric-Jorgenson_The-Almanack-of-Naval-Ravikant_Final.pdf")
|
||||
naval_chat_bot.add("web_page", "https://nav.al/feedback")
|
||||
naval_chat_bot.add("web_page", "https://nav.al/agi")
|
||||
|
||||
# Embed Local Resources
|
||||
naval_chat_bot.add_local("qna_pair", ("Who is Naval Ravikant?", "Naval Ravikant is an Indian-American entrepreneur and investor."))
|
||||
```
|
||||
|
||||
- If there is any other app instance in your script or app, you can change the import as
|
||||
|
||||
```python
|
||||
from embedchain import App as EmbedChainApp
|
||||
from embedchain import OpenSourceApp as EmbedChainOSApp
|
||||
from embedchain import PersonApp as EmbedChainPersonApp
|
||||
|
||||
# or
|
||||
|
||||
from embedchain import App as ECApp
|
||||
from embedchain import OpenSourceApp as ECOSApp
|
||||
from embedchain import PersonApp as ECPApp
|
||||
```
|
||||
|
||||
## Interface Types
|
||||
|
||||
### Query Interface
|
||||
|
||||
- This interface is like a question answering bot. It takes a question and gets the answer. It does not maintain context about the previous chats.
|
||||
|
||||
- To use this, call `.query` function to get the answer for any query.
|
||||
|
||||
```python
|
||||
print(naval_chat_bot.query("What unique capacity does Naval argue humans possess when it comes to understanding explanations or concepts?"))
|
||||
# answer: Naval argues that humans possess the unique capacity to understand explanations or concepts to the maximum extent possible in this physical reality.
|
||||
```
|
||||
|
||||
### Chat Interface
|
||||
|
||||
- This interface is chat interface where it remembers previous conversation. Right now it remembers 5 conversation by default.
|
||||
|
||||
- To use this, call `.chat` function to get the answer for any query.
|
||||
|
||||
```python
|
||||
print(naval_chat_bot.chat("How to be happy in life?"))
|
||||
# answer: The most important trick to being happy is to realize happiness is a skill you develop and a choice you make. You choose to be happy, and then you work at it. It's just like building muscles or succeeding at your job. It's about recognizing the abundance and gifts around you at all times.
|
||||
|
||||
print(naval_chat_bot.chat("who is naval ravikant?"))
|
||||
# answer: Naval Ravikant is an Indian-American entrepreneur and investor.
|
||||
|
||||
print(naval_chat_bot.chat("what did the author say about happiness?"))
|
||||
# answer: The author, Naval Ravikant, believes that happiness is a choice you make and a skill you develop. He compares the mind to the body, stating that just as the body can be molded and changed, so can the mind. He emphasizes the importance of being present in the moment and not getting caught up in regrets of the past or worries about the future. By being present and grateful for where you are, you can experience true happiness.
|
||||
```
|
||||
|
||||
### Stream Response
|
||||
|
||||
- You can add config to your query method to stream responses like ChatGPT does. You would require a downstream handler to render the chunk in your desirable format. Supports both OpenAI model and OpenSourceApp.
|
||||
|
||||
- To use this, instantiate a `QueryConfig` or `ChatConfig` object with `stream=True`. Then pass it to the `.chat()` or `.query()` method. The following example iterates through the chunks and prints them as they appear.
|
||||
|
||||
```python
|
||||
app = App()
|
||||
query_config = QueryConfig(stream = True)
|
||||
resp = app.query("What unique capacity does Naval argue humans possess when it comes to understanding explanations or concepts?", query_config)
|
||||
|
||||
for chunk in resp:
|
||||
print(chunk, end="", flush=True)
|
||||
# answer: Naval argues that humans possess the unique capacity to understand explanations or concepts to the maximum extent possible in this physical reality.
|
||||
```
|
||||
|
||||
## Format supported
|
||||
|
||||
We support the following formats:
|
||||
|
||||
### Youtube Video
|
||||
|
||||
To add any youtube video to your app, use the data_type (first argument to `.add`) as `youtube_video`. Eg:
|
||||
|
||||
```python
|
||||
app.add('youtube_video', 'a_valid_youtube_url_here')
|
||||
```
|
||||
|
||||
### PDF File
|
||||
|
||||
To add any pdf file, use the data_type as `pdf_file`. Eg:
|
||||
|
||||
```python
|
||||
app.add('pdf_file', 'a_valid_url_where_pdf_file_can_be_accessed')
|
||||
```
|
||||
|
||||
Note that we do not support password protected pdfs.
|
||||
|
||||
### Web Page
|
||||
|
||||
To add any web page, use the data_type as `web_page`. Eg:
|
||||
|
||||
```python
|
||||
app.add('web_page', 'a_valid_web_page_url')
|
||||
```
|
||||
|
||||
### Doc File
|
||||
|
||||
To add any doc/docx file, use the data_type as `docx`. Eg:
|
||||
|
||||
```python
|
||||
app.add('docx', 'a_local_docx_file_path')
|
||||
```
|
||||
|
||||
### Text
|
||||
|
||||
To supply your own text, use the data_type as `text` and enter a string. The text is not processed, this can be very versatile. Eg:
|
||||
|
||||
```python
|
||||
app.add_local('text', 'Seek wealth, not money or status. Wealth is having assets that earn while you sleep. Money is how we transfer time and wealth. Status is your place in the social hierarchy.')
|
||||
```
|
||||
|
||||
Note: This is not used in the examples because in most cases you will supply a whole paragraph or file, which did not fit.
|
||||
|
||||
### QnA Pair
|
||||
|
||||
To supply your own QnA pair, use the data_type as `qna_pair` and enter a tuple. Eg:
|
||||
|
||||
```python
|
||||
app.add_local('qna_pair', ("Question", "Answer"))
|
||||
```
|
||||
### Sitemap
|
||||
|
||||
To add a XML site map containing list of all urls, use the data_type as `sitemap` and enter the sitemap url. Eg:
|
||||
|
||||
```python
|
||||
app.add('sitemap', 'a_valid_sitemap_url/sitemap.xml')
|
||||
```
|
||||
|
||||
### Reusing a Vector DB
|
||||
|
||||
Default behavior is to create a persistent vector DB in the directory **./db**. You can split your application into two Python scripts: one to create a local vector DB and the other to reuse this local persistent vector DB. This is useful when you want to index hundreds of documents and separately implement a chat interface.
|
||||
|
||||
Create a local index:
|
||||
|
||||
```python
|
||||
|
||||
from embedchain import App
|
||||
|
||||
naval_chat_bot = App()
|
||||
naval_chat_bot.add("youtube_video", "https://www.youtube.com/watch?v=3qHkcs3kG44")
|
||||
naval_chat_bot.add("pdf_file", "https://navalmanack.s3.amazonaws.com/Eric-Jorgenson_The-Almanack-of-Naval-Ravikant_Final.pdf")
|
||||
```
|
||||
|
||||
You can reuse the local index with the same code, but without adding new documents:
|
||||
|
||||
```python
|
||||
|
||||
from embedchain import App
|
||||
|
||||
naval_chat_bot = App()
|
||||
print(naval_chat_bot.query("What unique capacity does Naval argue humans possess when it comes to understanding explanations or concepts?"))
|
||||
```
|
||||
|
||||
### More Formats coming soon
|
||||
|
||||
- If you want to add any other format, please create an [issue](https://github.com/embedchain/embedchain/issues) and we will add it to the list of supported formats.
|
||||
|
||||
## Testing
|
||||
|
||||
Before you consume valueable tokens, you should make sure that the embedding you have done works and that it's receiving the correct document from the database.
|
||||
|
||||
For this you can use the `dry_run` method.
|
||||
|
||||
Following the example above, add this to your script:
|
||||
|
||||
```python
|
||||
print(naval_chat_bot.dry_run('Can you tell me who Naval Ravikant is?'))
|
||||
|
||||
'''
|
||||
Use the following pieces of context to answer the query at the end. If you don't know the answer, just say that you don't know, don't try to make up an answer.
|
||||
Q: Who is Naval Ravikant?
|
||||
A: Naval Ravikant is an Indian-American entrepreneur and investor.
|
||||
Query: Can you tell me who Naval Ravikant is?
|
||||
Helpful Answer:
|
||||
'''
|
||||
```
|
||||
|
||||
_The embedding is confirmed to work as expected. It returns the right document, even if the question is asked slightly different. No prompt tokens have been consumed._
|
||||
|
||||
**The dry run will still consume tokens to embed your query, but it is only ~1/15 of the prompt.**
|
||||
|
||||
## Colab Notebook and Video Tutorials
|
||||
|
||||
Chinese Colab Tutorial:https://colab.research.google.com/drive/10_7Y0x4YXWVjuhhYwVraGQLpKAatTQTm?usp=sharing
|
||||
|
||||
Chinese Video Tutorial:https://www.bilibili.com/video/BV1YX4y1H7oN
|
||||
|
||||
# Advanced
|
||||
|
||||
## Configuration
|
||||
|
||||
Embedchain is made to work out of the box. However, for advanced users we're also offering configuration options. All of these configuration options are optional and have sane defaults.
|
||||
|
||||
### Example
|
||||
|
||||
Here's the readme example with configuration options.
|
||||
|
||||
```python
|
||||
import os
|
||||
from embedchain import App
|
||||
from embedchain.config import InitConfig, AddConfig, QueryConfig
|
||||
from chromadb.utils import embedding_functions
|
||||
|
||||
# Example: use your own embedding function
|
||||
config = InitConfig(ef=embedding_functions.OpenAIEmbeddingFunction(
|
||||
api_key=os.getenv("OPENAI_API_KEY"),
|
||||
organization_id=os.getenv("OPENAI_ORGANIZATION"),
|
||||
model_name="text-embedding-ada-002"
|
||||
))
|
||||
naval_chat_bot = App(config)
|
||||
|
||||
# Example: define your own chunker config for `youtube_video`
|
||||
youtube_add_config = {
|
||||
"chunker": {
|
||||
"chunk_size": 1000,
|
||||
"chunk_overlap": 100,
|
||||
"length_function": len,
|
||||
}
|
||||
}
|
||||
naval_chat_bot.add("youtube_video", "https://www.youtube.com/watch?v=3qHkcs3kG44", AddConfig(**youtube_add_config))
|
||||
|
||||
add_config = AddConfig()
|
||||
naval_chat_bot.add("pdf_file", "https://navalmanack.s3.amazonaws.com/Eric-Jorgenson_The-Almanack-of-Naval-Ravikant_Final.pdf", add_config)
|
||||
naval_chat_bot.add("web_page", "https://nav.al/feedback", add_config)
|
||||
naval_chat_bot.add("web_page", "https://nav.al/agi", add_config)
|
||||
|
||||
naval_chat_bot.add_local("qna_pair", ("Who is Naval Ravikant?", "Naval Ravikant is an Indian-American entrepreneur and investor."), add_config)
|
||||
|
||||
query_config = QueryConfig() # Currently no options
|
||||
print(naval_chat_bot.query("What unique capacity does Naval argue humans possess when it comes to understanding explanations or concepts?", query_config))
|
||||
```
|
||||
|
||||
Here's the example of using custom prompt template with `.query`
|
||||
|
||||
```python
|
||||
from embedchain.config import QueryConfig
|
||||
from embedchain.embedchain import App
|
||||
from string import Template
|
||||
import wikipedia
|
||||
|
||||
einstein_chat_bot = App()
|
||||
|
||||
# Embed Wikipedia page
|
||||
page = wikipedia.page("Albert Einstein")
|
||||
einstein_chat_bot.add("text", page.content)
|
||||
|
||||
# Example: use your own custom template with `$context` and `$query`
|
||||
einstein_chat_template = Template("""
|
||||
You are Albert Einstein, a German-born theoretical physicist,
|
||||
widely ranked among the greatest and most influential scientists of all time.
|
||||
|
||||
Use the following information about Albert Einstein to respond to
|
||||
the human's query acting as Albert Einstein.
|
||||
Context: $context
|
||||
|
||||
Keep the response brief. If you don't know the answer, just say that you don't know, don't try to make up an answer.
|
||||
|
||||
Human: $query
|
||||
Albert Einstein:""")
|
||||
query_config = QueryConfig(einstein_chat_template)
|
||||
queries = [
|
||||
"Where did you complete your studies?",
|
||||
"Why did you win nobel prize?",
|
||||
"Why did you divorce your first wife?",
|
||||
]
|
||||
for query in queries:
|
||||
response = einstein_chat_bot.query(query, query_config)
|
||||
print("Query: ", query)
|
||||
print("Response: ", response)
|
||||
|
||||
# Output
|
||||
# Query: Where did you complete your studies?
|
||||
# Response: I completed my secondary education at the Argovian cantonal school in Aarau, Switzerland.
|
||||
# Query: Why did you win nobel prize?
|
||||
# Response: I won the Nobel Prize in Physics in 1921 for my services to Theoretical Physics, particularly for my discovery of the law of the photoelectric effect.
|
||||
# Query: Why did you divorce your first wife?
|
||||
# Response: We divorced due to living apart for five years.
|
||||
```
|
||||
|
||||
**Client Mode**. By defining a (ChromaDB) server, you can run EmbedChain as a client only.
|
||||
|
||||
```python
|
||||
from embedchain import App
|
||||
config = InitConfig(host="localhost", port="8080")
|
||||
app = App(config)
|
||||
```
|
||||
This is useful for scalability. Say you have EmbedChain behind an API with multiple workers. If you separate clients and server, all clients can connect to the server, which only has to keep one instance of the database in memory. You also don't have to worry about replication.
|
||||
|
||||
To run a chroma db server, run `git clone https://github.com/chroma-core/chroma.git`, navigate to the directory (`cd chroma`) and then start the server with `docker-compose up -d --build`.
|
||||
|
||||
### Configs
|
||||
|
||||
This section describes all possible config options.
|
||||
|
||||
#### **InitConfig**
|
||||
|
||||
|option|description|type|default|
|
||||
|---|---|---|---|
|
||||
|log_level|log level|string|WARNING|
|
||||
|ef|embedding function|chromadb.utils.embedding_functions|{text-embedding-ada-002}|
|
||||
|db|vector database (experimental)|BaseVectorDB|ChromaDB|
|
||||
|host|hostname for (Chroma) DB server|string|None|
|
||||
|port|port number for (Chroma) DB server|string, int|None|
|
||||
|
||||
#### **Add Config**
|
||||
|
||||
|option|description|type|default|
|
||||
|---|---|---|---|
|
||||
|chunker|chunker config|ChunkerConfig|Default values for chunker depends on the `data_type`. Please refer [ChunkerConfig](#chunker-config)|
|
||||
|loader|loader config|LoaderConfig|None|
|
||||
|
||||
##### **Chunker Config**
|
||||
|
||||
|option|description|type|default|
|
||||
|---|---|---|---|
|
||||
|chunk_size|Maximum size of chunks to return|int|Default value for various `data_type` mentioned below|
|
||||
|chunk_overlap|Overlap in characters between chunks|int|Default value for various `data_type` mentioned below|
|
||||
|length_function|Function that measures the length of given chunks|typing.Callable|Default value for various `data_type` mentioned below|
|
||||
|
||||
Default values of chunker config parameters for different `data_type`:
|
||||
|
||||
|data_type|chunk_size|chunk_overlap|length_function|
|
||||
|---|---|---|---|
|
||||
|docx|1000|0|len|
|
||||
|text|300|0|len|
|
||||
|qna_pair|300|0|len|
|
||||
|web_page|500|0|len|
|
||||
|pdf_file|1000|0|len|
|
||||
|youtube_video|2000|0|len|
|
||||
|
||||
##### **Loader Config**
|
||||
|
||||
_coming soon_
|
||||
|
||||
#### **Query Config**
|
||||
|
||||
|option|description|type|default|
|
||||
|---|---|---|---|
|
||||
|number_documents|number of documents to be retrieved as context|int|1|
|
||||
|template|custom template for prompt|Template|Template("Use the following pieces of context to answer the query at the end. If you don't know the answer, just say that you don't know, don't try to make up an answer. \$context Query: $query Helpful Answer:")|
|
||||
|history|include conversation history from your client or database|any (recommendation: list[str])|None
|
||||
|stream|control if response is streamed back to the user|bool|False|
|
||||
|model|OpenAI model|string|gpt-3.5-turbo-0613|
|
||||
|temperature|creativity of the model (0-1)|float|0|
|
||||
|max_tokens|limit maximum tokens used|int|1000|
|
||||
|top_p|diversity of words used by the model (0-1)|float|1|
|
||||
|
||||
#### **Chat Config**
|
||||
|
||||
All options for query and...
|
||||
|
||||
_coming soon_
|
||||
|
||||
history is handled automatically, the config option is not supported.
|
||||
|
||||
## Other methods
|
||||
|
||||
### Reset
|
||||
|
||||
Resets the database and deletes all embeddings. Irreversible. Requires reinitialization afterwards.
|
||||
|
||||
```python
|
||||
app.reset()
|
||||
```
|
||||
|
||||
### Count
|
||||
|
||||
Counts the number of embeddings (chunks) in the database.
|
||||
|
||||
```python
|
||||
print(app.count())
|
||||
# returns: 481
|
||||
```
|
||||
|
||||
# How does it work?
|
||||
|
||||
Creating a chat bot over any dataset needs the following steps to happen
|
||||
|
||||
- load the data
|
||||
- create meaningful chunks
|
||||
- create embeddings for each chunk
|
||||
- store the chunks in vector database
|
||||
|
||||
Whenever a user asks any query, following process happens to find the answer for the query
|
||||
|
||||
- create the embedding for query
|
||||
- find similar documents for this query from vector database
|
||||
- pass similar documents as context to LLM to get the final answer.
|
||||
|
||||
The process of loading the dataset and then querying involves multiple steps and each steps has nuances of it is own.
|
||||
|
||||
- How should I chunk the data? What is a meaningful chunk size?
|
||||
- How should I create embeddings for each chunk? Which embedding model should I use?
|
||||
- How should I store the chunks in vector database? Which vector database should I use?
|
||||
- Should I store meta data along with the embeddings?
|
||||
- How should I find similar documents for a query? Which ranking model should I use?
|
||||
|
||||
These questions may be trivial for some but for a lot of us, it needs research, experimentation and time to find out the accurate answers.
|
||||
|
||||
embedchain is a framework which takes care of all these nuances and provides a simple interface to create bots over any dataset.
|
||||
|
||||
In the first release, we are making it easier for anyone to get a chatbot over any dataset up and running in less than a minute. All you need to do is create an app instance, add the data sets using `.add` function and then use `.query` function to get the relevant answer.
|
||||
|
||||
# Contribution Guidelines
|
||||
|
||||
Thank you for your interest in contributing to the EmbedChain project! We welcome your ideas and contributions to help improve the project. Please follow the instructions below to get started:
|
||||
|
||||
1. **Fork the repository**: Click on the "Fork" button at the top right corner of this repository page. This will create a copy of the repository in your own GitHub account.
|
||||
|
||||
2. **Install the required dependencies**: Ensure that you have the necessary dependencies installed in your Python environment. You can do this by running the following command:
|
||||
|
||||
```bash
|
||||
make install
|
||||
```
|
||||
|
||||
3. **Make changes in the code**: Create a new branch in your forked repository and make your desired changes in the codebase.
|
||||
4. **Format code**: Before creating a pull request, it's important to ensure that your code follows our formatting guidelines. Run the following commands to format the code:
|
||||
|
||||
```bash
|
||||
make lint format
|
||||
```
|
||||
|
||||
5. **Create a pull request**: When you are ready to contribute your changes, submit a pull request to the EmbedChain repository. Provide a clear and descriptive title for your pull request, along with a detailed description of the changes you have made.
|
||||
|
||||
# Tech Stack
|
||||
|
||||
embedchain is built on the following stack:
|
||||
|
||||
- [Langchain](https://github.com/hwchase17/langchain) as an LLM framework to load, chunk and index data
|
||||
- [OpenAI's Ada embedding model](https://platform.openai.com/docs/guides/embeddings) to create embeddings
|
||||
- [OpenAI's ChatGPT API](https://platform.openai.com/docs/guides/gpt/chat-completions-api) as LLM to get answers given the context
|
||||
- [Chroma](https://github.com/chroma-core/chroma) as the vector database to store embeddings
|
||||
- [gpt4all](https://github.com/nomic-ai/gpt4all) as an open source LLM
|
||||
- [sentence-transformers](https://huggingface.co/sentence-transformers) as open source embedding model
|
||||
|
||||
# Team
|
||||
|
||||
## Author
|
||||
|
||||
- Taranjeet Singh ([@taranjeetio](https://twitter.com/taranjeetio))
|
||||
|
||||
## Maintainer
|
||||
|
||||
- [cachho](https://github.com/cachho)
|
||||
We collect anonymous usage metrics to enhance our package's quality and user experience. This includes data like feature usage frequency and system info, but never personal details. The data helps us prioritize improvements and ensure compatibility. If you wish to opt-out, set the environment variable `EC_TELEMETRY=false`. We prioritize data security and don't share this data externally.
|
||||
|
||||
## Citation
|
||||
|
||||
@@ -625,8 +115,8 @@ If you utilize this repository, please consider citing it with:
|
||||
|
||||
```
|
||||
@misc{embedchain,
|
||||
author = {Taranjeet Singh},
|
||||
title = {Embechain: Framework to easily create LLM powered bots over any dataset},
|
||||
author = {Taranjeet Singh, Deshraj Yadav},
|
||||
title = {Embedchain: Data platform for LLMs - load, index, retrieve, and sync any unstructured data},
|
||||
year = {2023},
|
||||
publisher = {GitHub},
|
||||
journal = {GitHub repository},
|
||||
|
||||
@@ -0,0 +1,8 @@
|
||||
llm:
|
||||
provider: anthropic
|
||||
config:
|
||||
model: 'claude-instant-1'
|
||||
temperature: 0.5
|
||||
max_tokens: 1000
|
||||
top_p: 1
|
||||
stream: false
|
||||
@@ -0,0 +1,19 @@
|
||||
app:
|
||||
config:
|
||||
id: azure-openai-app
|
||||
|
||||
llm:
|
||||
provider: azure_openai
|
||||
config:
|
||||
model: gpt-35-turbo
|
||||
deployment_name: your_llm_deployment_name
|
||||
temperature: 0.5
|
||||
max_tokens: 1000
|
||||
top_p: 1
|
||||
stream: false
|
||||
|
||||
embedder:
|
||||
provider: azure_openai
|
||||
config:
|
||||
model: text-embedding-ada-002
|
||||
deployment_name: you_embedding_model_deployment_name
|
||||
@@ -0,0 +1,25 @@
|
||||
app:
|
||||
config:
|
||||
id: 'my-app'
|
||||
collection_name: 'my-app'
|
||||
|
||||
llm:
|
||||
provider: openai
|
||||
config:
|
||||
model: 'gpt-3.5-turbo'
|
||||
temperature: 0.5
|
||||
max_tokens: 1000
|
||||
top_p: 1
|
||||
stream: false
|
||||
|
||||
vectordb:
|
||||
provider: chroma
|
||||
config:
|
||||
collection_name: 'my-app'
|
||||
dir: db
|
||||
allow_reset: true
|
||||
|
||||
embedder:
|
||||
provider: openai
|
||||
config:
|
||||
model: 'text-embedding-ada-002'
|
||||
@@ -0,0 +1,4 @@
|
||||
chunker:
|
||||
chunk_size: 100
|
||||
chunk_overlap: 20
|
||||
length_function: 'len'
|
||||
@@ -0,0 +1,7 @@
|
||||
llm:
|
||||
provider: cohere
|
||||
config:
|
||||
model: large
|
||||
temperature: 0.5
|
||||
max_tokens: 1000
|
||||
top_p: 1
|
||||
@@ -0,0 +1,40 @@
|
||||
app:
|
||||
config:
|
||||
id: 'full-stack-app'
|
||||
|
||||
chunker:
|
||||
chunk_size: 100
|
||||
chunk_overlap: 20
|
||||
length_function: 'len'
|
||||
|
||||
llm:
|
||||
provider: openai
|
||||
config:
|
||||
model: 'gpt-3.5-turbo'
|
||||
temperature: 0.5
|
||||
max_tokens: 1000
|
||||
top_p: 1
|
||||
stream: false
|
||||
template: |
|
||||
Use the following pieces of context to answer the query at the end.
|
||||
If you don't know the answer, just say that you don't know, don't try to make up an answer.
|
||||
|
||||
$context
|
||||
|
||||
Query: $query
|
||||
|
||||
Helpful Answer:
|
||||
system_prompt: |
|
||||
Act as William Shakespeare. Answer the following questions in the style of William Shakespeare.
|
||||
|
||||
vectordb:
|
||||
provider: chroma
|
||||
config:
|
||||
collection_name: 'my-collection-name'
|
||||
dir: db
|
||||
allow_reset: true
|
||||
|
||||
embedder:
|
||||
provider: openai
|
||||
config:
|
||||
model: 'text-embedding-ada-002'
|
||||
@@ -0,0 +1,13 @@
|
||||
llm:
|
||||
provider: google
|
||||
config:
|
||||
model: gemini-pro
|
||||
max_tokens: 1000
|
||||
temperature: 0.9
|
||||
top_p: 1.0
|
||||
stream: false
|
||||
|
||||
embedder:
|
||||
provider: google
|
||||
config:
|
||||
model: models/embedding-001
|
||||
@@ -0,0 +1,8 @@
|
||||
llm:
|
||||
provider: openai
|
||||
config:
|
||||
model: 'gpt-4'
|
||||
temperature: 0.5
|
||||
max_tokens: 1000
|
||||
top_p: 1
|
||||
stream: false
|
||||
@@ -0,0 +1,11 @@
|
||||
llm:
|
||||
provider: gpt4all
|
||||
config:
|
||||
model: 'orca-mini-3b-gguf2-q4_0.gguf'
|
||||
temperature: 0.5
|
||||
max_tokens: 1000
|
||||
top_p: 1
|
||||
stream: false
|
||||
|
||||
embedder:
|
||||
provider: gpt4all
|
||||
@@ -0,0 +1,8 @@
|
||||
llm:
|
||||
provider: huggingface
|
||||
config:
|
||||
model: 'google/flan-t5-xxl'
|
||||
temperature: 0.5
|
||||
max_tokens: 1000
|
||||
top_p: 0.5
|
||||
stream: false
|
||||
@@ -0,0 +1,7 @@
|
||||
llm:
|
||||
provider: jina
|
||||
config:
|
||||
temperature: 0.5
|
||||
max_tokens: 1000
|
||||
top_p: 1
|
||||
stream: false
|
||||
@@ -0,0 +1,8 @@
|
||||
llm:
|
||||
provider: llama2
|
||||
config:
|
||||
model: 'a16z-infra/llama13b-v2-chat:df7690f1994d94e96ad9d568eac121aecf50684a0b0963b25a41cc40061269e5'
|
||||
temperature: 0.5
|
||||
max_tokens: 1000
|
||||
top_p: 0.5
|
||||
stream: false
|
||||
@@ -0,0 +1,33 @@
|
||||
app:
|
||||
config:
|
||||
id: 'my-app'
|
||||
log_level: 'WARNING'
|
||||
collect_metrics: true
|
||||
collection_name: 'my-app'
|
||||
|
||||
llm:
|
||||
provider: openai
|
||||
config:
|
||||
model: 'gpt-3.5-turbo'
|
||||
temperature: 0.5
|
||||
max_tokens: 1000
|
||||
top_p: 1
|
||||
stream: false
|
||||
|
||||
vectordb:
|
||||
provider: opensearch
|
||||
config:
|
||||
opensearch_url: 'https://localhost:9200'
|
||||
http_auth:
|
||||
- admin
|
||||
- admin
|
||||
vector_dimension: 1536
|
||||
collection_name: 'my-app'
|
||||
use_ssl: false
|
||||
verify_certs: false
|
||||
|
||||
embedder:
|
||||
provider: openai
|
||||
config:
|
||||
model: 'text-embedding-ada-002'
|
||||
deployment_name: 'my-app'
|
||||
@@ -0,0 +1,26 @@
|
||||
app:
|
||||
config:
|
||||
id: 'open-source-app'
|
||||
collection_name: 'open-source-app'
|
||||
collect_metrics: false
|
||||
|
||||
llm:
|
||||
provider: gpt4all
|
||||
config:
|
||||
model: 'orca-mini-3b-gguf2-q4_0.gguf'
|
||||
temperature: 0.5
|
||||
max_tokens: 1000
|
||||
top_p: 1
|
||||
stream: false
|
||||
|
||||
vectordb:
|
||||
provider: chroma
|
||||
config:
|
||||
collection_name: 'open-source-app'
|
||||
dir: db
|
||||
allow_reset: true
|
||||
|
||||
embedder:
|
||||
provider: gpt4all
|
||||
config:
|
||||
deployment_name: 'test-deployment'
|
||||
@@ -0,0 +1,6 @@
|
||||
vectordb:
|
||||
provider: pinecone
|
||||
config:
|
||||
metric: cosine
|
||||
vector_dimension: 1536
|
||||
collection_name: my-pinecone-index
|
||||
@@ -0,0 +1,26 @@
|
||||
pipeline:
|
||||
config:
|
||||
name: Example pipeline
|
||||
id: pipeline-1 # Make sure that id is different every time you create a new pipeline
|
||||
|
||||
vectordb:
|
||||
provider: chroma
|
||||
config:
|
||||
collection_name: pipeline-1
|
||||
dir: db
|
||||
allow_reset: true
|
||||
|
||||
llm:
|
||||
provider: gpt4all
|
||||
config:
|
||||
model: 'orca-mini-3b-gguf2-q4_0.gguf'
|
||||
temperature: 0.5
|
||||
max_tokens: 1000
|
||||
top_p: 1
|
||||
stream: false
|
||||
|
||||
embedding_model:
|
||||
provider: gpt4all
|
||||
config:
|
||||
model: 'all-MiniLM-L6-v2'
|
||||
deployment_name: null
|
||||
@@ -0,0 +1,6 @@
|
||||
llm:
|
||||
provider: vertexai
|
||||
config:
|
||||
model: 'chat-bison'
|
||||
temperature: 0.5
|
||||
top_p: 0.5
|
||||
@@ -0,0 +1,4 @@
|
||||
vectordb:
|
||||
provider: weaviate
|
||||
config:
|
||||
collection_name: my_weaviate_index
|
||||
@@ -0,0 +1,10 @@
|
||||
install:
|
||||
npm i -g mintlify
|
||||
|
||||
run_local:
|
||||
mintlify dev
|
||||
|
||||
troubleshoot:
|
||||
mintlify install
|
||||
|
||||
.PHONY: install run_local troubleshoot
|
||||
@@ -0,0 +1,25 @@
|
||||
# Contributing to embedchain docs
|
||||
|
||||
|
||||
### 👩💻 Development
|
||||
|
||||
Install the [Mintlify CLI](https://www.npmjs.com/package/mintlify) to preview the documentation changes locally. To install, use the following command
|
||||
|
||||
```
|
||||
npm i -g mintlify
|
||||
```
|
||||
|
||||
Run the following command at the root of your documentation (where mint.json is)
|
||||
|
||||
```
|
||||
mintlify dev
|
||||
```
|
||||
|
||||
### 😎 Publishing Changes
|
||||
|
||||
Changes will be deployed to production automatically after your PR is merged to the main branch.
|
||||
|
||||
#### Troubleshooting
|
||||
|
||||
- Mintlify dev isn't running - Run `mintlify install` it'll re-install dependencies.
|
||||
- Page loads as a 404 - Make sure you are running in a folder with `mint.json`
|
||||
@@ -0,0 +1,11 @@
|
||||
<CardGroup cols={3}>
|
||||
<Card title="Talk to founders" icon="calendar" href="https://cal.com/taranjeetio/ec">
|
||||
Schedule a call
|
||||
</Card>
|
||||
<Card title="Slack" icon="slack" href="https://join.slack.com/t/embedchain/shared_invite/zt-22uwz3c46-Zg7cIh5rOBteT_xe1jwLDw" color="#4A154B">
|
||||
Join our slack community
|
||||
</Card>
|
||||
<Card title="Discord" icon="discord" href="https://discord.gg/6PzXDgEjG5" color="#7289DA">
|
||||
Join our discord community
|
||||
</Card>
|
||||
</CardGroup>
|
||||
@@ -0,0 +1,19 @@
|
||||
<p>If you can't find the specific data source, please feel free to request through one of the following channels and help us prioritize.</p>
|
||||
|
||||
<CardGroup cols={2}>
|
||||
<Card title="Google Form" icon="file" href="https://forms.gle/NDRCKsRpUHsz2Wcm8" color="#7387d0">
|
||||
Fill out this form
|
||||
</Card>
|
||||
<Card title="Slack" icon="slack" href="https://join.slack.com/t/embedchain/shared_invite/zt-22uwz3c46-Zg7cIh5rOBteT_xe1jwLDw" color="#4A154B">
|
||||
Let us know on our slack community
|
||||
</Card>
|
||||
<Card title="Discord" icon="discord" href="https://discord.gg/6PzXDgEjG5" color="#7289DA">
|
||||
Let us know on discord community
|
||||
</Card>
|
||||
<Card title="GitHub" icon="github" href="https://github.com/embedchain/embedchain/issues/new?assignees=&labels=&projects=&template=feature_request.yml" color="#181717">
|
||||
Open an issue on our GitHub
|
||||
</Card>
|
||||
<Card title="Schedule a call" icon="calendar" href="https://cal.com/taranjeetio/ec">
|
||||
Schedule a call with Embedchain founder
|
||||
</Card>
|
||||
</CardGroup>
|
||||
@@ -0,0 +1,16 @@
|
||||
<p>If you can't find the specific LLM you need, no need to fret. We're continuously expanding our support for additional LLMs, and you can help us prioritize by opening an issue on our GitHub or simply reaching out to us on our Slack or Discord community.</p>
|
||||
|
||||
<CardGroup cols={2}>
|
||||
<Card title="Slack" icon="slack" href="https://join.slack.com/t/embedchain/shared_invite/zt-22uwz3c46-Zg7cIh5rOBteT_xe1jwLDw" color="#4A154B">
|
||||
Let us know on our slack community
|
||||
</Card>
|
||||
<Card title="Discord" icon="discord" href="https://discord.gg/6PzXDgEjG5" color="#7289DA">
|
||||
Let us know on discord community
|
||||
</Card>
|
||||
<Card title="GitHub" icon="github" href="https://github.com/embedchain/embedchain/issues/new?assignees=&labels=&projects=&template=feature_request.yml" color="#181717">
|
||||
Open an issue on our GitHub
|
||||
</Card>
|
||||
<Card title="Schedule a call" icon="calendar" href="https://cal.com/taranjeetio/ec">
|
||||
Schedule a call with Embedchain founder
|
||||
</Card>
|
||||
</CardGroup>
|
||||
@@ -0,0 +1,18 @@
|
||||
|
||||
|
||||
<p>If you can't find the specific vector database, please feel free to request through one of the following channels and help us prioritize.</p>
|
||||
|
||||
<CardGroup cols={2}>
|
||||
<Card title="Slack" icon="slack" href="https://join.slack.com/t/embedchain/shared_invite/zt-22uwz3c46-Zg7cIh5rOBteT_xe1jwLDw" color="#4A154B">
|
||||
Let us know on our slack community
|
||||
</Card>
|
||||
<Card title="Discord" icon="discord" href="https://discord.gg/6PzXDgEjG5" color="#7289DA">
|
||||
Let us know on discord community
|
||||
</Card>
|
||||
<Card title="GitHub" icon="github" href="https://github.com/embedchain/embedchain/issues/new?assignees=&labels=&projects=&template=feature_request.yml" color="#181717">
|
||||
Open an issue on our GitHub
|
||||
</Card>
|
||||
<Card title="Schedule a call" icon="calendar" href="https://cal.com/taranjeetio/ec">
|
||||
Schedule a call with Embedchain founder
|
||||
</Card>
|
||||
</CardGroup>
|
||||
@@ -0,0 +1,190 @@
|
||||
---
|
||||
title: 'Custom configurations'
|
||||
---
|
||||
|
||||
Embedchain offers several configuration options for your LLM, vector database, and embedding model. All of these configuration options are optional and have sane defaults.
|
||||
|
||||
You can configure different components of your app (`llm`, `embedding model`, or `vector database`) through a simple yaml configuration that Embedchain offers. Here is a generic full-stack example of the yaml config:
|
||||
|
||||
|
||||
<Tip>
|
||||
Embedchain applications are configurable using YAML file, JSON file or by directly passing the config dictionary. Checkout the [docs here](/api-reference/pipeline/overview#usage) on how to use other formats.
|
||||
</Tip>
|
||||
|
||||
<CodeGroup>
|
||||
```yaml config.yaml
|
||||
app:
|
||||
config:
|
||||
name: 'full-stack-app'
|
||||
|
||||
llm:
|
||||
provider: openai
|
||||
config:
|
||||
model: 'gpt-3.5-turbo'
|
||||
temperature: 0.5
|
||||
max_tokens: 1000
|
||||
top_p: 1
|
||||
stream: false
|
||||
template: |
|
||||
Use the following pieces of context to answer the query at the end.
|
||||
If you don't know the answer, just say that you don't know, don't try to make up an answer.
|
||||
|
||||
$context
|
||||
|
||||
Query: $query
|
||||
|
||||
Helpful Answer:
|
||||
system_prompt: |
|
||||
Act as William Shakespeare. Answer the following questions in the style of William Shakespeare.
|
||||
|
||||
vectordb:
|
||||
provider: chroma
|
||||
config:
|
||||
collection_name: 'full-stack-app'
|
||||
dir: db
|
||||
allow_reset: true
|
||||
|
||||
embedder:
|
||||
provider: openai
|
||||
config:
|
||||
model: 'text-embedding-ada-002'
|
||||
|
||||
chunker:
|
||||
chunk_size: 2000
|
||||
chunk_overlap: 100
|
||||
length_function: 'len'
|
||||
min_chunk_size: 0
|
||||
```
|
||||
|
||||
```json config.json
|
||||
{
|
||||
"app": {
|
||||
"config": {
|
||||
"name": "full-stack-app"
|
||||
}
|
||||
},
|
||||
"llm": {
|
||||
"provider": "openai",
|
||||
"config": {
|
||||
"model": "gpt-3.5-turbo",
|
||||
"temperature": 0.5,
|
||||
"max_tokens": 1000,
|
||||
"top_p": 1,
|
||||
"stream": false,
|
||||
"template": "Use the following pieces of context to answer the query at the end.\nIf you don't know the answer, just say that you don't know, don't try to make up an answer.\n$context\n\nQuery: $query\n\nHelpful Answer:",
|
||||
"system_prompt": "Act as William Shakespeare. Answer the following questions in the style of William Shakespeare."
|
||||
}
|
||||
},
|
||||
"vectordb": {
|
||||
"provider": "chroma",
|
||||
"config": {
|
||||
"collection_name": "full-stack-app",
|
||||
"dir": "db",
|
||||
"allow_reset": true
|
||||
}
|
||||
},
|
||||
"embedder": {
|
||||
"provider": "openai",
|
||||
"config": {
|
||||
"model": "text-embedding-ada-002"
|
||||
}
|
||||
},
|
||||
"chunker": {
|
||||
"chunk_size": 2000,
|
||||
"chunk_overlap": 100,
|
||||
"length_function": "len",
|
||||
"min_chunk_size": 0
|
||||
}
|
||||
}
|
||||
```
|
||||
|
||||
```python config.py
|
||||
config = {
|
||||
'app': {
|
||||
'config': {
|
||||
'name': 'full-stack-app'
|
||||
}
|
||||
},
|
||||
'llm': {
|
||||
'provider': 'openai',
|
||||
'config': {
|
||||
'model': 'gpt-3.5-turbo',
|
||||
'temperature': 0.5,
|
||||
'max_tokens': 1000,
|
||||
'top_p': 1,
|
||||
'stream': False,
|
||||
'template': (
|
||||
"Use the following pieces of context to answer the query at the end.\n"
|
||||
"If you don't know the answer, just say that you don't know, don't try to make up an answer.\n"
|
||||
"$context\n\nQuery: $query\n\nHelpful Answer:"
|
||||
),
|
||||
'system_prompt': (
|
||||
"Act as William Shakespeare. Answer the following questions in the style of William Shakespeare."
|
||||
)
|
||||
}
|
||||
},
|
||||
'vectordb': {
|
||||
'provider': 'chroma',
|
||||
'config': {
|
||||
'collection_name': 'full-stack-app',
|
||||
'dir': 'db',
|
||||
'allow_reset': True
|
||||
}
|
||||
},
|
||||
'embedder': {
|
||||
'provider': 'openai',
|
||||
'config': {
|
||||
'model': 'text-embedding-ada-002'
|
||||
}
|
||||
},
|
||||
'chunker': {
|
||||
'chunk_size': 2000,
|
||||
'chunk_overlap': 100,
|
||||
'length_function': 'len',
|
||||
'min_chunk_size': 0
|
||||
}
|
||||
}
|
||||
```
|
||||
</CodeGroup>
|
||||
|
||||
Alright, let's dive into what each key means in the yaml config above:
|
||||
|
||||
1. `app` Section:
|
||||
- `config`:
|
||||
- `name` (String): The name of your full-stack application.
|
||||
- `id` (String): The id of your full-stack application.
|
||||
<Note>Only use this to reload already created apps. We recommend users to not create their own ids.</Note>
|
||||
- `collect_metrics` (Boolean): Indicates whether metrics should be collected for the app, defaults to `True`
|
||||
- `log_level` (String): The log level for the app, defaults to `WARNING`
|
||||
2. `llm` Section:
|
||||
- `provider` (String): The provider for the language model, which is set to 'openai'. You can find the full list of llm providers in [our docs](/components/llms).
|
||||
- `config`:
|
||||
- `model` (String): The specific model being used, 'gpt-3.5-turbo'.
|
||||
- `temperature` (Float): Controls the randomness of the model's output. A higher value (closer to 1) makes the output more random.
|
||||
- `max_tokens` (Integer): Controls how many tokens are used in the response.
|
||||
- `top_p` (Float): Controls the diversity of word selection. A higher value (closer to 1) makes word selection more diverse.
|
||||
- `stream` (Boolean): Controls if the response is streamed back to the user (set to false).
|
||||
- `template` (String): A custom template for the prompt that the model uses to generate responses.
|
||||
- `system_prompt` (String): A system prompt for the model to follow when generating responses, in this case, it's set to the style of William Shakespeare.
|
||||
- `stream` (Boolean): Controls if the response is streamed back to the user (set to false).
|
||||
- `number_documents` (Integer): Number of documents to pull from the vectordb as context, defaults to 1
|
||||
3. `vectordb` Section:
|
||||
- `provider` (String): The provider for the vector database, set to 'chroma'. You can find the full list of vector database providers in [our docs](/components/vector-databases).
|
||||
- `config`:
|
||||
- `collection_name` (String): The initial collection name for the vectordb, set to 'full-stack-app'.
|
||||
- `dir` (String): The directory for the local database, set to 'db'.
|
||||
- `allow_reset` (Boolean): Indicates whether resetting the vectordb is allowed, set to true.
|
||||
<Note>We recommend you to checkout vectordb specific config [here](https://docs.embedchain.ai/components/vector-databases)</Note>
|
||||
4. `embedder` Section:
|
||||
- `provider` (String): The provider for the embedder, set to 'openai'. You can find the full list of embedding model providers in [our docs](/components/embedding-models).
|
||||
- `config`:
|
||||
- `model` (String): The specific model used for text embedding, 'text-embedding-ada-002'.
|
||||
5. `chunker` Section:
|
||||
- `chunk_size` (Integer): The size of each chunk of text that is sent to the language model.
|
||||
- `chunk_overlap` (Integer): The amount of overlap between each chunk of text.
|
||||
- `length_function` (String): The function used to calculate the length of each chunk of text. In this case, it's set to 'len'. You can also use any function import directly as a string here.
|
||||
- `min_chunk_size` (Integer): The minimum size of each chunk of text that is sent to the language model. Must be less than `chunk_size`, and greater than `chunk_overlap`.
|
||||
|
||||
If you have questions about the configuration above, please feel free to reach out to us using one of the following methods:
|
||||
|
||||
<Snippet file="get-help.mdx" />
|
||||
@@ -0,0 +1,44 @@
|
||||
---
|
||||
title: '📊 add'
|
||||
---
|
||||
|
||||
`add()` method is used to load the data sources from different data sources to a RAG pipeline. You can find the signature below:
|
||||
|
||||
### Parameters
|
||||
|
||||
<ParamField path="source" type="str">
|
||||
The data to embed, can be a URL, local file or raw content, depending on the data type.. You can find the full list of supported data sources [here](/components/data-sources/overview).
|
||||
</ParamField>
|
||||
<ParamField path="data_type" type="str" optional>
|
||||
Type of data source. It can be automatically detected but user can force what data type to load as.
|
||||
</ParamField>
|
||||
<ParamField path="metadata" type="dict" optional>
|
||||
Any metadata that you want to store with the data source. Metadata is generally really useful for doing metadata filtering on top of semantic search to yield faster search and better results.
|
||||
</ParamField>
|
||||
|
||||
## Usage
|
||||
|
||||
### Load data from webpage
|
||||
|
||||
```python Code example
|
||||
from embedchain import Pipeline as App
|
||||
|
||||
app = App()
|
||||
app.add("https://www.forbes.com/profile/elon-musk")
|
||||
# Inserting batches in chromadb: 100%|███████████████| 1/1 [00:00<00:00, 1.19it/s]
|
||||
# Successfully saved https://www.forbes.com/profile/elon-musk (DataType.WEB_PAGE). New chunks count: 4
|
||||
```
|
||||
|
||||
### Load data from sitemap
|
||||
|
||||
```python Code example
|
||||
from embedchain import Pipeline as App
|
||||
|
||||
app = App()
|
||||
app.add("https://python.langchain.com/sitemap.xml", data_type="sitemap")
|
||||
# Loading pages: 100%|█████████████| 1108/1108 [00:47<00:00, 23.17it/s]
|
||||
# Inserting batches in chromadb: 100%|█████████| 111/111 [04:41<00:00, 2.54s/it]
|
||||
# Successfully saved https://python.langchain.com/sitemap.xml (DataType.SITEMAP). New chunks count: 11024
|
||||
```
|
||||
|
||||
You can find complete list of supported data sources [here](/components/data-sources/overview).
|
||||
@@ -0,0 +1,97 @@
|
||||
---
|
||||
title: '💬 chat'
|
||||
---
|
||||
|
||||
`chat()` method allows you to chat over your data sources using a user-friendly chat API. You can find the signature below:
|
||||
|
||||
### Parameters
|
||||
|
||||
<ParamField path="input_query" type="str">
|
||||
Question to ask
|
||||
</ParamField>
|
||||
<ParamField path="config" type="BaseLlmConfig" optional>
|
||||
Configure different llm settings such as prompt, temprature, number_documents etc.
|
||||
</ParamField>
|
||||
<ParamField path="dry_run" type="bool" optional>
|
||||
The purpose is to test the prompt structure without actually running LLM inference. Defaults to `False`
|
||||
</ParamField>
|
||||
<ParamField path="where" type="dict" optional>
|
||||
A dictionary of key-value pairs to filter the chunks from the vector database. Defaults to `None`
|
||||
</ParamField>
|
||||
<ParamField path="citations" type="bool" optional>
|
||||
Return citations along with the LLM answer. Defaults to `False`
|
||||
</ParamField>
|
||||
|
||||
### Returns
|
||||
|
||||
<ResponseField name="answer" type="str | tuple">
|
||||
If `citations=False`, return a stringified answer to the question asked. <br />
|
||||
If `citations=True`, returns a tuple with answer and citations respectively.
|
||||
</ResponseField>
|
||||
|
||||
## Usage
|
||||
|
||||
### With citations
|
||||
|
||||
If you want to get the answer to question and return both answer and citations, use the following code snippet:
|
||||
|
||||
```python With Citations
|
||||
from embedchain import Pipeline as App
|
||||
|
||||
# Initialize app
|
||||
app = App()
|
||||
|
||||
# Add data source
|
||||
app.add("https://www.forbes.com/profile/elon-musk")
|
||||
|
||||
# Get relevant answer for your query
|
||||
answer, sources = app.chat("What is the net worth of Elon?", citations=True)
|
||||
print(answer)
|
||||
# Answer: The net worth of Elon Musk is $221.9 billion.
|
||||
|
||||
print(sources)
|
||||
# [
|
||||
# (
|
||||
# 'Elon Musk PROFILEElon MuskCEO, Tesla$247.1B$2.3B (0.96%)Real Time Net Worthas of 12/7/23 ...',
|
||||
# 'https://www.forbes.com/profile/elon-musk',
|
||||
# '4651b266--4aa78839fe97'
|
||||
# ),
|
||||
# (
|
||||
# '74% of the company, which is now called X.Wealth HistoryHOVER TO REVEAL NET WORTH BY YEARForbes ...',
|
||||
# 'https://www.forbes.com/profile/elon-musk',
|
||||
# '4651b266--4aa78839fe97'
|
||||
# ),
|
||||
# (
|
||||
# 'founded in 2002, is worth nearly $150 billion after a $750 million tender offer in June 2023 ...',
|
||||
# 'https://www.forbes.com/profile/elon-musk',
|
||||
# '4651b266--4aa78839fe97'
|
||||
# )
|
||||
# ]
|
||||
```
|
||||
|
||||
<Note>
|
||||
When `citations=True`, note that the returned `sources` are a list of tuples where each tuple has three elements (in the following order):
|
||||
1. source chunk
|
||||
2. link of the source document
|
||||
3. document id (used for book keeping purposes)
|
||||
</Note>
|
||||
|
||||
|
||||
### Without citations
|
||||
|
||||
If you just want to return answers and don't want to return citations, you can use the following example:
|
||||
|
||||
```python Without Citations
|
||||
from embedchain import Pipeline as App
|
||||
|
||||
# Initialize app
|
||||
app = App()
|
||||
|
||||
# Add data source
|
||||
app.add("https://www.forbes.com/profile/elon-musk")
|
||||
|
||||
# Chat on your data using `.chat()`
|
||||
answer = app.chat("What is the net worth of Elon?")
|
||||
print(answer)
|
||||
# Answer: The net worth of Elon Musk is $221.9 billion.
|
||||
```
|
||||
@@ -0,0 +1,19 @@
|
||||
---
|
||||
title: 🗑 delete
|
||||
---
|
||||
|
||||
`delete_chat_history()` method allows you to delete all previous messages in a chat history.
|
||||
|
||||
## Usage
|
||||
|
||||
```python
|
||||
from embedchain import Pipeline as App
|
||||
|
||||
app = App()
|
||||
|
||||
app.add("https://www.forbes.com/profile/elon-musk")
|
||||
|
||||
app.chat("What is the net worth of Elon Musk?")
|
||||
|
||||
app.delete_chat_history()
|
||||
```
|
||||
@@ -0,0 +1,31 @@
|
||||
---
|
||||
title: 🚀 deploy
|
||||
---
|
||||
|
||||
Using the `deploy()` method, Embedchain allows developers to easily launch their LLM-powered applications on the [Embedchain Platform](https://app.embedchain.ai). This platform facilitates seamless access to your data's context via a free and user-friendly REST API. Once your pipeline is deployed, you can update your data sources at any time.
|
||||
|
||||
The `deploy()` method not only deploys your pipeline but also efficiently manages LLMs, vector databases, embedding models, and data syncing, enabling you to focus on querying, chatting, or searching without the hassle of infrastructure management.
|
||||
|
||||
## Usage
|
||||
|
||||
```python
|
||||
from embedchain import Pipeline as App
|
||||
|
||||
# Initialize app
|
||||
app = App()
|
||||
|
||||
# Add data source
|
||||
app.add("https://www.forbes.com/profile/elon-musk")
|
||||
|
||||
# Deploy your pipeline to Embedchain Platform
|
||||
app.deploy()
|
||||
|
||||
# 🔑 Enter your Embedchain API key. You can find the API key at https://app.embedchain.ai/settings/keys/
|
||||
# ec-xxxxxx
|
||||
|
||||
# 🛠️ Creating pipeline on the platform...
|
||||
# 🎉🎉🎉 Pipeline created successfully! View your pipeline: https://app.embedchain.ai/pipelines/xxxxx
|
||||
|
||||
# 🛠️ Adding data to your pipeline...
|
||||
# ✅ Data of type: web_page, value: https://www.forbes.com/profile/elon-musk added successfully.
|
||||
```
|
||||
@@ -0,0 +1,130 @@
|
||||
---
|
||||
title: "Pipeline"
|
||||
---
|
||||
|
||||
Create a RAG pipeline object on Embedchain. This is the main entrypoint for a developer to interact with Embedchain APIs. A pipeline configures the llm, vector database, embedding model, and retrieval strategy of your choice.
|
||||
|
||||
### Attributes
|
||||
|
||||
<ParamField path="local_id" type="str">
|
||||
Pipeline ID
|
||||
</ParamField>
|
||||
<ParamField path="name" type="str" optional>
|
||||
Name of the pipeline
|
||||
</ParamField>
|
||||
<ParamField path="config" type="BaseConfig">
|
||||
Configuration of the pipeline
|
||||
</ParamField>
|
||||
<ParamField path="llm" type="BaseLlm">
|
||||
Configured LLM for the RAG pipeline
|
||||
</ParamField>
|
||||
<ParamField path="db" type="BaseVectorDB">
|
||||
Configured vector database for the RAG pipeline
|
||||
</ParamField>
|
||||
<ParamField path="embedding_model" type="BaseEmbedder">
|
||||
Configured embedding model for the RAG pipeline
|
||||
</ParamField>
|
||||
<ParamField path="chunker" type="ChunkerConfig">
|
||||
Chunker configuration
|
||||
</ParamField>
|
||||
<ParamField path="client" type="Client" optional>
|
||||
Client object (used to deploy a pipeline to Embedchain platform)
|
||||
</ParamField>
|
||||
<ParamField path="logger" type="logging.Logger">
|
||||
Logger object
|
||||
</ParamField>
|
||||
|
||||
## Usage
|
||||
|
||||
You can create an embedchain pipeline instance using the following methods:
|
||||
|
||||
### Default setting
|
||||
|
||||
```python Code Example
|
||||
from embedchain import Pipeline as App
|
||||
app = App()
|
||||
```
|
||||
|
||||
|
||||
### Python Dict
|
||||
|
||||
```python Code Example
|
||||
from embedchain import Pipeline as App
|
||||
|
||||
config_dict = {
|
||||
'llm': {
|
||||
'provider': 'gpt4all',
|
||||
'config': {
|
||||
'model': 'orca-mini-3b-gguf2-q4_0.gguf',
|
||||
'temperature': 0.5,
|
||||
'max_tokens': 1000,
|
||||
'top_p': 1,
|
||||
'stream': False
|
||||
}
|
||||
},
|
||||
'embedder': {
|
||||
'provider': 'gpt4all'
|
||||
}
|
||||
}
|
||||
|
||||
# load llm configuration from config dict
|
||||
app = App.from_config(config=config_dict)
|
||||
```
|
||||
|
||||
### YAML Config
|
||||
|
||||
<CodeGroup>
|
||||
|
||||
```python main.py
|
||||
from embedchain import Pipeline as App
|
||||
|
||||
# load llm configuration from config.yaml file
|
||||
app = App.from_config(config_path="config.yaml")
|
||||
```
|
||||
|
||||
```yaml config.yaml
|
||||
llm:
|
||||
provider: gpt4all
|
||||
config:
|
||||
model: 'orca-mini-3b-gguf2-q4_0.gguf'
|
||||
temperature: 0.5
|
||||
max_tokens: 1000
|
||||
top_p: 1
|
||||
stream: false
|
||||
|
||||
embedder:
|
||||
provider: gpt4all
|
||||
```
|
||||
|
||||
</CodeGroup>
|
||||
|
||||
### JSON Config
|
||||
|
||||
<CodeGroup>
|
||||
|
||||
```python main.py
|
||||
from embedchain import Pipeline as App
|
||||
|
||||
# load llm configuration from config.json file
|
||||
app = App.from_config(config_path="config.json")
|
||||
```
|
||||
|
||||
```json config.json
|
||||
{
|
||||
"llm": {
|
||||
"provider": "gpt4all",
|
||||
"config": {
|
||||
"model": "orca-mini-3b-gguf2-q4_0.gguf",
|
||||
"temperature": 0.5,
|
||||
"max_tokens": 1000,
|
||||
"top_p": 1,
|
||||
"stream": false
|
||||
}
|
||||
},
|
||||
"embedder": {
|
||||
"provider": "gpt4all"
|
||||
}
|
||||
}
|
||||
```
|
||||
|
||||
</CodeGroup>
|
||||
@@ -0,0 +1,97 @@
|
||||
---
|
||||
title: '❓ query'
|
||||
---
|
||||
|
||||
`.query()` method empowers developers to ask questions and receive relevant answers through a user-friendly query API. Function signature is given below:
|
||||
|
||||
### Parameters
|
||||
|
||||
<ParamField path="input_query" type="str">
|
||||
Question to ask
|
||||
</ParamField>
|
||||
<ParamField path="config" type="BaseLlmConfig" optional>
|
||||
Configure different llm settings such as prompt, temprature, number_documents etc.
|
||||
</ParamField>
|
||||
<ParamField path="dry_run" type="bool" optional>
|
||||
The purpose is to test the prompt structure without actually running LLM inference. Defaults to `False`
|
||||
</ParamField>
|
||||
<ParamField path="where" type="dict" optional>
|
||||
A dictionary of key-value pairs to filter the chunks from the vector database. Defaults to `None`
|
||||
</ParamField>
|
||||
<ParamField path="citations" type="bool" optional>
|
||||
Return citations along with the LLM answer. Defaults to `False`
|
||||
</ParamField>
|
||||
|
||||
### Returns
|
||||
|
||||
<ResponseField name="answer" type="str | tuple">
|
||||
If `citations=False`, return a stringified answer to the question asked. <br />
|
||||
If `citations=True`, returns a tuple with answer and citations respectively.
|
||||
</ResponseField>
|
||||
|
||||
## Usage
|
||||
|
||||
### With citations
|
||||
|
||||
If you want to get the answer to question and return both answer and citations, use the following code snippet:
|
||||
|
||||
```python With Citations
|
||||
from embedchain import Pipeline as App
|
||||
|
||||
# Initialize app
|
||||
app = App()
|
||||
|
||||
# Add data source
|
||||
app.add("https://www.forbes.com/profile/elon-musk")
|
||||
|
||||
# Get relevant answer for your query
|
||||
answer, sources = app.query("What is the net worth of Elon?", citations=True)
|
||||
print(answer)
|
||||
# Answer: The net worth of Elon Musk is $221.9 billion.
|
||||
|
||||
print(sources)
|
||||
# [
|
||||
# (
|
||||
# 'Elon Musk PROFILEElon MuskCEO, Tesla$247.1B$2.3B (0.96%)Real Time Net Worthas of 12/7/23 ...',
|
||||
# 'https://www.forbes.com/profile/elon-musk',
|
||||
# '4651b266--4aa78839fe97'
|
||||
# ),
|
||||
# (
|
||||
# '74% of the company, which is now called X.Wealth HistoryHOVER TO REVEAL NET WORTH BY YEARForbes ...',
|
||||
# 'https://www.forbes.com/profile/elon-musk',
|
||||
# '4651b266--4aa78839fe97'
|
||||
# ),
|
||||
# (
|
||||
# 'founded in 2002, is worth nearly $150 billion after a $750 million tender offer in June 2023 ...',
|
||||
# 'https://www.forbes.com/profile/elon-musk',
|
||||
# '4651b266--4aa78839fe97'
|
||||
# )
|
||||
# ]
|
||||
```
|
||||
|
||||
<Note>
|
||||
When `citations=True`, note that the returned `sources` are a list of tuples where each tuple has three elements (in the following order):
|
||||
1. source chunk
|
||||
2. link of the source document
|
||||
3. document id (used for book keeping purposes)
|
||||
</Note>
|
||||
|
||||
### Without citations
|
||||
|
||||
If you just want to return answers and don't want to return citations, you can use the following example:
|
||||
|
||||
```python Without Citations
|
||||
from embedchain import Pipeline as App
|
||||
|
||||
# Initialize app
|
||||
app = App()
|
||||
|
||||
# Add data source
|
||||
app.add("https://www.forbes.com/profile/elon-musk")
|
||||
|
||||
# Get relevant answer for your query
|
||||
answer = app.query("What is the net worth of Elon?")
|
||||
print(answer)
|
||||
# Answer: The net worth of Elon Musk is $221.9 billion.
|
||||
```
|
||||
|
||||
@@ -0,0 +1,17 @@
|
||||
---
|
||||
title: 🔄 reset
|
||||
---
|
||||
|
||||
`reset()` method allows you to wipe the data from your RAG application and start from scratch.
|
||||
|
||||
## Usage
|
||||
|
||||
```python
|
||||
from embedchain import Pipeline as App
|
||||
|
||||
app = App()
|
||||
app.add("https://www.forbes.com/profile/elon-musk")
|
||||
|
||||
# Reset the app
|
||||
app.reset()
|
||||
```
|
||||
@@ -0,0 +1,51 @@
|
||||
---
|
||||
title: '🔍 search'
|
||||
---
|
||||
|
||||
`.search()` enables you to uncover the most pertinent context by performing a semantic search across your data sources based on a given query. Refer to the function signature below:
|
||||
|
||||
### Parameters
|
||||
|
||||
<ParamField path="query" type="str">
|
||||
Question
|
||||
</ParamField>
|
||||
<ParamField path="num_documents" type="int" optional>
|
||||
Number of relevant documents to fetch. Defaults to `3`
|
||||
</ParamField>
|
||||
|
||||
### Returns
|
||||
|
||||
<ResponseField name="answer" type="dict">
|
||||
Return list of dictionaries that contain the relevant chunk and their source information.
|
||||
</ResponseField>
|
||||
|
||||
## Usage
|
||||
|
||||
Refer to the following example on how to use the search api:
|
||||
|
||||
```python Code example
|
||||
from embedchain import Pipeline as App
|
||||
|
||||
# Initialize app
|
||||
app = App()
|
||||
|
||||
# Add data source
|
||||
app.add("https://www.forbes.com/profile/elon-musk")
|
||||
|
||||
# Get relevant context using semantic search
|
||||
context = app.search("What is the net worth of Elon?", num_documents=2)
|
||||
print(context)
|
||||
# Context:
|
||||
# [
|
||||
# {
|
||||
# 'context': 'Elon Musk PROFILEElon MuskCEO, Tesla$221.9BReal Time Net Worthas of 10/29/23Reflects change since 5 pm ET of prior trading day. 1 in the world todayPhoto by Martin Schoeller for ForbesAbout Elon MuskElon Musk cofounded six companies, including electric car maker Tesla, rocket producer SpaceX and tunneling startup Boring Company.He owns about 21% of Tesla between stock and options, but has pledged more than half his shares as collateral for personal loans of up to $3.5 billion.SpaceX, founded in',
|
||||
# 'source': 'https://www.forbes.com/profile/elon-musk',
|
||||
# 'document_id': 'some_document_id'
|
||||
# },
|
||||
# {
|
||||
# 'context': 'company, which is now called X.Wealth HistoryHOVER TO REVEAL NET WORTH BY YEARForbes Lists 1Forbes 400 (2023)The Richest Person In Every State (2023) 2Billionaires (2023) 1Innovative Leaders (2019) 25Powerful People (2018) 12Richest In Tech (2017)Global Game Changers (2016)More ListsPersonal StatsAge52Source of WealthTesla, SpaceX, Self MadeSelf-Made Score8Philanthropy Score1ResidenceAustin, TexasCitizenshipUnited StatesMarital StatusSingleChildren11EducationBachelor of Arts/Science, University',
|
||||
# 'source': 'https://www.forbes.com/profile/elon-musk',
|
||||
# 'document_id': 'some_document_id'
|
||||
# }
|
||||
# ]
|
||||
```
|
||||
@@ -0,0 +1,54 @@
|
||||
---
|
||||
title: 'AI Assistant'
|
||||
---
|
||||
|
||||
The `AIAssistant` class, an alternative to the OpenAI Assistant API, is designed for those who prefer using large language models (LLMs) other than those provided by OpenAI. It facilitates the creation of AI Assistants with several key benefits:
|
||||
|
||||
- **Visibility into Citations**: It offers transparent access to the sources and citations used by the AI, enhancing the understanding and trustworthiness of its responses.
|
||||
|
||||
- **Debugging Capabilities**: Users have the ability to delve into and debug the AI's processes, allowing for a deeper understanding and fine-tuning of its performance.
|
||||
|
||||
- **Customizable Prompts**: The class provides the flexibility to modify and tailor prompts according to specific needs, enabling more precise and relevant interactions.
|
||||
|
||||
- **Chain of Thought Integration**: It supports the incorporation of a 'chain of thought' approach, which helps in breaking down complex queries into simpler, sequential steps, thereby improving the clarity and accuracy of responses.
|
||||
|
||||
It is ideal for those who value customization, transparency, and detailed control over their AI Assistant's functionalities.
|
||||
|
||||
### Arguments
|
||||
|
||||
<ParamField path="name" type="string" optional>
|
||||
Name for your AI assistant
|
||||
</ParamField>
|
||||
|
||||
<ParamField path="instructions" type="string" optional>
|
||||
How the Assistant and model should behave or respond
|
||||
</ParamField>
|
||||
|
||||
<ParamField path="assistant_id" type="string" optional>
|
||||
Load existing AI Assistant. If you pass this, you don't have to pass other arguments.
|
||||
</ParamField>
|
||||
|
||||
<ParamField path="thread_id" type="string" optional>
|
||||
Existing thread id if exists
|
||||
</ParamField>
|
||||
|
||||
<ParamField path="yaml_path" type="str" Optional>
|
||||
Embedchain pipeline config yaml path to use. This will define the configuration of the AI Assistant (such as configuring the LLM, vector database, and embedding model)
|
||||
</ParamField>
|
||||
|
||||
<ParamField path="data_sources" type="list" default="[]">
|
||||
Add data sources to your assistant. You can add in the following format: `[{"source": "https://example.com", "data_type": "web_page"}]`
|
||||
</ParamField>
|
||||
|
||||
<ParamField path="collect_metrics" type="boolean" default="True">
|
||||
Anonymous telemetry (doesn't collect any user information or user's files). Used to improve the Embedchain package utilization. Default is `True`.
|
||||
</ParamField>
|
||||
|
||||
|
||||
## Usage
|
||||
|
||||
For detailed guidance on creating your own AI Assistant, click the link below. It provides step-by-step instructions to help you through the process:
|
||||
|
||||
<Card title="Guide to Creating Your AI Assistant" icon="link" href="/examples/opensource-assistant">
|
||||
Learn how to build a customized AI Assistant using the `AIAssistant` class.
|
||||
</Card>
|
||||
@@ -0,0 +1,45 @@
|
||||
---
|
||||
title: 'OpenAI Assistant'
|
||||
---
|
||||
|
||||
### Arguments
|
||||
|
||||
<ParamField path="name" type="string">
|
||||
Name for your AI assistant
|
||||
</ParamField>
|
||||
|
||||
<ParamField path="instructions" type="string">
|
||||
how the Assistant and model should behave or respond
|
||||
</ParamField>
|
||||
|
||||
<ParamField path="assistant_id" type="string">
|
||||
Load existing OpenAI Assistant. If you pass this, you don't have to pass other arguments.
|
||||
</ParamField>
|
||||
|
||||
<ParamField path="thread_id" type="string">
|
||||
Existing OpenAI thread id if exists
|
||||
</ParamField>
|
||||
|
||||
<ParamField path="model" type="str" default="gpt-4-1106-preview">
|
||||
OpenAI model to use
|
||||
</ParamField>
|
||||
|
||||
<ParamField path="tools" type="list">
|
||||
OpenAI tools to use. Default set to `[{"type": "retrieval"}]`
|
||||
</ParamField>
|
||||
|
||||
<ParamField path="data_sources" type="list" default="[]">
|
||||
Add data sources to your assistant. You can add in the following format: `[{"source": "https://example.com", "data_type": "web_page"}]`
|
||||
</ParamField>
|
||||
|
||||
<ParamField path="telemetry" type="boolean" default="True">
|
||||
Anonymous telemetry (doesn't collect any user information or user's files). Used to improve the Embedchain package utilization. Default is `True`.
|
||||
</ParamField>
|
||||
|
||||
## Usage
|
||||
|
||||
For detailed guidance on creating your own OpenAI Assistant, click the link below. It provides step-by-step instructions to help you through the process:
|
||||
|
||||
<Card title="Guide to Creating Your OpenAI Assistant" icon="link" href="/examples/openai-assistant">
|
||||
Learn how to build an OpenAI Assistant using the `OpenAIAssistant` class.
|
||||
</Card>
|
||||
@@ -0,0 +1,28 @@
|
||||
---
|
||||
title: 🤝 Connect with Us
|
||||
---
|
||||
|
||||
We believe in building a vibrant and supportive community around embedchain. There are various channels through which you can connect with us, stay updated, and contribute to the ongoing discussions:
|
||||
|
||||
<CardGroup cols={3}>
|
||||
<Card title="Twitter" icon="twitter" href="https://twitter.com/embedchain">
|
||||
Follow us on Twitter
|
||||
</Card>
|
||||
<Card title="Slack" icon="slack" href="https://join.slack.com/t/embedchain/shared_invite/zt-22uwz3c46-Zg7cIh5rOBteT_xe1jwLDw" color="#4A154B">
|
||||
Join our slack community
|
||||
</Card>
|
||||
<Card title="Discord" icon="discord" href="https://discord.gg/6PzXDgEjG5" color="#7289DA">
|
||||
Join our discord community
|
||||
</Card>
|
||||
<Card title="LinkedIn" icon="linkedin" href="https://www.linkedin.com/company/embedchain/">
|
||||
Connect with us on LinkedIn
|
||||
</Card>
|
||||
<Card title="Schedule a call" icon="calendar" href="https://cal.com/taranjeetio/ec">
|
||||
Schedule a call with Embedchain founder
|
||||
</Card>
|
||||
<Card title="Newsletter" icon="message" href="https://embedchain.substack.com/">
|
||||
Subscribe to our newsletter
|
||||
</Card>
|
||||
</CardGroup>
|
||||
|
||||
We look forward to connecting with you and seeing how we can create amazing things together!
|
||||
@@ -0,0 +1,16 @@
|
||||
---
|
||||
title: "🐝 Beehiiv"
|
||||
---
|
||||
|
||||
To add any Beehiiv data sources to your app, just add the base url as the source and set the data_type to `beehiiv`.
|
||||
|
||||
```python
|
||||
from embedchain import Pipeline as App
|
||||
|
||||
app = App()
|
||||
|
||||
# source: just add the base url and set the data_type to 'beehiiv'
|
||||
app.add('https://aibreakfast.beehiiv.com', data_type='beehiiv')
|
||||
app.query("How much is OpenAI paying developers?")
|
||||
# Answer: OpenAI is aggressively recruiting Google's top AI researchers with offers ranging between $5 to $10 million annually, primarily in stock options.
|
||||
```
|
||||
@@ -0,0 +1,19 @@
|
||||
---
|
||||
title: '📊 CSV'
|
||||
---
|
||||
|
||||
To add any csv file, use the data_type as `csv`. `csv` allows remote urls and conventional file paths. Headers are included for each line, so if you have an `age` column, `18` will be added as `age: 18`. Eg:
|
||||
|
||||
```python
|
||||
from embedchain import Pipeline as App
|
||||
|
||||
app = App()
|
||||
app.add('https://people.sc.fsu.edu/~jburkardt/data/csv/airtravel.csv', data_type="csv")
|
||||
# Or add using the local file path
|
||||
# app.add('/path/to/file.csv', data_type="csv")
|
||||
|
||||
app.query("Summarize the air travel data")
|
||||
# Answer: The air travel data shows the number of flights for the months of July in the years 1958, 1959, and 1960. In July 1958, there were 491 flights, in July 1959 there were 548 flights, and in July 1960 there were 622 flights.
|
||||
```
|
||||
|
||||
Note: There is a size limit allowed for csv file beyond which it can throw error. This limit is set by the LLMs. Please consider chunking large csv files into smaller csv files.
|
||||
@@ -0,0 +1,41 @@
|
||||
---
|
||||
title: '⚙️ Custom'
|
||||
---
|
||||
|
||||
When we say "custom", we mean that you can customize the loader and chunker to your needs. This is done by passing a custom loader and chunker to the `add` method.
|
||||
|
||||
```python
|
||||
from embedchain import Pipeline as App
|
||||
import your_loader
|
||||
import your_chunker
|
||||
|
||||
app = App()
|
||||
loader = your_loader()
|
||||
chunker = your_chunker()
|
||||
|
||||
app.add("source", data_type="custom", loader=loader, chunker=chunker)
|
||||
```
|
||||
|
||||
<Note>
|
||||
The custom loader and chunker must be a class that inherits from the [`BaseLoader`](https://github.com/embedchain/embedchain/blob/main/embedchain/loaders/base_loader.py) and [`BaseChunker`](https://github.com/embedchain/embedchain/blob/main/embedchain/chunkers/base_chunker.py) classes respectively.
|
||||
</Note>
|
||||
|
||||
<Note>
|
||||
If the `data_type` is not a valid data type, the `add` method will fallback to the `custom` data type and expect a custom loader and chunker to be passed by the user.
|
||||
</Note>
|
||||
|
||||
Example:
|
||||
|
||||
```python
|
||||
from embedchain import Pipeline as App
|
||||
from embedchain.loaders.github import GithubLoader
|
||||
|
||||
app = App()
|
||||
|
||||
loader = GithubLoader(config={"token": "ghp_xxx"})
|
||||
|
||||
app.add("repo:embedchain/embedchain type:repo", data_type="github", loader=loader)
|
||||
|
||||
app.query("What is Embedchain?")
|
||||
# Answer: Embedchain is a Data Platform for Large Language Models (LLMs). It allows users to seamlessly load, index, retrieve, and sync unstructured data in order to build dynamic, LLM-powered applications. There is also a JavaScript implementation called embedchain-js available on GitHub.
|
||||
```
|
||||
@@ -0,0 +1,64 @@
|
||||
---
|
||||
title: 'Data type handling'
|
||||
---
|
||||
|
||||
## Automatic data type detection
|
||||
|
||||
The add method automatically tries to detect the data_type, based on your input for the source argument. So `app.add('https://www.youtube.com/watch?v=dQw4w9WgXcQ')` is enough to embed a YouTube video.
|
||||
|
||||
This detection is implemented for all formats. It is based on factors such as whether it's a URL, a local file, the source data type, etc.
|
||||
|
||||
### Debugging automatic detection
|
||||
|
||||
Set `log_level: DEBUG` in the config yaml to debug if the data type detection is done right or not. Otherwise, you will not know when, for instance, an invalid filepath is interpreted as raw text instead.
|
||||
|
||||
### Forcing a data type
|
||||
|
||||
To omit any issues with the data type detection, you can **force** a data_type by adding it as a `add` method argument.
|
||||
The examples below show you the keyword to force the respective `data_type`.
|
||||
|
||||
Forcing can also be used for edge cases, such as interpreting a sitemap as a web_page, for reading its raw text instead of following links.
|
||||
|
||||
## Remote data types
|
||||
|
||||
<Tip>
|
||||
**Use local files in remote data types**
|
||||
|
||||
Some data_types are meant for remote content and only work with URLs.
|
||||
You can pass local files by formatting the path using the `file:` [URI scheme](https://en.wikipedia.org/wiki/File_URI_scheme), e.g. `file:///info.pdf`.
|
||||
</Tip>
|
||||
|
||||
## Reusing a vector database
|
||||
|
||||
Default behavior is to create a persistent vector db in the directory **./db**. You can split your application into two Python scripts: one to create a local vector db and the other to reuse this local persistent vector db. This is useful when you want to index hundreds of documents and separately implement a chat interface.
|
||||
|
||||
Create a local index:
|
||||
|
||||
```python
|
||||
from embedchain import Pipeline as App
|
||||
|
||||
naval_chat_bot = App()
|
||||
naval_chat_bot.add("https://www.youtube.com/watch?v=3qHkcs3kG44")
|
||||
naval_chat_bot.add("https://navalmanack.s3.amazonaws.com/Eric-Jorgenson_The-Almanack-of-Naval-Ravikant_Final.pdf")
|
||||
```
|
||||
|
||||
You can reuse the local index with the same code, but without adding new documents:
|
||||
|
||||
```python
|
||||
from embedchain import Pipeline as App
|
||||
|
||||
naval_chat_bot = App()
|
||||
print(naval_chat_bot.query("What unique capacity does Naval argue humans possess when it comes to understanding explanations or concepts?"))
|
||||
```
|
||||
|
||||
## Resetting an app and vector database
|
||||
|
||||
You can reset the app by simply calling the `reset` method. This will delete the vector database and all other app related files.
|
||||
|
||||
```python
|
||||
from embedchain import Pipeline as App
|
||||
|
||||
app = App()
|
||||
app.add("https://www.youtube.com/watch?v=3qHkcs3kG44")
|
||||
app.reset()
|
||||
```
|
||||
@@ -0,0 +1,41 @@
|
||||
---
|
||||
title: '📁 Directory'
|
||||
---
|
||||
|
||||
To use an entire directory as data source, just add `data_type` as `directory` and pass in the path of the local directory.
|
||||
|
||||
### Without customization
|
||||
|
||||
```python
|
||||
import os
|
||||
from embedchain import Pipeline as App
|
||||
|
||||
os.environ["OPENAI_API_KEY"] = "sk-xxx"
|
||||
|
||||
app = App()
|
||||
app.add("./elon-musk", data_type="directory")
|
||||
response = app.query("list all files")
|
||||
print(response)
|
||||
# Answer: Files are elon-musk-1.txt, elon-musk-2.pdf.
|
||||
```
|
||||
|
||||
### Customization
|
||||
|
||||
```python
|
||||
import os
|
||||
from embedchain import Pipeline as App
|
||||
from embedchain.loaders.directory_loader import DirectoryLoader
|
||||
|
||||
os.environ["OPENAI_API_KEY"] = "sk-xxx"
|
||||
lconfig = {
|
||||
"recursive": True,
|
||||
"extensions": [".txt"]
|
||||
}
|
||||
loader = DirectoryLoader(config=lconfig)
|
||||
app = App()
|
||||
app.add("./elon-musk", loader=loader)
|
||||
response = app.query("what are all the files related to?")
|
||||
print(response)
|
||||
|
||||
# Answer: The files are related to Elon Musk.
|
||||
```
|
||||
@@ -0,0 +1,28 @@
|
||||
---
|
||||
title: "💬 Discord"
|
||||
---
|
||||
|
||||
To add any Discord channel messages to your app, just add the `channel_id` as the source and set the `data_type` to `discord`.
|
||||
|
||||
<Note>
|
||||
This loader requires a Discord bot token with read messages access.
|
||||
To obtain the token, follow the instructions provided in this tutorial:
|
||||
<a href="https://www.writebots.com/discord-bot-token/">How to Get a Discord Bot Token?</a>.
|
||||
</Note>
|
||||
|
||||
```python
|
||||
import os
|
||||
from embedchain import Pipeline as App
|
||||
|
||||
# add your discord "BOT" token
|
||||
os.environ["DISCORD_TOKEN"] = "xxx"
|
||||
|
||||
app = App()
|
||||
|
||||
app.add("1177296711023075338", data_type="discord")
|
||||
|
||||
response = app.query("What is Joe saying about Elon Musk?")
|
||||
|
||||
print(response)
|
||||
# Answer: Joe is saying "Elon Musk is a genius".
|
||||
```
|
||||
@@ -0,0 +1,44 @@
|
||||
---
|
||||
title: '🗨️ Discourse'
|
||||
---
|
||||
|
||||
You can now easily load data from your community built with [Discourse](https://discourse.org/).
|
||||
|
||||
## Example
|
||||
|
||||
1. Setup the Discourse Loader with your community url.
|
||||
```Python
|
||||
from embedchain.loaders.discourse import DiscourseLoader
|
||||
|
||||
dicourse_loader = DiscourseLoader(config={"domain": "https://community.openai.com"})
|
||||
```
|
||||
|
||||
2. Once you setup the loader, you can create an app and load data using the above discourse loader
|
||||
```Python
|
||||
import os
|
||||
from embedchain.pipeline import Pipeline as App
|
||||
|
||||
os.environ["OPENAI_API_KEY"] = "sk-xxx"
|
||||
|
||||
app = App()
|
||||
|
||||
app.add("openai after:2023-10-1", data_type="discourse", loader=dicourse_loader)
|
||||
|
||||
question = "Where can I find the OpenAI API status page?"
|
||||
app.query(question)
|
||||
# Answer: You can find the OpenAI API status page at https:/status.openai.com/.
|
||||
```
|
||||
|
||||
NOTE: The `add` function of the app will accept any executable search query to load data. Refer [Discourse API Docs](https://docs.discourse.org/#tag/Search) to learn more about search queries.
|
||||
|
||||
3. We automatically create a chunker to chunk your discourse data, however if you wish to provide your own chunker class. Here is how you can do that:
|
||||
```Python
|
||||
|
||||
from embedchain.chunkers.discourse import DiscourseChunker
|
||||
from embedchain.config.add_config import ChunkerConfig
|
||||
|
||||
discourse_chunker_config = ChunkerConfig(chunk_size=1000, chunk_overlap=0, length_function=len)
|
||||
discourse_chunker = DiscourseChunker(config=discourse_chunker_config)
|
||||
|
||||
app.add("openai", data_type='discourse', loader=dicourse_loader, chunker=discourse_chunker)
|
||||
```
|
||||
@@ -0,0 +1,14 @@
|
||||
---
|
||||
title: '📚 Code documentation'
|
||||
---
|
||||
|
||||
To add any code documentation website as a loader, use the data_type as `docs_site`. Eg:
|
||||
|
||||
```python
|
||||
from embedchain import Pipeline as App
|
||||
|
||||
app = App()
|
||||
app.add("https://docs.embedchain.ai/", data_type="docs_site")
|
||||
app.query("What is Embedchain?")
|
||||
# Answer: Embedchain is a platform that utilizes various components, including paid/proprietary ones, to provide what is believed to be the best configuration available. It uses LLM (Language Model) providers such as OpenAI, Anthpropic, Vertex_AI, GPT4ALL, Azure_OpenAI, LLAMA2, JINA, and COHERE. Embedchain allows users to import and utilize these LLM providers for their applications.'
|
||||
```
|
||||
@@ -0,0 +1,18 @@
|
||||
---
|
||||
title: '📄 Docx file'
|
||||
---
|
||||
|
||||
### Docx file
|
||||
|
||||
To add any doc/docx file, use the data_type as `docx`. `docx` allows remote urls and conventional file paths. Eg:
|
||||
|
||||
```python
|
||||
from embedchain import Pipeline as App
|
||||
|
||||
app = App()
|
||||
app.add('https://example.com/content/intro.docx', data_type="docx")
|
||||
# Or add file using the local file path on your system
|
||||
# app.add('content/intro.docx', data_type="docx")
|
||||
|
||||
app.query("Summarize the docx data?")
|
||||
```
|
||||
@@ -0,0 +1,50 @@
|
||||
---
|
||||
title: 📝 Github
|
||||
---
|
||||
|
||||
1. Setup the Github loader by configuring the Github account with username and personal access token (PAT). Check out [this](https://docs.github.com/en/enterprise-server@3.6/authentication/keeping-your-account-and-data-secure/managing-your-personal-access-tokens#creating-a-personal-access-token) link to learn how to create a PAT.
|
||||
```Python
|
||||
from embedchain.loaders.github import GithubLoader
|
||||
|
||||
loader = GithubLoader(
|
||||
config={
|
||||
"token":"ghp_xxxx"
|
||||
}
|
||||
)
|
||||
```
|
||||
|
||||
2. Once you setup the loader, you can create an app and load data using the above Github loader
|
||||
```Python
|
||||
import os
|
||||
from embedchain.pipeline import Pipeline as App
|
||||
|
||||
os.environ["OPENAI_API_KEY"] = "sk-xxxx"
|
||||
|
||||
app = App()
|
||||
|
||||
app.add("repo:embedchain/embedchain type:repo", data_type="github", loader=loader)
|
||||
|
||||
response = app.query("What is Embedchain?")
|
||||
# Answer: Embedchain is a Data Platform for Large Language Models (LLMs). It allows users to seamlessly load, index, retrieve, and sync unstructured data in order to build dynamic, LLM-powered applications. There is also a JavaScript implementation called embedchain-js available on GitHub.
|
||||
```
|
||||
The `add` function of the app will accept any valid github query with qualifiers. It only supports loading github code, repository, issues and pull-requests.
|
||||
<Note>
|
||||
You must provide qualifiers `type:` and `repo:` in the query. The `type:` qualifier can be a combination of `code`, `repo`, `pr`, `issue`. The `repo:` qualifier must be a valid github repository name.
|
||||
</Note>
|
||||
|
||||
<Card title="Valid queries" icon="lightbulb" iconType="duotone" color="#ca8b04">
|
||||
- `repo:embedchain/embedchain type:repo` - to load the repository
|
||||
- `repo:embedchain/embedchain type:issue,pr` - to load the issues and pull-requests of the repository
|
||||
- `repo:embedchain/embedchain type:issue state:closed` - to load the closed issues of the repository
|
||||
</Card>
|
||||
|
||||
3. We automatically create a chunker to chunk your GitHub data, however if you wish to provide your own chunker class. Here is how you can do that:
|
||||
```Python
|
||||
from embedchain.chunkers.common_chunker import CommonChunker
|
||||
from embedchain.config.add_config import ChunkerConfig
|
||||
|
||||
github_chunker_config = ChunkerConfig(chunk_size=2000, chunk_overlap=0, length_function=len)
|
||||
github_chunker = CommonChunker(config=github_chunker_config)
|
||||
|
||||
app.add(load_query, data_type="github", loader=loader, chunker=github_chunker)
|
||||
```
|
||||
@@ -0,0 +1,34 @@
|
||||
---
|
||||
title: '📬 Gmail'
|
||||
---
|
||||
|
||||
To use GmailLoader you must install the extra dependencies with `pip install --upgrade embedchain[gmail]`.
|
||||
|
||||
The `source` must be a valid Gmail search query, you can refer `https://support.google.com/mail/answer/7190?hl=en` to build a query.
|
||||
|
||||
To load Gmail messages, you MUST use the data_type as `gmail`. Otherwise the source will be detected as simple `text`.
|
||||
|
||||
To use this you need to save `credentials.json` in the directory from where you will run the loader. Follow these steps to get the credentials
|
||||
|
||||
1. Go to the [Google Cloud Console](https://console.cloud.google.com/apis/credentials).
|
||||
2. Create a project if you don't have one already.
|
||||
3. Create an `OAuth Consent Screen` in the project. You may need to select the `external` option.
|
||||
4. Make sure the consent screen is published.
|
||||
5. Enable the [Gmail API](https://console.cloud.google.com/apis/api/gmail.googleapis.com)
|
||||
6. Create credentials from the `Credentials` tab.
|
||||
7. Select the type `OAuth Client ID`.
|
||||
8. Choose the application type `Web application`. As a name you can choose `embedchain` or any other name as per your use case.
|
||||
9. Add an authorized redirect URI for `http://localhost:8080/`.
|
||||
10. You can leave everything else at default, finish the creation.
|
||||
11. When you are done, a modal opens where you can download the details in `json` format.
|
||||
12. Put the `.json` file in your current directory and rename it to `credentials.json`
|
||||
|
||||
```python
|
||||
from embedchain import Pipeline as App
|
||||
|
||||
app = App()
|
||||
|
||||
gmail_filter = "to: me label:inbox"
|
||||
app.add(gmail_filter, data_type="gmail")
|
||||
app.query("Summarize my email conversations")
|
||||
```
|
||||
@@ -0,0 +1,44 @@
|
||||
---
|
||||
title: '📃 JSON'
|
||||
---
|
||||
|
||||
To add any json file, use the data_type as `json`. Headers are included for each line, so for example if you have a json like `{"age": 18}`, then it will be added as `age: 18`.
|
||||
|
||||
Here are the supported sources for loading `json`:
|
||||
|
||||
```
|
||||
1. URL - valid url to json file that ends with ".json" extension.
|
||||
2. Local file - valid url to local json file that ends with ".json" extension.
|
||||
3. String - valid json string (e.g. - app.add('{"foo": "bar"}'))
|
||||
```
|
||||
|
||||
<Tip>
|
||||
If you would like to add other data structures (e.g. list, dict etc.), convert it to a valid json first using `json.dumps()` function.
|
||||
</Tip>
|
||||
|
||||
## Example
|
||||
|
||||
<CodeGroup>
|
||||
|
||||
```python python
|
||||
from embedchain import Pipeline as App
|
||||
|
||||
app = App()
|
||||
|
||||
# Add json file
|
||||
app.add("temp.json")
|
||||
|
||||
app.query("What is the net worth of Elon Musk as of October 2023?")
|
||||
# As of October 2023, Elon Musk's net worth is $255.2 billion.
|
||||
```
|
||||
|
||||
|
||||
```json temp.json
|
||||
{
|
||||
"question": "What is your net worth, Elon Musk?",
|
||||
"answer": "As of October 2023, Elon Musk's net worth is $255.2 billion, making him one of the wealthiest individuals in the world."
|
||||
}
|
||||
```
|
||||
</CodeGroup>
|
||||
|
||||
|
||||
@@ -0,0 +1,14 @@
|
||||
---
|
||||
title: '📝 Mdx file'
|
||||
---
|
||||
|
||||
To add any `.mdx` file to your app, use the data_type (first argument to `.add()` method) as `mdx`. Note that this supports support mdx file present on machine, so this should be a file path. Eg:
|
||||
|
||||
```python
|
||||
from embedchain import Pipeline as App
|
||||
|
||||
app = App()
|
||||
app.add('path/to/file.mdx', data_type='mdx')
|
||||
|
||||
app.query("What are the docs about?")
|
||||
```
|
||||
@@ -0,0 +1,47 @@
|
||||
---
|
||||
title: '🐬 MySQL'
|
||||
---
|
||||
|
||||
1. Setup the MySQL loader by configuring the SQL db.
|
||||
```Python
|
||||
from embedchain.loaders.mysql import MySQLLoader
|
||||
|
||||
config = {
|
||||
"host": "host",
|
||||
"port": "port",
|
||||
"database": "database",
|
||||
"user": "username",
|
||||
"password": "password",
|
||||
}
|
||||
|
||||
mysql_loader = MySQLLoader(config=config)
|
||||
```
|
||||
|
||||
For more details on how to setup with valid config, check MySQL [documentation](https://dev.mysql.com/doc/connector-python/en/connector-python-connectargs.html).
|
||||
|
||||
2. Once you setup the loader, you can create an app and load data using the above MySQL loader
|
||||
```Python
|
||||
from embedchain.pipeline import Pipeline as App
|
||||
|
||||
app = App()
|
||||
|
||||
app.add("SELECT * FROM table_name;", data_type='mysql', loader=mysql_loader)
|
||||
# Adds `(1, 'What is your net worth, Elon Musk?', "As of October 2023, Elon Musk's net worth is $255.2 billion.")`
|
||||
|
||||
response = app.query(question)
|
||||
# Answer: As of October 2023, Elon Musk's net worth is $255.2 billion.
|
||||
```
|
||||
|
||||
NOTE: The `add` function of the app will accept any executable query to load data. DO NOT pass the `CREATE`, `INSERT` queries in `add` function.
|
||||
|
||||
3. We automatically create a chunker to chunk your SQL data, however if you wish to provide your own chunker class. Here is how you can do that:
|
||||
``Python
|
||||
|
||||
from embedchain.chunkers.mysql import MySQLChunker
|
||||
from embedchain.config.add_config import ChunkerConfig
|
||||
|
||||
mysql_chunker_config = ChunkerConfig(chunk_size=1000, chunk_overlap=0, length_function=len)
|
||||
mysql_chunker = MySQLChunker(config=mysql_chunker_config)
|
||||
|
||||
app.add("SELECT * FROM table_name;", data_type='mysql', loader=mysql_loader, chunker=mysql_chunker)
|
||||
```
|
||||
@@ -0,0 +1,20 @@
|
||||
---
|
||||
title: '📓 Notion'
|
||||
---
|
||||
|
||||
To use notion you must install the extra dependencies with `pip install --upgrade embedchain[community]`.
|
||||
|
||||
To load a notion page, use the data_type as `notion`. Since it is hard to automatically detect, it is advised to specify the `data_type` when adding a notion document.
|
||||
The next argument must **end** with the `notion page id`. The id is a 32-character string. Eg:
|
||||
|
||||
```python
|
||||
from embedchain import Pipeline as App
|
||||
|
||||
app = App()
|
||||
|
||||
app.add("cfbc134ca6464fc980d0391613959196", data_type="notion")
|
||||
app.add("my-page-cfbc134ca6464fc980d0391613959196", data_type="notion")
|
||||
app.add("https://www.notion.so/my-page-cfbc134ca6464fc980d0391613959196", data_type="notion")
|
||||
|
||||
app.query("Summarize the notion doc")
|
||||
```
|
||||
@@ -0,0 +1,22 @@
|
||||
---
|
||||
title: 🙌 OpenAPI
|
||||
---
|
||||
|
||||
To add any OpenAPI spec yaml file (currently the json file will be detected as JSON data type), use the data_type as 'openapi'. 'openapi' allows remote urls and conventional file paths.
|
||||
|
||||
```python
|
||||
from embedchain import Pipeline as App
|
||||
|
||||
app = App()
|
||||
|
||||
app.add("https://github.com/openai/openai-openapi/blob/master/openapi.yaml", data_type="openapi")
|
||||
# Or add using the local file path
|
||||
# app.add("configs/openai_openapi.yaml", data_type="openapi")
|
||||
|
||||
app.query("What can OpenAI API endpoint do? Can you list the things it can learn from?")
|
||||
# Answer: The OpenAI API endpoint allows users to interact with OpenAI's models and perform various tasks such as generating text, answering questions, summarizing documents, translating languages, and more. The specific capabilities and tasks that the API can learn from may vary depending on the models and features provided by OpenAI. For more detailed information, it is recommended to refer to the OpenAI API documentation at https://platform.openai.com/docs/api-reference.
|
||||
```
|
||||
|
||||
<Note>
|
||||
The yaml file added to the App must have the required OpenAPI fields otherwise the adding OpenAPI spec will fail. Please refer to [OpenAPI Spec Doc](https://spec.openapis.org/oas/v3.1.0)
|
||||
</Note>
|
||||
@@ -0,0 +1,37 @@
|
||||
---
|
||||
title: Overview
|
||||
---
|
||||
|
||||
Embedchain comes with built-in support for various data sources. We handle the complexity of loading unstructured data from these data sources, allowing you to easily customize your app through a user-friendly interface.
|
||||
|
||||
<CardGroup cols={4}>
|
||||
<Card title="📰 PDF file" href="/components/data-sources/pdf-file"></Card>
|
||||
<Card title="📊 CSV file" href="/components/data-sources/csv"></Card>
|
||||
<Card title="📃 JSON file" href="/components/data-sources/json"></Card>
|
||||
<Card title="📺 Youtube" href="/components/data-sources/youtube-video"></Card>
|
||||
<Card title="📝 Text" href="/components/data-sources/text"></Card>
|
||||
<Card title="📚 Documentation website" href="/components/data-sources/docs-site"></Card>
|
||||
<Card title="📄 DOCX file" href="/components/data-sources/docx"></Card>
|
||||
<Card title="📝 MDX file" href="/components/data-sources/mdx"></Card>
|
||||
<Card title="📓 Notion" href="/components/data-sources/notion"></Card>
|
||||
<Card title="❓💬 Q&A pair" href="/components/data-sources/qna"></Card>
|
||||
<Card title="🗺️ Sitemap" href="/components/data-sources/sitemap"></Card>
|
||||
<Card title="🌐 Web page" href="/components/data-sources/web-page"></Card>
|
||||
<Card title="🧾 XML file" href="/components/data-sources/xml"></Card>
|
||||
<Card title="🙌 OpenAPI" href="/components/data-sources/openapi"></Card>
|
||||
<Card title="📬 Gmail" href="/components/data-sources/gmail"></Card>
|
||||
<Card title="🐘 Postgres" href="/components/data-sources/postgres"></Card>
|
||||
<Card title="🐬 MySQL" href="/components/data-sources/mysql"></Card>
|
||||
<Card title="🤖 Slack" href="/components/data-sources/slack"></Card>
|
||||
<Card title="🗨️ Discourse" href="/components/data-sources/discourse"></Card>
|
||||
<Card title="💬 Discord" href="/components/data-sources/discord"></Card>
|
||||
<Card title="📝 Github" href="/components/data-sources/github"></Card>
|
||||
<Card title="⚙️ Custom" href="/components/data-sources/custom"></Card>
|
||||
<Card title="📝 Substack" href="/components/data-sources/substack"></Card>
|
||||
<Card title="🐝 Beehiiv" href="/components/data-sources/beehiiv"></Card>
|
||||
<Card title="📁 Directory" href="/components/data-sources/directory"></Card>
|
||||
</CardGroup>
|
||||
|
||||
<br/ >
|
||||
|
||||
<Snippet file="missing-data-source-tip.mdx" />
|
||||
@@ -0,0 +1,17 @@
|
||||
---
|
||||
title: '📰 PDF file'
|
||||
---
|
||||
|
||||
To add any pdf file, use the data_type as `pdf_file`. Eg:
|
||||
|
||||
```python
|
||||
from embedchain import Pipeline as App
|
||||
|
||||
app = App()
|
||||
|
||||
app.add('https://arxiv.org/pdf/1706.03762.pdf', data_type='pdf_file')
|
||||
app.query("What is the paper 'attention is all you need' about?")
|
||||
# Answer: The paper "Attention Is All You Need" proposes a new network architecture called the Transformer, which is based solely on attention mechanisms. It suggests moving away from complex recurrent or convolutional neural networks and instead using attention mechanisms to connect the encoder and decoder in sequence transduction models.
|
||||
```
|
||||
|
||||
Note that we do not support password protected pdfs.
|
||||
@@ -0,0 +1,64 @@
|
||||
---
|
||||
title: '🐘 Postgres'
|
||||
---
|
||||
|
||||
1. Setup the Postgres loader by configuring the postgres db.
|
||||
```Python
|
||||
from embedchain.loaders.postgres import PostgresLoader
|
||||
|
||||
config = {
|
||||
"host": "host_address",
|
||||
"port": "port_number",
|
||||
"dbname": "database_name",
|
||||
"user": "username",
|
||||
"password": "password",
|
||||
}
|
||||
|
||||
"""
|
||||
config = {
|
||||
"url": "your_postgres_url"
|
||||
}
|
||||
"""
|
||||
|
||||
postgres_loader = PostgresLoader(config=config)
|
||||
|
||||
```
|
||||
|
||||
You can either setup the loader by passing the postgresql url or by providing the config data.
|
||||
For more details on how to setup with valid url and config, check postgres [documentation](https://www.postgresql.org/docs/current/libpq-connect.html#LIBPQ-CONNSTRING:~:text=34.1.1.%C2%A0Connection%20Strings-,%23,-Several%20libpq%20functions).
|
||||
|
||||
NOTE: if you provide the `url` field in config, all other fields will be ignored.
|
||||
|
||||
2. Once you setup the loader, you can create an app and load data using the above postgres loader
|
||||
```Python
|
||||
import os
|
||||
from embedchain.pipeline import Pipeline as App
|
||||
|
||||
os.environ["OPENAI_API_KEY"] = "sk-xxx"
|
||||
|
||||
app = App()
|
||||
|
||||
question = "What is Elon Musk's networth?"
|
||||
response = app.query(question)
|
||||
# Answer: As of September 2021, Elon Musk's net worth is estimated to be around $250 billion, making him one of the wealthiest individuals in the world. However, please note that net worth can fluctuate over time due to various factors such as stock market changes and business ventures.
|
||||
|
||||
app.add("SELECT * FROM table_name;", data_type='postgres', loader=postgres_loader)
|
||||
# Adds `(1, 'What is your net worth, Elon Musk?', "As of October 2023, Elon Musk's net worth is $255.2 billion.")`
|
||||
|
||||
response = app.query(question)
|
||||
# Answer: As of October 2023, Elon Musk's net worth is $255.2 billion.
|
||||
```
|
||||
|
||||
NOTE: The `add` function of the app will accept any executable query to load data. DO NOT pass the `CREATE`, `INSERT` queries in `add` function as they will result in not adding any data, so it is pointless.
|
||||
|
||||
3. We automatically create a chunker to chunk your postgres data, however if you wish to provide your own chunker class. Here is how you can do that:
|
||||
```Python
|
||||
|
||||
from embedchain.chunkers.postgres import PostgresChunker
|
||||
from embedchain.config.add_config import ChunkerConfig
|
||||
|
||||
postgres_chunker_config = ChunkerConfig(chunk_size=1000, chunk_overlap=0, length_function=len)
|
||||
postgres_chunker = PostgresChunker(config=postgres_chunker_config)
|
||||
|
||||
app.add("SELECT * FROM table_name;", data_type='postgres', loader=postgres_loader, chunker=postgres_chunker)
|
||||
```
|
||||
@@ -0,0 +1,13 @@
|
||||
---
|
||||
title: '❓💬 Queston and answer pair'
|
||||
---
|
||||
|
||||
QnA pair is a local data type. To supply your own QnA pair, use the data_type as `qna_pair` and enter a tuple. Eg:
|
||||
|
||||
```python
|
||||
from embedchain import Pipeline as App
|
||||
|
||||
app = App()
|
||||
|
||||
app.add(("Question", "Answer"), data_type="qna_pair")
|
||||
```
|
||||
@@ -0,0 +1,13 @@
|
||||
---
|
||||
title: '🗺️ Sitemap'
|
||||
---
|
||||
|
||||
Add all web pages from an xml-sitemap. Filters non-text files. Use the data_type as `sitemap`. Eg:
|
||||
|
||||
```python
|
||||
from embedchain import Pipeline as App
|
||||
|
||||
app = App()
|
||||
|
||||
app.add('https://example.com/sitemap.xml', data_type='sitemap')
|
||||
```
|
||||
@@ -0,0 +1,71 @@
|
||||
---
|
||||
title: '🤖 Slack'
|
||||
---
|
||||
|
||||
## Pre-requisite
|
||||
- Download required packages by running `pip install --upgrade "embedchain[slack]"`.
|
||||
- Configure your slack bot token as environment variable `SLACK_USER_TOKEN`.
|
||||
- Find your user token on your [Slack Account](https://api.slack.com/authentication/token-types)
|
||||
- Make sure your slack user token includes [search](https://api.slack.com/scopes/search:read) scope.
|
||||
|
||||
## Example
|
||||
|
||||
### Get Started
|
||||
|
||||
This will automatically retrieve data from the workspace associated with the user's token.
|
||||
|
||||
```python
|
||||
import os
|
||||
from embedchain import Pipeline as App
|
||||
|
||||
os.environ["SLACK_USER_TOKEN"] = "xoxp-xxx"
|
||||
app = App()
|
||||
|
||||
app.add("in:general", data_type="slack")
|
||||
|
||||
result = app.query("what are the messages in general channel?")
|
||||
|
||||
print(result)
|
||||
```
|
||||
|
||||
|
||||
### Customize your SlackLoader
|
||||
1. Setup the Slack loader by configuring the Slack Webclient.
|
||||
```Python
|
||||
from embedchain.loaders.slack import SlackLoader
|
||||
|
||||
os.environ["SLACK_USER_TOKEN"] = "xoxp-*"
|
||||
|
||||
config = {
|
||||
'base_url': slack_app_url,
|
||||
'headers': web_headers,
|
||||
'team_id': slack_team_id,
|
||||
}
|
||||
|
||||
loader = SlackLoader(config)
|
||||
```
|
||||
|
||||
NOTE: you can also pass the `config` with `base_url`, `headers`, `team_id` to setup your SlackLoader.
|
||||
|
||||
2. Once you setup the loader, you can create an app and load data using the above slack loader
|
||||
```Python
|
||||
import os
|
||||
from embedchain.pipeline import Pipeline as App
|
||||
|
||||
app = App()
|
||||
|
||||
app.add("in:random", data_type="slack", loader=loader)
|
||||
question = "Which bots are available in the slack workspace's random channel?"
|
||||
# Answer: The available bot in the slack workspace's random channel is the Embedchain bot.
|
||||
```
|
||||
|
||||
3. We automatically create a chunker to chunk your slack data, however if you wish to provide your own chunker class. Here is how you can do that:
|
||||
```Python
|
||||
from embedchain.chunkers.slack import SlackChunker
|
||||
from embedchain.config.add_config import ChunkerConfig
|
||||
|
||||
slack_chunker_config = ChunkerConfig(chunk_size=1000, chunk_overlap=0, length_function=len)
|
||||
slack_chunker = SlackChunker(config=slack_chunker_config)
|
||||
|
||||
app.add(slack_chunker, data_type="slack", loader=loader, chunker=slack_chunker)
|
||||
```
|
||||
@@ -0,0 +1,16 @@
|
||||
---
|
||||
title: "📝 Substack"
|
||||
---
|
||||
|
||||
To add any Substack data sources to your app, just add the main base url as the source and set the data_type to `substack`.
|
||||
|
||||
```python
|
||||
from embedchain import Pipeline as App
|
||||
|
||||
app = App()
|
||||
|
||||
# source: for any substack just add the root URL
|
||||
app.add('https://www.lennysnewsletter.com', data_type='substack')
|
||||
app.query("Who is Brian Chesky?")
|
||||
# Answer: Brian Chesky is the co-founder and CEO of Airbnb.
|
||||
```
|
||||
@@ -0,0 +1,17 @@
|
||||
---
|
||||
title: '📝 Text'
|
||||
---
|
||||
|
||||
### Text
|
||||
|
||||
Text is a local data type. To supply your own text, use the data_type as `text` and enter a string. The text is not processed, this can be very versatile. Eg:
|
||||
|
||||
```python
|
||||
from embedchain import Pipeline as App
|
||||
|
||||
app = App()
|
||||
|
||||
app.add('Seek wealth, not money or status. Wealth is having assets that earn while you sleep. Money is how we transfer time and wealth. Status is your place in the social hierarchy.', data_type='text')
|
||||
```
|
||||
|
||||
Note: This is not used in the examples because in most cases you will supply a whole paragraph or file, which did not fit.
|
||||
@@ -0,0 +1,13 @@
|
||||
---
|
||||
title: '🌐 Web page'
|
||||
---
|
||||
|
||||
To add any web page, use the data_type as `web_page`. Eg:
|
||||
|
||||
```python
|
||||
from embedchain import Pipeline as App
|
||||
|
||||
app = App()
|
||||
|
||||
app.add('a_valid_web_page_url', data_type='web_page')
|
||||
```
|
||||
@@ -0,0 +1,17 @@
|
||||
---
|
||||
title: '🧾 XML file'
|
||||
---
|
||||
|
||||
### XML file
|
||||
|
||||
To add any xml file, use the data_type as `xml`. Eg:
|
||||
|
||||
```python
|
||||
from embedchain import Pipeline as App
|
||||
|
||||
app = App()
|
||||
|
||||
app.add('content/data.xml')
|
||||
```
|
||||
|
||||
Note: Only the text content of the xml file will be added to the app. The tags will be ignored.
|
||||
@@ -0,0 +1,13 @@
|
||||
---
|
||||
title: '📺 Youtube'
|
||||
---
|
||||
|
||||
|
||||
To add any youtube video to your app, use the data_type (first argument to `.add()` method) as `youtube_video`. Eg:
|
||||
|
||||
```python
|
||||
from embedchain import Pipeline as App
|
||||
|
||||
app = App()
|
||||
app.add('a_valid_youtube_url_here', data_type='youtube_video')
|
||||
```
|
||||
@@ -0,0 +1,202 @@
|
||||
---
|
||||
title: 🧩 Embedding models
|
||||
---
|
||||
|
||||
## Overview
|
||||
|
||||
Embedchain supports several embedding models from the following providers:
|
||||
|
||||
<CardGroup cols={4}>
|
||||
<Card title="OpenAI" href="#openai"></Card>
|
||||
<Card title="GoogleAI" href="#google-ai"></Card>
|
||||
<Card title="Azure OpenAI" href="#azure-openai"></Card>
|
||||
<Card title="GPT4All" href="#gpt4all"></Card>
|
||||
<Card title="Hugging Face" href="#hugging-face"></Card>
|
||||
<Card title="Vertex AI" href="#vertex-ai"></Card>
|
||||
</CardGroup>
|
||||
|
||||
## OpenAI
|
||||
|
||||
To use OpenAI embedding function, you have to set the `OPENAI_API_KEY` environment variable. You can obtain the OpenAI API key from the [OpenAI Platform](https://platform.openai.com/account/api-keys).
|
||||
|
||||
Once you have obtained the key, you can use it like this:
|
||||
|
||||
<CodeGroup>
|
||||
|
||||
```python main.py
|
||||
import os
|
||||
from embedchain import Pipeline as App
|
||||
|
||||
os.environ['OPENAI_API_KEY'] = 'xxx'
|
||||
|
||||
# load embedding model configuration from config.yaml file
|
||||
app = App.from_config(config_path="config.yaml")
|
||||
|
||||
app.add("https://en.wikipedia.org/wiki/OpenAI")
|
||||
app.query("What is OpenAI?")
|
||||
```
|
||||
|
||||
```yaml config.yaml
|
||||
embedder:
|
||||
provider: openai
|
||||
config:
|
||||
model: 'text-embedding-ada-002'
|
||||
```
|
||||
|
||||
</CodeGroup>
|
||||
|
||||
## Google AI
|
||||
|
||||
To use Google AI embedding function, you have to set the `GOOGLE_API_KEY` environment variable. You can obtain the Google API key from the [Google Maker Suite](https://makersuite.google.com/app/apikey)
|
||||
|
||||
<CodeGroup>
|
||||
```python main.py
|
||||
import os
|
||||
from embedchain import Pipeline as App
|
||||
|
||||
os.environ["GOOGLE_API_KEY"] = "xxx"
|
||||
|
||||
app = App.from_config(config_path="config.yaml")
|
||||
```
|
||||
|
||||
```yaml config.yaml
|
||||
embedder:
|
||||
provider: google
|
||||
config:
|
||||
model: 'models/embedding-001'
|
||||
task_type: "retrieval_document"
|
||||
title: "Embeddings for Embedchain"
|
||||
```
|
||||
</CodeGroup>
|
||||
<br/>
|
||||
<Note>
|
||||
For more details regarding the Google AI embedding model, please refer to the [Google AI documentation](https://ai.google.dev/tutorials/python_quickstart#use_embeddings).
|
||||
</Note>
|
||||
|
||||
## Azure OpenAI
|
||||
|
||||
To use Azure OpenAI embedding model, you have to set some of the azure openai related environment variables as given in the code block below:
|
||||
|
||||
<CodeGroup>
|
||||
|
||||
```python main.py
|
||||
import os
|
||||
from embedchain import Pipeline as App
|
||||
|
||||
os.environ["OPENAI_API_TYPE"] = "azure"
|
||||
os.environ["AZURE_OPENAI_ENDPOINT"] = "https://xxx.openai.azure.com/"
|
||||
os.environ["AZURE_OPENAI_API_KEY"] = "xxx"
|
||||
os.environ["OPENAI_API_VERSION"] = "xxx"
|
||||
|
||||
app = App.from_config(config_path="config.yaml")
|
||||
```
|
||||
|
||||
```yaml config.yaml
|
||||
llm:
|
||||
provider: azure_openai
|
||||
config:
|
||||
model: gpt-35-turbo
|
||||
deployment_name: your_llm_deployment_name
|
||||
temperature: 0.5
|
||||
max_tokens: 1000
|
||||
top_p: 1
|
||||
stream: false
|
||||
|
||||
embedder:
|
||||
provider: azure_openai
|
||||
config:
|
||||
model: text-embedding-ada-002
|
||||
deployment_name: you_embedding_model_deployment_name
|
||||
```
|
||||
</CodeGroup>
|
||||
|
||||
You can find the list of models and deployment name on the [Azure OpenAI Platform](https://oai.azure.com/portal).
|
||||
|
||||
## GPT4ALL
|
||||
|
||||
GPT4All supports generating high quality embeddings of arbitrary length documents of text using a CPU optimized contrastively trained Sentence Transformer.
|
||||
|
||||
<CodeGroup>
|
||||
|
||||
```python main.py
|
||||
from embedchain import Pipeline as App
|
||||
|
||||
# load embedding model configuration from config.yaml file
|
||||
app = App.from_config(config_path="config.yaml")
|
||||
```
|
||||
|
||||
```yaml config.yaml
|
||||
llm:
|
||||
provider: gpt4all
|
||||
config:
|
||||
model: 'orca-mini-3b-gguf2-q4_0.gguf'
|
||||
temperature: 0.5
|
||||
max_tokens: 1000
|
||||
top_p: 1
|
||||
stream: false
|
||||
|
||||
embedder:
|
||||
provider: gpt4all
|
||||
```
|
||||
|
||||
</CodeGroup>
|
||||
|
||||
## Hugging Face
|
||||
|
||||
Hugging Face supports generating embeddings of arbitrary length documents of text using Sentence Transformer library. Example of how to generate embeddings using hugging face is given below:
|
||||
|
||||
<CodeGroup>
|
||||
|
||||
```python main.py
|
||||
from embedchain import Pipeline as App
|
||||
|
||||
# load embedding model configuration from config.yaml file
|
||||
app = App.from_config(config_path="config.yaml")
|
||||
```
|
||||
|
||||
```yaml config.yaml
|
||||
llm:
|
||||
provider: huggingface
|
||||
config:
|
||||
model: 'google/flan-t5-xxl'
|
||||
temperature: 0.5
|
||||
max_tokens: 1000
|
||||
top_p: 0.5
|
||||
stream: false
|
||||
|
||||
embedder:
|
||||
provider: huggingface
|
||||
config:
|
||||
model: 'sentence-transformers/all-mpnet-base-v2'
|
||||
```
|
||||
|
||||
</CodeGroup>
|
||||
|
||||
## Vertex AI
|
||||
|
||||
Embedchain supports Google's VertexAI embeddings model through a simple interface. You just have to pass the `model_name` in the config yaml and it would work out of the box.
|
||||
|
||||
<CodeGroup>
|
||||
|
||||
```python main.py
|
||||
from embedchain import Pipeline as App
|
||||
|
||||
# load embedding model configuration from config.yaml file
|
||||
app = App.from_config(config_path="config.yaml")
|
||||
```
|
||||
|
||||
```yaml config.yaml
|
||||
llm:
|
||||
provider: vertexai
|
||||
config:
|
||||
model: 'chat-bison'
|
||||
temperature: 0.5
|
||||
top_p: 0.5
|
||||
|
||||
embedder:
|
||||
provider: vertexai
|
||||
config:
|
||||
model: 'textembedding-gecko'
|
||||
```
|
||||
|
||||
</CodeGroup>
|
||||
@@ -0,0 +1,487 @@
|
||||
---
|
||||
title: 🤖 Large language models (LLMs)
|
||||
---
|
||||
|
||||
## Overview
|
||||
|
||||
Embedchain comes with built-in support for various popular large language models. We handle the complexity of integrating these models for you, allowing you to easily customize your language model interactions through a user-friendly interface.
|
||||
|
||||
<CardGroup cols={4}>
|
||||
<Card title="OpenAI" href="#openai"></Card>
|
||||
<Card title="Google AI" href="#google-ai"></Card>
|
||||
<Card title="Azure OpenAI" href="#azure-openai"></Card>
|
||||
<Card title="Anthropic" href="#anthropic"></Card>
|
||||
<Card title="Cohere" href="#cohere"></Card>
|
||||
<Card title="GPT4All" href="#gpt4all"></Card>
|
||||
<Card title="JinaChat" href="#jinachat"></Card>
|
||||
<Card title="Hugging Face" href="#hugging-face"></Card>
|
||||
<Card title="Llama2" href="#llama2"></Card>
|
||||
<Card title="Vertex AI" href="#vertex-ai"></Card>
|
||||
</CardGroup>
|
||||
|
||||
## OpenAI
|
||||
|
||||
To use OpenAI LLM models, you have to set the `OPENAI_API_KEY` environment variable. You can obtain the OpenAI API key from the [OpenAI Platform](https://platform.openai.com/account/api-keys).
|
||||
|
||||
Once you have obtained the key, you can use it like this:
|
||||
|
||||
```python
|
||||
import os
|
||||
from embedchain import Pipeline as App
|
||||
|
||||
os.environ['OPENAI_API_KEY'] = 'xxx'
|
||||
|
||||
app = App()
|
||||
app.add("https://en.wikipedia.org/wiki/OpenAI")
|
||||
app.query("What is OpenAI?")
|
||||
```
|
||||
|
||||
If you are looking to configure the different parameters of the LLM, you can do so by loading the app using a [yaml config](https://github.com/embedchain/embedchain/blob/main/configs/chroma.yaml) file.
|
||||
|
||||
<CodeGroup>
|
||||
|
||||
```python main.py
|
||||
import os
|
||||
from embedchain import Pipeline as App
|
||||
|
||||
os.environ['OPENAI_API_KEY'] = 'xxx'
|
||||
|
||||
# load llm configuration from config.yaml file
|
||||
app = App.from_config(config_path="config.yaml")
|
||||
```
|
||||
|
||||
```yaml config.yaml
|
||||
llm:
|
||||
provider: openai
|
||||
config:
|
||||
model: 'gpt-3.5-turbo'
|
||||
temperature: 0.5
|
||||
max_tokens: 1000
|
||||
top_p: 1
|
||||
stream: false
|
||||
```
|
||||
</CodeGroup>
|
||||
|
||||
### Function Calling
|
||||
To enable [function calling](https://platform.openai.com/docs/guides/function-calling) in your application using embedchain and OpenAI, you need to pass functions into `OpenAILlm` class as an array of functions. Here are several ways in which you can achieve that:
|
||||
|
||||
Examples:
|
||||
<Accordion title="Using Pydantic Models">
|
||||
```python
|
||||
import os
|
||||
from embedchain import Pipeline as App
|
||||
from embedchain.llm.openai import OpenAILlm
|
||||
import requests
|
||||
from pydantic import BaseModel, Field, ValidationError, field_validator
|
||||
|
||||
os.environ["OPENAI_API_KEY"] = "sk-xxx"
|
||||
|
||||
class QA(BaseModel):
|
||||
"""
|
||||
A question and answer pair.
|
||||
"""
|
||||
|
||||
question: str = Field(
|
||||
..., description="The question.", example="What is a mountain?"
|
||||
)
|
||||
answer: str = Field(
|
||||
..., description="The answer.", example="A mountain is a hill."
|
||||
)
|
||||
person_who_is_asking: str = Field(
|
||||
..., description="The person who is asking the question.", example="John"
|
||||
)
|
||||
|
||||
@field_validator("question")
|
||||
def question_must_end_with_a_question_mark(cls, v):
|
||||
"""
|
||||
Validate that the question ends with a question mark.
|
||||
"""
|
||||
if not v.endswith("?"):
|
||||
raise ValueError("question must end with a question mark")
|
||||
return v
|
||||
|
||||
@field_validator("answer")
|
||||
def answer_must_end_with_a_period(cls, v):
|
||||
"""
|
||||
Validate that the answer ends with a period.
|
||||
"""
|
||||
if not v.endswith("."):
|
||||
raise ValueError("answer must end with a period")
|
||||
return v
|
||||
|
||||
llm = OpenAILlm(config=None,functions=[QA])
|
||||
app = App(llm=llm)
|
||||
|
||||
result = app.query("Hey I am Sid. What is a mountain? A mountain is a hill.")
|
||||
|
||||
print(result)
|
||||
```
|
||||
</Accordion>
|
||||
|
||||
<Accordion title="Using OpenAI JSON schema">
|
||||
```python
|
||||
import os
|
||||
from embedchain import Pipeline as App
|
||||
from embedchain.llm.openai import OpenAILlm
|
||||
import requests
|
||||
from pydantic import BaseModel, Field, ValidationError, field_validator
|
||||
|
||||
os.environ["OPENAI_API_KEY"] = "sk-xxx"
|
||||
|
||||
json_schema = {
|
||||
"name": "get_qa",
|
||||
"description": "A question and answer pair and the user who is asking the question.",
|
||||
"parameters": {
|
||||
"type": "object",
|
||||
"properties": {
|
||||
"question": {"type": "string", "description": "The question."},
|
||||
"answer": {"type": "string", "description": "The answer."},
|
||||
"person_who_is_asking": {
|
||||
"type": "string",
|
||||
"description": "The person who is asking the question.",
|
||||
}
|
||||
},
|
||||
"required": ["question", "answer", "person_who_is_asking"],
|
||||
},
|
||||
}
|
||||
|
||||
llm = OpenAILlm(config=None,functions=[json_schema])
|
||||
app = App(llm=llm)
|
||||
|
||||
result = app.query("Hey I am Sid. What is a mountain? A mountain is a hill.")
|
||||
|
||||
print(result)
|
||||
```
|
||||
</Accordion>
|
||||
<Accordion title="Using actual python functions">
|
||||
```python
|
||||
import os
|
||||
from embedchain import Pipeline as App
|
||||
from embedchain.llm.openai import OpenAILlm
|
||||
import requests
|
||||
from pydantic import BaseModel, Field, ValidationError, field_validator
|
||||
|
||||
os.environ["OPENAI_API_KEY"] = "sk-xxx"
|
||||
|
||||
def find_info_of_pokemon(pokemon: str):
|
||||
"""
|
||||
Find the information of the given pokemon.
|
||||
Args:
|
||||
pokemon: The pokemon.
|
||||
"""
|
||||
req = requests.get(f"https://pokeapi.co/api/v2/pokemon/{pokemon}")
|
||||
if req.status_code == 404:
|
||||
raise ValueError("pokemon not found")
|
||||
return req.json()
|
||||
|
||||
llm = OpenAILlm(config=None,functions=[find_info_of_pokemon])
|
||||
app = App(llm=llm)
|
||||
|
||||
result = app.query("Tell me more about the pokemon pikachu.")
|
||||
|
||||
print(result)
|
||||
```
|
||||
</Accordion>
|
||||
|
||||
## Google AI
|
||||
|
||||
To use Google AI model, you have to set the `GOOGLE_API_KEY` environment variable. You can obtain the Google API key from the [Google Maker Suite](https://makersuite.google.com/app/apikey)
|
||||
|
||||
<CodeGroup>
|
||||
```python main.py
|
||||
import os
|
||||
from embedchain import Pipeline as App
|
||||
|
||||
os.environ["GOOGLE_API_KEY"] = "xxx"
|
||||
|
||||
app = App.from_config(config_path="config.yaml")
|
||||
|
||||
app.add("https://www.forbes.com/profile/elon-musk")
|
||||
|
||||
response = app.query("What is the net worth of Elon Musk?")
|
||||
if app.llm.config.stream: # if stream is enabled, response is a generator
|
||||
for chunk in response:
|
||||
print(chunk)
|
||||
else:
|
||||
print(response)
|
||||
```
|
||||
|
||||
```yaml config.yaml
|
||||
llm:
|
||||
provider: google
|
||||
config:
|
||||
model: gemini-pro
|
||||
max_tokens: 1000
|
||||
temperature: 0.5
|
||||
top_p: 1
|
||||
stream: false
|
||||
|
||||
embedder:
|
||||
provider: google
|
||||
config:
|
||||
model: 'models/embedding-001'
|
||||
task_type: "retrieval_document"
|
||||
title: "Embeddings for Embedchain"
|
||||
```
|
||||
</CodeGroup>
|
||||
|
||||
## Azure OpenAI
|
||||
|
||||
To use Azure OpenAI model, you have to set some of the azure openai related environment variables as given in the code block below:
|
||||
|
||||
<CodeGroup>
|
||||
|
||||
```python main.py
|
||||
import os
|
||||
from embedchain import Pipeline as App
|
||||
|
||||
os.environ["OPENAI_API_TYPE"] = "azure"
|
||||
os.environ["OPENAI_API_BASE"] = "https://xxx.openai.azure.com/"
|
||||
os.environ["OPENAI_API_KEY"] = "xxx"
|
||||
os.environ["OPENAI_API_VERSION"] = "xxx"
|
||||
|
||||
app = App.from_config(config_path="config.yaml")
|
||||
```
|
||||
|
||||
```yaml config.yaml
|
||||
llm:
|
||||
provider: azure_openai
|
||||
config:
|
||||
model: gpt-35-turbo
|
||||
deployment_name: your_llm_deployment_name
|
||||
temperature: 0.5
|
||||
max_tokens: 1000
|
||||
top_p: 1
|
||||
stream: false
|
||||
|
||||
embedder:
|
||||
provider: azure_openai
|
||||
config:
|
||||
model: text-embedding-ada-002
|
||||
deployment_name: you_embedding_model_deployment_name
|
||||
```
|
||||
</CodeGroup>
|
||||
|
||||
You can find the list of models and deployment name on the [Azure OpenAI Platform](https://oai.azure.com/portal).
|
||||
|
||||
## Anthropic
|
||||
|
||||
To use anthropic's model, please set the `ANTHROPIC_API_KEY` which you find on their [Account Settings Page](https://console.anthropic.com/account/keys).
|
||||
|
||||
<CodeGroup>
|
||||
|
||||
```python main.py
|
||||
import os
|
||||
from embedchain import Pipeline as App
|
||||
|
||||
os.environ["ANTHROPIC_API_KEY"] = "xxx"
|
||||
|
||||
# load llm configuration from config.yaml file
|
||||
app = App.from_config(config_path="config.yaml")
|
||||
```
|
||||
|
||||
```yaml config.yaml
|
||||
llm:
|
||||
provider: anthropic
|
||||
config:
|
||||
model: 'claude-instant-1'
|
||||
temperature: 0.5
|
||||
max_tokens: 1000
|
||||
top_p: 1
|
||||
stream: false
|
||||
```
|
||||
|
||||
</CodeGroup>
|
||||
|
||||
## Cohere
|
||||
|
||||
Install related dependencies using the following command:
|
||||
|
||||
```bash
|
||||
pip install --upgrade 'embedchain[cohere]'
|
||||
```
|
||||
|
||||
Set the `COHERE_API_KEY` as environment variable which you can find on their [Account settings page](https://dashboard.cohere.com/api-keys).
|
||||
|
||||
Once you have the API key, you are all set to use it with Embedchain.
|
||||
|
||||
<CodeGroup>
|
||||
|
||||
```python main.py
|
||||
import os
|
||||
from embedchain import Pipeline as App
|
||||
|
||||
os.environ["COHERE_API_KEY"] = "xxx"
|
||||
|
||||
# load llm configuration from config.yaml file
|
||||
app = App.from_config(config_path="config.yaml")
|
||||
```
|
||||
|
||||
```yaml config.yaml
|
||||
llm:
|
||||
provider: cohere
|
||||
config:
|
||||
model: large
|
||||
temperature: 0.5
|
||||
max_tokens: 1000
|
||||
top_p: 1
|
||||
```
|
||||
|
||||
</CodeGroup>
|
||||
|
||||
## GPT4ALL
|
||||
|
||||
Install related dependencies using the following command:
|
||||
|
||||
```bash
|
||||
pip install --upgrade 'embedchain[opensource]'
|
||||
```
|
||||
|
||||
GPT4all is a free-to-use, locally running, privacy-aware chatbot. No GPU or internet required. You can use this with Embedchain using the following code:
|
||||
|
||||
<CodeGroup>
|
||||
|
||||
```python main.py
|
||||
from embedchain import Pipeline as App
|
||||
|
||||
# load llm configuration from config.yaml file
|
||||
app = App.from_config(config_path="config.yaml")
|
||||
```
|
||||
|
||||
```yaml config.yaml
|
||||
llm:
|
||||
provider: gpt4all
|
||||
config:
|
||||
model: 'orca-mini-3b-gguf2-q4_0.gguf'
|
||||
temperature: 0.5
|
||||
max_tokens: 1000
|
||||
top_p: 1
|
||||
stream: false
|
||||
|
||||
embedder:
|
||||
provider: gpt4all
|
||||
```
|
||||
</CodeGroup>
|
||||
|
||||
|
||||
## JinaChat
|
||||
|
||||
First, set `JINACHAT_API_KEY` in environment variable which you can obtain from [their platform](https://chat.jina.ai/api).
|
||||
|
||||
Once you have the key, load the app using the config yaml file:
|
||||
|
||||
<CodeGroup>
|
||||
|
||||
```python main.py
|
||||
import os
|
||||
from embedchain import Pipeline as App
|
||||
|
||||
os.environ["JINACHAT_API_KEY"] = "xxx"
|
||||
# load llm configuration from config.yaml file
|
||||
app = App.from_config(config_path="config.yaml")
|
||||
```
|
||||
|
||||
```yaml config.yaml
|
||||
llm:
|
||||
provider: jina
|
||||
config:
|
||||
temperature: 0.5
|
||||
max_tokens: 1000
|
||||
top_p: 1
|
||||
stream: false
|
||||
```
|
||||
</CodeGroup>
|
||||
|
||||
|
||||
## Hugging Face
|
||||
|
||||
|
||||
Install related dependencies using the following command:
|
||||
|
||||
```bash
|
||||
pip install --upgrade 'embedchain[huggingface-hub]'
|
||||
```
|
||||
|
||||
First, set `HUGGINGFACE_ACCESS_TOKEN` in environment variable which you can obtain from [their platform](https://huggingface.co/settings/tokens).
|
||||
|
||||
Once you have the token, load the app using the config yaml file:
|
||||
|
||||
<CodeGroup>
|
||||
|
||||
```python main.py
|
||||
import os
|
||||
from embedchain import Pipeline as App
|
||||
|
||||
os.environ["HUGGINGFACE_ACCESS_TOKEN"] = "xxx"
|
||||
|
||||
# load llm configuration from config.yaml file
|
||||
app = App.from_config(config_path="config.yaml")
|
||||
```
|
||||
|
||||
```yaml config.yaml
|
||||
llm:
|
||||
provider: huggingface
|
||||
config:
|
||||
model: 'google/flan-t5-xxl'
|
||||
temperature: 0.5
|
||||
max_tokens: 1000
|
||||
top_p: 0.5
|
||||
stream: false
|
||||
```
|
||||
</CodeGroup>
|
||||
|
||||
## Llama2
|
||||
|
||||
Llama2 is integrated through [Replicate](https://replicate.com/). Set `REPLICATE_API_TOKEN` in environment variable which you can obtain from [their platform](https://replicate.com/account/api-tokens).
|
||||
|
||||
Once you have the token, load the app using the config yaml file:
|
||||
|
||||
<CodeGroup>
|
||||
|
||||
```python main.py
|
||||
import os
|
||||
from embedchain import Pipeline as App
|
||||
|
||||
os.environ["REPLICATE_API_TOKEN"] = "xxx"
|
||||
|
||||
# load llm configuration from config.yaml file
|
||||
app = App.from_config(config_path="config.yaml")
|
||||
```
|
||||
|
||||
```yaml config.yaml
|
||||
llm:
|
||||
provider: llama2
|
||||
config:
|
||||
model: 'a16z-infra/llama13b-v2-chat:df7690f1994d94e96ad9d568eac121aecf50684a0b0963b25a41cc40061269e5'
|
||||
temperature: 0.5
|
||||
max_tokens: 1000
|
||||
top_p: 0.5
|
||||
stream: false
|
||||
```
|
||||
</CodeGroup>
|
||||
|
||||
## Vertex AI
|
||||
|
||||
Setup Google Cloud Platform application credentials by following the instruction on [GCP](https://cloud.google.com/docs/authentication/external/set-up-adc). Once setup is done, use the following code to create an app using VertexAI as provider:
|
||||
|
||||
<CodeGroup>
|
||||
|
||||
```python main.py
|
||||
from embedchain import Pipeline as App
|
||||
|
||||
# load llm configuration from config.yaml file
|
||||
app = App.from_config(config_path="config.yaml")
|
||||
```
|
||||
|
||||
```yaml config.yaml
|
||||
llm:
|
||||
provider: vertexai
|
||||
config:
|
||||
model: 'chat-bison'
|
||||
temperature: 0.5
|
||||
top_p: 0.5
|
||||
```
|
||||
</CodeGroup>
|
||||
|
||||
<br/ >
|
||||
<Snippet file="missing-llm-tip.mdx" />
|
||||
@@ -0,0 +1,232 @@
|
||||
---
|
||||
title: 🗄️ Vector databases
|
||||
---
|
||||
|
||||
## Overview
|
||||
|
||||
Utilizing a vector database alongside Embedchain is a seamless process. All you need to do is configure it within the YAML configuration file. We've provided examples for each supported database below:
|
||||
|
||||
<CardGroup cols={4}>
|
||||
<Card title="ChromaDB" href="#chromadb"></Card>
|
||||
<Card title="Elasticsearch" href="#elasticsearch"></Card>
|
||||
<Card title="OpenSearch" href="#opensearch"></Card>
|
||||
<Card title="Zilliz" href="#zilliz"></Card>
|
||||
<Card title="LanceDB" href="#lancedb"></Card>
|
||||
<Card title="Pinecone" href="#pinecone"></Card>
|
||||
<Card title="Qdrant" href="#qdrant"></Card>
|
||||
<Card title="Weaviate" href="#weaviate"></Card>
|
||||
</CardGroup>
|
||||
|
||||
## ChromaDB
|
||||
|
||||
<CodeGroup>
|
||||
|
||||
```python main.py
|
||||
from embedchain import Pipeline as App
|
||||
|
||||
# load chroma configuration from yaml file
|
||||
app = App.from_config(config_path="config1.yaml")
|
||||
```
|
||||
|
||||
```yaml config1.yaml
|
||||
vectordb:
|
||||
provider: chroma
|
||||
config:
|
||||
collection_name: 'my-collection'
|
||||
dir: db
|
||||
allow_reset: true
|
||||
```
|
||||
|
||||
```yaml config2.yaml
|
||||
vectordb:
|
||||
provider: chroma
|
||||
config:
|
||||
collection_name: 'my-collection'
|
||||
host: localhost
|
||||
port: 5200
|
||||
allow_reset: true
|
||||
```
|
||||
|
||||
</CodeGroup>
|
||||
|
||||
|
||||
## Elasticsearch
|
||||
|
||||
Install related dependencies using the following command:
|
||||
|
||||
```bash
|
||||
pip install --upgrade 'embedchain[elasticsearch]'
|
||||
```
|
||||
|
||||
<Note>
|
||||
You can configure the Elasticsearch connection by providing either `es_url` or `cloud_id`. If you are using the Elasticsearch Service on Elastic Cloud, you can find the `cloud_id` on the [Elastic Cloud dashboard](https://cloud.elastic.co/deployments).
|
||||
</Note>
|
||||
|
||||
You can authorize the connection to Elasticsearch by providing either `basic_auth`, `api_key`, or `bearer_auth`.
|
||||
|
||||
<CodeGroup>
|
||||
|
||||
```python main.py
|
||||
from embedchain import Pipeline as App
|
||||
|
||||
# load elasticsearch configuration from yaml file
|
||||
app = App.from_config(config_path="config.yaml")
|
||||
```
|
||||
|
||||
```yaml config.yaml
|
||||
vectordb:
|
||||
provider: elasticsearch
|
||||
config:
|
||||
collection_name: 'es-index'
|
||||
cloud_id: 'deployment-name:xxxx'
|
||||
basic_auth:
|
||||
- elastic
|
||||
- <your_password>
|
||||
verify_certs: false
|
||||
```
|
||||
</CodeGroup>
|
||||
|
||||
## OpenSearch
|
||||
|
||||
Install related dependencies using the following command:
|
||||
|
||||
```bash
|
||||
pip install --upgrade 'embedchain[opensearch]'
|
||||
```
|
||||
|
||||
<CodeGroup>
|
||||
|
||||
```python main.py
|
||||
from embedchain import Pipeline as App
|
||||
|
||||
# load opensearch configuration from yaml file
|
||||
app = App.from_config(config_path="config.yaml")
|
||||
```
|
||||
|
||||
```yaml config.yaml
|
||||
vectordb:
|
||||
provider: opensearch
|
||||
config:
|
||||
collection_name: 'my-app'
|
||||
opensearch_url: 'https://localhost:9200'
|
||||
http_auth:
|
||||
- admin
|
||||
- admin
|
||||
vector_dimension: 1536
|
||||
use_ssl: false
|
||||
verify_certs: false
|
||||
```
|
||||
|
||||
</CodeGroup>
|
||||
|
||||
## Zilliz
|
||||
|
||||
Install related dependencies using the following command:
|
||||
|
||||
```bash
|
||||
pip install --upgrade 'embedchain[milvus]'
|
||||
```
|
||||
|
||||
Set the Zilliz environment variables `ZILLIZ_CLOUD_URI` and `ZILLIZ_CLOUD_TOKEN` which you can find it on their [cloud platform](https://cloud.zilliz.com/).
|
||||
|
||||
<CodeGroup>
|
||||
|
||||
```python main.py
|
||||
import os
|
||||
from embedchain import Pipeline as App
|
||||
|
||||
os.environ['ZILLIZ_CLOUD_URI'] = 'https://xxx.zillizcloud.com'
|
||||
os.environ['ZILLIZ_CLOUD_TOKEN'] = 'xxx'
|
||||
|
||||
# load zilliz configuration from yaml file
|
||||
app = App.from_config(config_path="config.yaml")
|
||||
```
|
||||
|
||||
```yaml config.yaml
|
||||
vectordb:
|
||||
provider: zilliz
|
||||
config:
|
||||
collection_name: 'zilliz_app'
|
||||
uri: https://xxxx.api.gcp-region.zillizcloud.com
|
||||
token: xxx
|
||||
vector_dim: 1536
|
||||
metric_type: L2
|
||||
```
|
||||
|
||||
</CodeGroup>
|
||||
|
||||
## LanceDB
|
||||
|
||||
_Coming soon_
|
||||
|
||||
## Pinecone
|
||||
|
||||
Install pinecone related dependencies using the following command:
|
||||
|
||||
```bash
|
||||
pip install --upgrade 'embedchain[pinecone]'
|
||||
```
|
||||
|
||||
In order to use Pinecone as vector database, set the environment variables `PINECONE_API_KEY` and `PINECONE_ENV` which you can find on [Pinecone dashboard](https://app.pinecone.io/).
|
||||
|
||||
<CodeGroup>
|
||||
|
||||
```python main.py
|
||||
from embedchain import Pipeline as App
|
||||
|
||||
# load pinecone configuration from yaml file
|
||||
app = App.from_config(config_path="config.yaml")
|
||||
```
|
||||
|
||||
```yaml config.yaml
|
||||
vectordb:
|
||||
provider: pinecone
|
||||
config:
|
||||
metric: cosine
|
||||
vector_dimension: 1536
|
||||
collection_name: my-pinecone-index
|
||||
```
|
||||
|
||||
</CodeGroup>
|
||||
|
||||
## Qdrant
|
||||
|
||||
In order to use Qdrant as a vector database, set the environment variables `QDRANT_URL` and `QDRANT_API_KEY` which you can find on [Qdrant Dashboard](https://cloud.qdrant.io/).
|
||||
|
||||
<CodeGroup>
|
||||
```python main.py
|
||||
from embedchain import Pipeline as App
|
||||
|
||||
# load qdrant configuration from yaml file
|
||||
app = App.from_config(config_path="config.yaml")
|
||||
```
|
||||
|
||||
```yaml config.yaml
|
||||
vectordb:
|
||||
provider: qdrant
|
||||
config:
|
||||
collection_name: my_qdrant_index
|
||||
```
|
||||
</CodeGroup>
|
||||
|
||||
## Weaviate
|
||||
|
||||
In order to use Weaviate as a vector database, set the environment variables `WEAVIATE_ENDPOINT` and `WEAVIATE_API_KEY` which you can find on [Weaviate dashboard](https://console.weaviate.cloud/dashboard).
|
||||
|
||||
<CodeGroup>
|
||||
```python main.py
|
||||
from embedchain import Pipeline as App
|
||||
|
||||
# load weaviate configuration from yaml file
|
||||
app = App.from_config(config_path="config.yaml")
|
||||
```
|
||||
|
||||
```yaml config.yaml
|
||||
vectordb:
|
||||
provider: weaviate
|
||||
config:
|
||||
collection_name: my_weaviate_index
|
||||
```
|
||||
</CodeGroup>
|
||||
|
||||
<Snippet file="missing-vector-db-tip.mdx" />
|
||||
@@ -0,0 +1,45 @@
|
||||
---
|
||||
title: '👨💻 Development'
|
||||
description: 'Contribute to Embedchain framework development'
|
||||
---
|
||||
|
||||
Thank you for your interest in contributing to the EmbedChain project! We welcome your ideas and contributions to help improve the project. Please follow the instructions below to get started:
|
||||
|
||||
1. **Fork the repository**: Click on the "Fork" button at the top right corner of this repository page. This will create a copy of the repository in your own GitHub account.
|
||||
|
||||
2. **Install the required dependencies**: Ensure that you have the necessary dependencies installed in your Python environment. You can do this by running the following command:
|
||||
|
||||
```bash
|
||||
make install
|
||||
```
|
||||
|
||||
3. **Make changes in the code**: Create a new branch in your forked repository and make your desired changes in the codebase.
|
||||
4. **Format code**: Before creating a pull request, it's important to ensure that your code follows our formatting guidelines. Run the following commands to format the code:
|
||||
|
||||
```bash
|
||||
make lint format
|
||||
```
|
||||
|
||||
5. **Create a pull request**: When you are ready to contribute your changes, submit a pull request to the EmbedChain repository. Provide a clear and descriptive title for your pull request, along with a detailed description of the changes you have made.
|
||||
|
||||
## Team
|
||||
|
||||
### Authors
|
||||
|
||||
- Taranjeet Singh ([@taranjeetio](https://twitter.com/taranjeetio))
|
||||
- Deshraj Yadav ([@deshrajdry](https://twitter.com/taranjeetio))
|
||||
|
||||
### Citation
|
||||
|
||||
If you utilize this repository, please consider citing it with:
|
||||
|
||||
```
|
||||
@misc{embedchain,
|
||||
author = {Taranjeet Singh, Deshraj Yadav},
|
||||
title = {Embechain: Data platform for LLMs - Load, index, retrieve and sync any unstructured data},
|
||||
year = {2023},
|
||||
publisher = {GitHub},
|
||||
journal = {GitHub repository},
|
||||
howpublished = {\url{https://github.com/embedchain/embedchain}},
|
||||
}
|
||||
```
|
||||
@@ -0,0 +1,61 @@
|
||||
---
|
||||
title: '📝 Documentation'
|
||||
description: 'Contribute to Embedchain docs'
|
||||
---
|
||||
|
||||
<Info>
|
||||
**Prerequisite** You should have installed Node.js (version 18.10.0 or
|
||||
higher).
|
||||
</Info>
|
||||
|
||||
Step 1. Install Mintlify on your OS:
|
||||
|
||||
<CodeGroup>
|
||||
|
||||
```bash npm
|
||||
npm i -g mintlify
|
||||
```
|
||||
|
||||
```bash yarn
|
||||
yarn global add mintlify
|
||||
```
|
||||
|
||||
</CodeGroup>
|
||||
|
||||
Step 2. Go to the `docs/` directory (where you can find `mint.json`) and run the following command:
|
||||
|
||||
```bash
|
||||
mintlify dev
|
||||
```
|
||||
|
||||
The documentation website is now available at `http://localhost:3000`.
|
||||
|
||||
### Custom Ports
|
||||
|
||||
Mintlify uses port 3000 by default. You can use the `--port` flag to customize the port Mintlify runs on. For example, use this command to run in port 3333:
|
||||
|
||||
```bash
|
||||
mintlify dev --port 3333
|
||||
```
|
||||
|
||||
You will see an error like this if you try to run Mintlify in a port that's already taken:
|
||||
|
||||
```md
|
||||
Error: listen EADDRINUSE: address already in use :::3000
|
||||
```
|
||||
|
||||
## Mintlify Versions
|
||||
|
||||
Each CLI is linked to a specific version of Mintlify. Please update the CLI if your local website looks different than production.
|
||||
|
||||
<CodeGroup>
|
||||
|
||||
```bash npm
|
||||
npm i -g mintlify@latest
|
||||
```
|
||||
|
||||
```bash yarn
|
||||
yarn global upgrade mintlify
|
||||
```
|
||||
|
||||
</CodeGroup>
|
||||
@@ -0,0 +1,4 @@
|
||||
---
|
||||
title: '📋 Guidelines'
|
||||
url: https://github.com/embedchain/embedchain/blob/main/CONTRIBUTING.md
|
||||
---
|
||||
@@ -0,0 +1,4 @@
|
||||
---
|
||||
title: ' 🟨 Javascript'
|
||||
url: https://github.com/embedchain/embedchain/tree/main/embedchain-js
|
||||
---
|
||||
@@ -0,0 +1,4 @@
|
||||
---
|
||||
title: '🐍 Python'
|
||||
url: https://github.com/embedchain/embedchain
|
||||
---
|
||||
@@ -0,0 +1,38 @@
|
||||
---
|
||||
title: 'Embedchain.ai'
|
||||
description: 'Deploy your RAG application to embedchain.ai platform'
|
||||
---
|
||||
|
||||
## Deploy on Embedchain Platform
|
||||
|
||||
Embedchain enables developers to deploy their LLM-powered apps in production using the [Embedchain platform](https://app.embedchain.ai). The platform offers free access to context on your data through its REST API. Once the pipeline is deployed, you can update your data sources anytime after deployment.
|
||||
|
||||
See the example below on how to use the deploy your app (for free):
|
||||
|
||||
```python
|
||||
from embedchain import Pipeline as App
|
||||
|
||||
# Initialize app
|
||||
app = App()
|
||||
|
||||
# Add data source
|
||||
app.add("https://www.forbes.com/profile/elon-musk")
|
||||
|
||||
# Deploy your pipeline to Embedchain Platform
|
||||
app.deploy()
|
||||
|
||||
# 🔑 Enter your Embedchain API key. You can find the API key at https://app.embedchain.ai/settings/keys/
|
||||
# ec-xxxxxx
|
||||
|
||||
# 🛠️ Creating pipeline on the platform...
|
||||
# 🎉🎉🎉 Pipeline created successfully! View your pipeline: https://app.embedchain.ai/pipelines/xxxxx
|
||||
|
||||
# 🛠️ Adding data to your pipeline...
|
||||
# ✅ Data of type: web_page, value: https://www.forbes.com/profile/elon-musk added successfully.
|
||||
```
|
||||
|
||||
## Seeking help?
|
||||
|
||||
If you run into issues with deployment, please feel free to reach out to us via any of the following methods:
|
||||
|
||||
<Snippet file="get-help.mdx" />
|
||||
@@ -0,0 +1,101 @@
|
||||
---
|
||||
title: 'Fly.io'
|
||||
description: 'Deploy your RAG application to fly.io platform'
|
||||
---
|
||||
|
||||
Embedchain has a nice and simple abstraction on top of the [Fly.io](https://fly.io/) tools to let developers deploy RAG application to fly.io platform seamlessly.
|
||||
|
||||
Follow the instructions given below to deploy your first application quickly:
|
||||
|
||||
|
||||
## Step-1: Install flyctl command line
|
||||
|
||||
<CodeGroup>
|
||||
```bash OSX
|
||||
brew install flyctl
|
||||
```
|
||||
|
||||
```bash Linux
|
||||
curl -L https://fly.io/install.sh | sh
|
||||
```
|
||||
|
||||
```bash Windows
|
||||
pwsh -Command "iwr https://fly.io/install.ps1 -useb | iex"
|
||||
```
|
||||
</CodeGroup>
|
||||
|
||||
Once you have installed the fly.io cli tool, signup/login to their platform using the following command:
|
||||
|
||||
<CodeGroup>
|
||||
```bash Sign up
|
||||
fly auth signup
|
||||
```
|
||||
|
||||
```bash Sign in
|
||||
fly auth login
|
||||
```
|
||||
</CodeGroup>
|
||||
|
||||
In case you run into issues, refer to official [fly.io docs](https://fly.io/docs/hands-on/install-flyctl/).
|
||||
|
||||
## Step-2: Create RAG app
|
||||
|
||||
We provide a command line utility called `ec` in embedchain that inherits the template for `fly.io` platform and help you deploy the app. Follow the instructions to create a fly.io app using the template provided:
|
||||
|
||||
```bash Install embedchain
|
||||
pip install embedchain
|
||||
```
|
||||
|
||||
```bash Create application
|
||||
mkdir my-rag-app
|
||||
ec create --template=fly.io
|
||||
```
|
||||
|
||||
This will generate a directory structure like this:
|
||||
|
||||
```bash
|
||||
├── Dockerfile
|
||||
├── app.py
|
||||
├── fly.toml
|
||||
├── .env
|
||||
├── .env.example
|
||||
├── embedchain.json
|
||||
└── requirements.txt
|
||||
```
|
||||
|
||||
Feel free to edit the files as required.
|
||||
- `Dockerfile`: Defines the steps to setup the application
|
||||
- `app.py`: Contains API app code
|
||||
- `fly.toml`: fly.io config file
|
||||
- `.env`: Contains environment variables for production
|
||||
- `.env.example`: Contains dummy environment variables (can ignore this file)
|
||||
- `embedchain.json`: Contains embedchain specific configuration for deployment (you don't need to configure this)
|
||||
- `requirements.txt`: Contains python dependencies for your application
|
||||
|
||||
## Step-3: Test app locally
|
||||
|
||||
You can run the app locally by simply doing:
|
||||
|
||||
```bash Run locally
|
||||
pip install -r requirements.txt
|
||||
ec dev
|
||||
```
|
||||
|
||||
## Step-4: Deploy to fly.io
|
||||
|
||||
You can deploy to fly.io using the following command:
|
||||
```bash Deploy app
|
||||
ec deploy
|
||||
```
|
||||
|
||||
Once this step finished, it will provide you with the deployment endpoint where you can access the app live. It will look something like this (Swagger docs):
|
||||
|
||||
You can also check the logs, monitor app status etc on their dashboard by running command `fly dashboard`.
|
||||
|
||||
<img src="/images/fly_io.png" />
|
||||
|
||||
## Seeking help?
|
||||
|
||||
If you run into issues with deployment, please feel free to reach out to us via any of the following methods:
|
||||
|
||||
<Snippet file="get-help.mdx" />
|
||||
@@ -0,0 +1,59 @@
|
||||
---
|
||||
title: 'Gradio.app'
|
||||
description: 'Deploy your RAG application to gradio.app platform'
|
||||
---
|
||||
|
||||
Embedchain offers a Streamlit template to facilitate the development of RAG chatbot applications in just three easy steps.
|
||||
|
||||
Follow the instructions given below to deploy your first application quickly:
|
||||
|
||||
## Step-1: Create RAG app
|
||||
|
||||
We provide a command line utility called `ec` in embedchain that inherits the template for `gradio.app` platform and help you deploy the app. Follow the instructions to create a gradio.app app using the template provided:
|
||||
|
||||
```bash Install embedchain
|
||||
pip install embedchain
|
||||
```
|
||||
|
||||
```bash Create application
|
||||
mkdir my-rag-app
|
||||
ec create --template=gradio.app
|
||||
```
|
||||
|
||||
This will generate a directory structure like this:
|
||||
|
||||
```bash
|
||||
├── app.py
|
||||
├── embedchain.json
|
||||
└── requirements.txt
|
||||
```
|
||||
|
||||
Feel free to edit the files as required.
|
||||
- `app.py`: Contains API app code
|
||||
- `embedchain.json`: Contains embedchain specific configuration for deployment (you don't need to configure this)
|
||||
- `requirements.txt`: Contains python dependencies for your application
|
||||
|
||||
## Step-2: Test app locally
|
||||
|
||||
You can run the app locally by simply doing:
|
||||
|
||||
```bash Run locally
|
||||
pip install -r requirements.txt
|
||||
ec dev
|
||||
```
|
||||
|
||||
## Step-3: Deploy to gradio.app
|
||||
|
||||
```bash Deploy to gradio.app
|
||||
ec deploy
|
||||
```
|
||||
|
||||
This will run `gradio deploy` which will prompt you questions and deploy your app directly to huggingface spaces.
|
||||
|
||||
<img src="/images/gradio_app.png" alt="gradio app" />
|
||||
|
||||
## Seeking help?
|
||||
|
||||
If you run into issues with deployment, please feel free to reach out to us via any of the following methods:
|
||||
|
||||
<Snippet file="get-help.mdx" />
|
||||
@@ -0,0 +1,103 @@
|
||||
---
|
||||
title: 'Huggingface.co'
|
||||
description: 'Deploy your RAG application to huggingface.co platform'
|
||||
---
|
||||
|
||||
With Embedchain, you can directly host your apps in just three steps to huggingface spaces where you can view and deploy your app to the world.
|
||||
|
||||
We support two types of deployment to huggingface spaces:
|
||||
|
||||
<CardGroup cols={2}>
|
||||
<Card title="" href="#using-streamlit-io">
|
||||
Streamlit.io
|
||||
</Card>
|
||||
<Card title="" href="#using-gradio-app">
|
||||
Gradio.app
|
||||
</Card>
|
||||
</CardGroup>
|
||||
|
||||
## Using streamlit.io
|
||||
|
||||
### Step 1: Create a new RAG app
|
||||
|
||||
Create a new RAG app using the following command:
|
||||
|
||||
```bash
|
||||
mkdir my-rag-app
|
||||
ec create --template=hf/streamlit.io # inside my-rag-app directory
|
||||
```
|
||||
|
||||
When you run this for the first time, you'll be asked to login to huggingface.co. Once you login, you'll need to create a **write** token. You can create a write token by going to [huggingface.co settings](https://huggingface.co/settings/token). Once you create a token, you'll be asked to enter the token in the terminal.
|
||||
|
||||
This will also create an `embedchain.json` file in your app directory. Add a `name` key into the `embedchain.json` file. This will be the "repo-name" of your app in huggingface spaces.
|
||||
|
||||
```json embedchain.json
|
||||
{
|
||||
"name": "my-rag-app",
|
||||
"provider": "hf/streamlit.io"
|
||||
}
|
||||
```
|
||||
|
||||
### Step-2: Test app locally
|
||||
|
||||
You can run the app locally by simply doing:
|
||||
|
||||
```bash Run locally
|
||||
pip install -r requirements.txt
|
||||
ec dev
|
||||
```
|
||||
|
||||
### Step-3: Deploy to huggingface spaces
|
||||
|
||||
```bash Deploy to huggingface spaces
|
||||
ec deploy
|
||||
```
|
||||
|
||||
This will deploy your app to huggingface spaces. You can view your app at `https://huggingface.co/spaces/<your-username>/my-rag-app`. This will get prompted in the terminal once the app is deployed.
|
||||
|
||||
## Using gradio.app
|
||||
|
||||
Similar to streamlit.io, you can deploy your app to gradio.app in just three steps.
|
||||
|
||||
### Step 1: Create a new RAG app
|
||||
|
||||
Create a new RAG app using the following command:
|
||||
|
||||
```bash
|
||||
mkdir my-rag-app
|
||||
ec create --template=hf/gradio.app # inside my-rag-app directory
|
||||
```
|
||||
|
||||
When you run this for the first time, you'll be asked to login to huggingface.co. Once you login, you'll need to create a **write** token. You can create a write token by going to [huggingface.co settings](https://huggingface.co/settings/token). Once you create a token, you'll be asked to enter the token in the terminal.
|
||||
|
||||
This will also create an `embedchain.json` file in your app directory. Add a `name` key into the `embedchain.json` file. This will be the "repo-name" of your app in huggingface spaces.
|
||||
|
||||
```json embedchain.json
|
||||
{
|
||||
"name": "my-rag-app",
|
||||
"provider": "hf/gradio.app"
|
||||
}
|
||||
```
|
||||
|
||||
### Step-2: Test app locally
|
||||
|
||||
You can run the app locally by simply doing:
|
||||
|
||||
```bash Run locally
|
||||
pip install -r requirements.txt
|
||||
ec dev
|
||||
```
|
||||
|
||||
### Step-3: Deploy to huggingface spaces
|
||||
|
||||
```bash Deploy to huggingface spaces
|
||||
ec deploy
|
||||
```
|
||||
|
||||
This will deploy your app to huggingface spaces. You can view your app at `https://huggingface.co/spaces/<your-username>/my-rag-app`. This will get prompted in the terminal once the app is deployed.
|
||||
|
||||
## Seeking help?
|
||||
|
||||
If you run into issues with deployment, please feel free to reach out to us via any of the following methods:
|
||||
|
||||
<Snippet file="get-help.mdx" />
|
||||
@@ -0,0 +1,63 @@
|
||||
---
|
||||
title: 'Modal.com'
|
||||
description: 'Deploy your RAG application to modal.com platform'
|
||||
---
|
||||
|
||||
Embedchain has a nice and simple abstraction on top of the [Modal.com](https://modal.com/) tools to let developers deploy RAG application to modal.com platform seamlessly.
|
||||
|
||||
Follow the instructions given below to deploy your first application quickly:
|
||||
|
||||
|
||||
## Step-1 Create RAG application:
|
||||
|
||||
We provide a command line utility called `ec` in embedchain that inherits the template for `modal.com` platform and help you deploy the app. Follow the instructions to create a modal.com app using the template provided:
|
||||
|
||||
|
||||
```bash Create application
|
||||
pip install embedchain[modal]
|
||||
mkdir my-rag-app
|
||||
ec create --template=modal.com
|
||||
```
|
||||
|
||||
This `create` command will open a browser window and ask you to login to your modal.com account and will generate a directory structure like this:
|
||||
|
||||
```bash
|
||||
├── app.py
|
||||
├── .env
|
||||
├── .env.example
|
||||
├── embedchain.json
|
||||
└── requirements.txt
|
||||
```
|
||||
|
||||
Feel free to edit the files as required.
|
||||
- `app.py`: Contains API app code
|
||||
- `.env`: Contains environment variables for production
|
||||
- `.env.example`: Contains dummy environment variables (can ignore this file)
|
||||
- `embedchain.json`: Contains embedchain specific configuration for deployment (you don't need to configure this)
|
||||
- `requirements.txt`: Contains python dependencies for your FastAPI application
|
||||
|
||||
## Step-2: Test app locally
|
||||
|
||||
You can run the app locally by simply doing:
|
||||
|
||||
```bash Run locally
|
||||
pip install -r requirements.txt
|
||||
ec dev
|
||||
```
|
||||
|
||||
## Step-3: Deploy to modal.com
|
||||
|
||||
You can deploy to modal.com using the following command:
|
||||
```bash Deploy app
|
||||
ec deploy
|
||||
```
|
||||
|
||||
Once this step finished, it will provide you with the deployment endpoint where you can access the app live. It will look something like this (Swagger docs):
|
||||
|
||||
<img src="/images/fly_io.png" />
|
||||
|
||||
## Seeking help?
|
||||
|
||||
If you run into issues with deployment, please feel free to reach out to us via any of the following methods:
|
||||
|
||||
<Snippet file="get-help.mdx" />
|
||||
@@ -0,0 +1,93 @@
|
||||
---
|
||||
title: 'Render.com'
|
||||
description: 'Deploy your RAG application to render.com platform'
|
||||
---
|
||||
|
||||
Embedchain has a nice and simple abstraction on top of the [render.com](https://render.com/) tools to let developers deploy RAG application to render.com platform seamlessly.
|
||||
|
||||
Follow the instructions given below to deploy your first application quickly:
|
||||
|
||||
## Step-1: Install `render` command line
|
||||
|
||||
<CodeGroup>
|
||||
```bash OSX
|
||||
brew tap render-oss/render
|
||||
brew install render
|
||||
```
|
||||
|
||||
```bash Linux
|
||||
# Make sure you have deno installed -> https://docs.render.com/docs/cli#from-source-unsupported-operating-systems
|
||||
git clone https://github.com/render-oss/render-cli
|
||||
cd render-cli
|
||||
make deps
|
||||
deno task run
|
||||
deno compile
|
||||
```
|
||||
|
||||
```bash Windows
|
||||
choco install rendercli
|
||||
```
|
||||
</CodeGroup>
|
||||
|
||||
In case you run into issues, refer to official [render.com docs](https://docs.render.com/docs/cli).
|
||||
|
||||
## Step-2 Create RAG application:
|
||||
|
||||
We provide a command line utility called `ec` in embedchain that inherits the template for `render.com` platform and help you deploy the app. Follow the instructions to create a render.com app using the template provided:
|
||||
|
||||
|
||||
```bash Create application
|
||||
pip install embedchain
|
||||
mkdir my-rag-app
|
||||
ec create --template=render.com
|
||||
```
|
||||
|
||||
This `create` command will open a browser window and ask you to login to your render.com account and will generate a directory structure like this:
|
||||
|
||||
```bash
|
||||
├── app.py
|
||||
├── .env
|
||||
├── render.yaml
|
||||
├── embedchain.json
|
||||
└── requirements.txt
|
||||
```
|
||||
|
||||
Feel free to edit the files as required.
|
||||
- `app.py`: Contains API app code
|
||||
- `.env`: Contains environment variables for production
|
||||
- `render.yaml`: Contains render.com specific configuration for deployment (configure this according to your needs, follow [this](https://docs.render.com/docs/blueprint-spec) for more info)
|
||||
- `embedchain.json`: Contains embedchain specific configuration for deployment (you don't need to configure this)
|
||||
- `requirements.txt`: Contains python dependencies for your application
|
||||
|
||||
## Step-3: Test app locally
|
||||
|
||||
You can run the app locally by simply doing:
|
||||
|
||||
```bash Run locally
|
||||
pip install -r requirements.txt
|
||||
ec dev
|
||||
```
|
||||
|
||||
## Step-4: Deploy to render.com
|
||||
|
||||
Before deploying to render.com, you only have to set up one thing.
|
||||
|
||||
In the render.yaml file, make sure to modify the repo key by inserting the URL of your Git repository where your application will be hosted. You can create a repository from [GitHub](https://github.com) or [GitLab](https://gitlab.com/users/sign_in).
|
||||
|
||||
After that, you're ready to deploy on render.com.
|
||||
|
||||
```bash Deploy app
|
||||
ec deploy
|
||||
```
|
||||
|
||||
When you run this, it should open up your render dashboard and you can see the app being deployed. You can find your hosted link over there only.
|
||||
|
||||
You can also check the logs, monitor app status etc on their dashboard by running command `render dashboard`.
|
||||
|
||||
<img src="/images/fly_io.png" />
|
||||
|
||||
## Seeking help?
|
||||
|
||||
If you run into issues with deployment, please feel free to reach out to us via any of the following methods:
|
||||
|
||||
<Snippet file="get-help.mdx" />
|
||||
@@ -0,0 +1,62 @@
|
||||
---
|
||||
title: 'Streamlit.io'
|
||||
description: 'Deploy your RAG application to streamlit.io platform'
|
||||
---
|
||||
|
||||
Embedchain offers a Streamlit template to facilitate the development of RAG chatbot applications in just three easy steps.
|
||||
|
||||
Follow the instructions given below to deploy your first application quickly:
|
||||
|
||||
## Step-1: Create RAG app
|
||||
|
||||
We provide a command line utility called `ec` in embedchain that inherits the template for `streamlit.io` platform and help you deploy the app. Follow the instructions to create a streamlit.io app using the template provided:
|
||||
|
||||
```bash Install embedchain
|
||||
pip install embedchain
|
||||
```
|
||||
|
||||
```bash Create application
|
||||
mkdir my-rag-app
|
||||
ec create --template=streamlit.io
|
||||
```
|
||||
|
||||
This will generate a directory structure like this:
|
||||
|
||||
```bash
|
||||
├── .streamlit
|
||||
│ └── secrets.toml
|
||||
├── app.py
|
||||
├── embedchain.json
|
||||
└── requirements.txt
|
||||
```
|
||||
|
||||
Feel free to edit the files as required.
|
||||
- `app.py`: Contains API app code
|
||||
- `.streamlit/secrets.toml`: Contains secrets for your application
|
||||
- `embedchain.json`: Contains embedchain specific configuration for deployment (you don't need to configure this)
|
||||
- `requirements.txt`: Contains python dependencies for your application
|
||||
|
||||
Add your `OPENAI_API_KEY` in `.streamlit/secrets.toml` file to run and deploy the app.
|
||||
|
||||
## Step-2: Test app locally
|
||||
|
||||
You can run the app locally by simply doing:
|
||||
|
||||
```bash Run locally
|
||||
pip install -r requirements.txt
|
||||
ec dev
|
||||
```
|
||||
|
||||
## Step-3: Deploy to streamlit.io
|
||||
|
||||
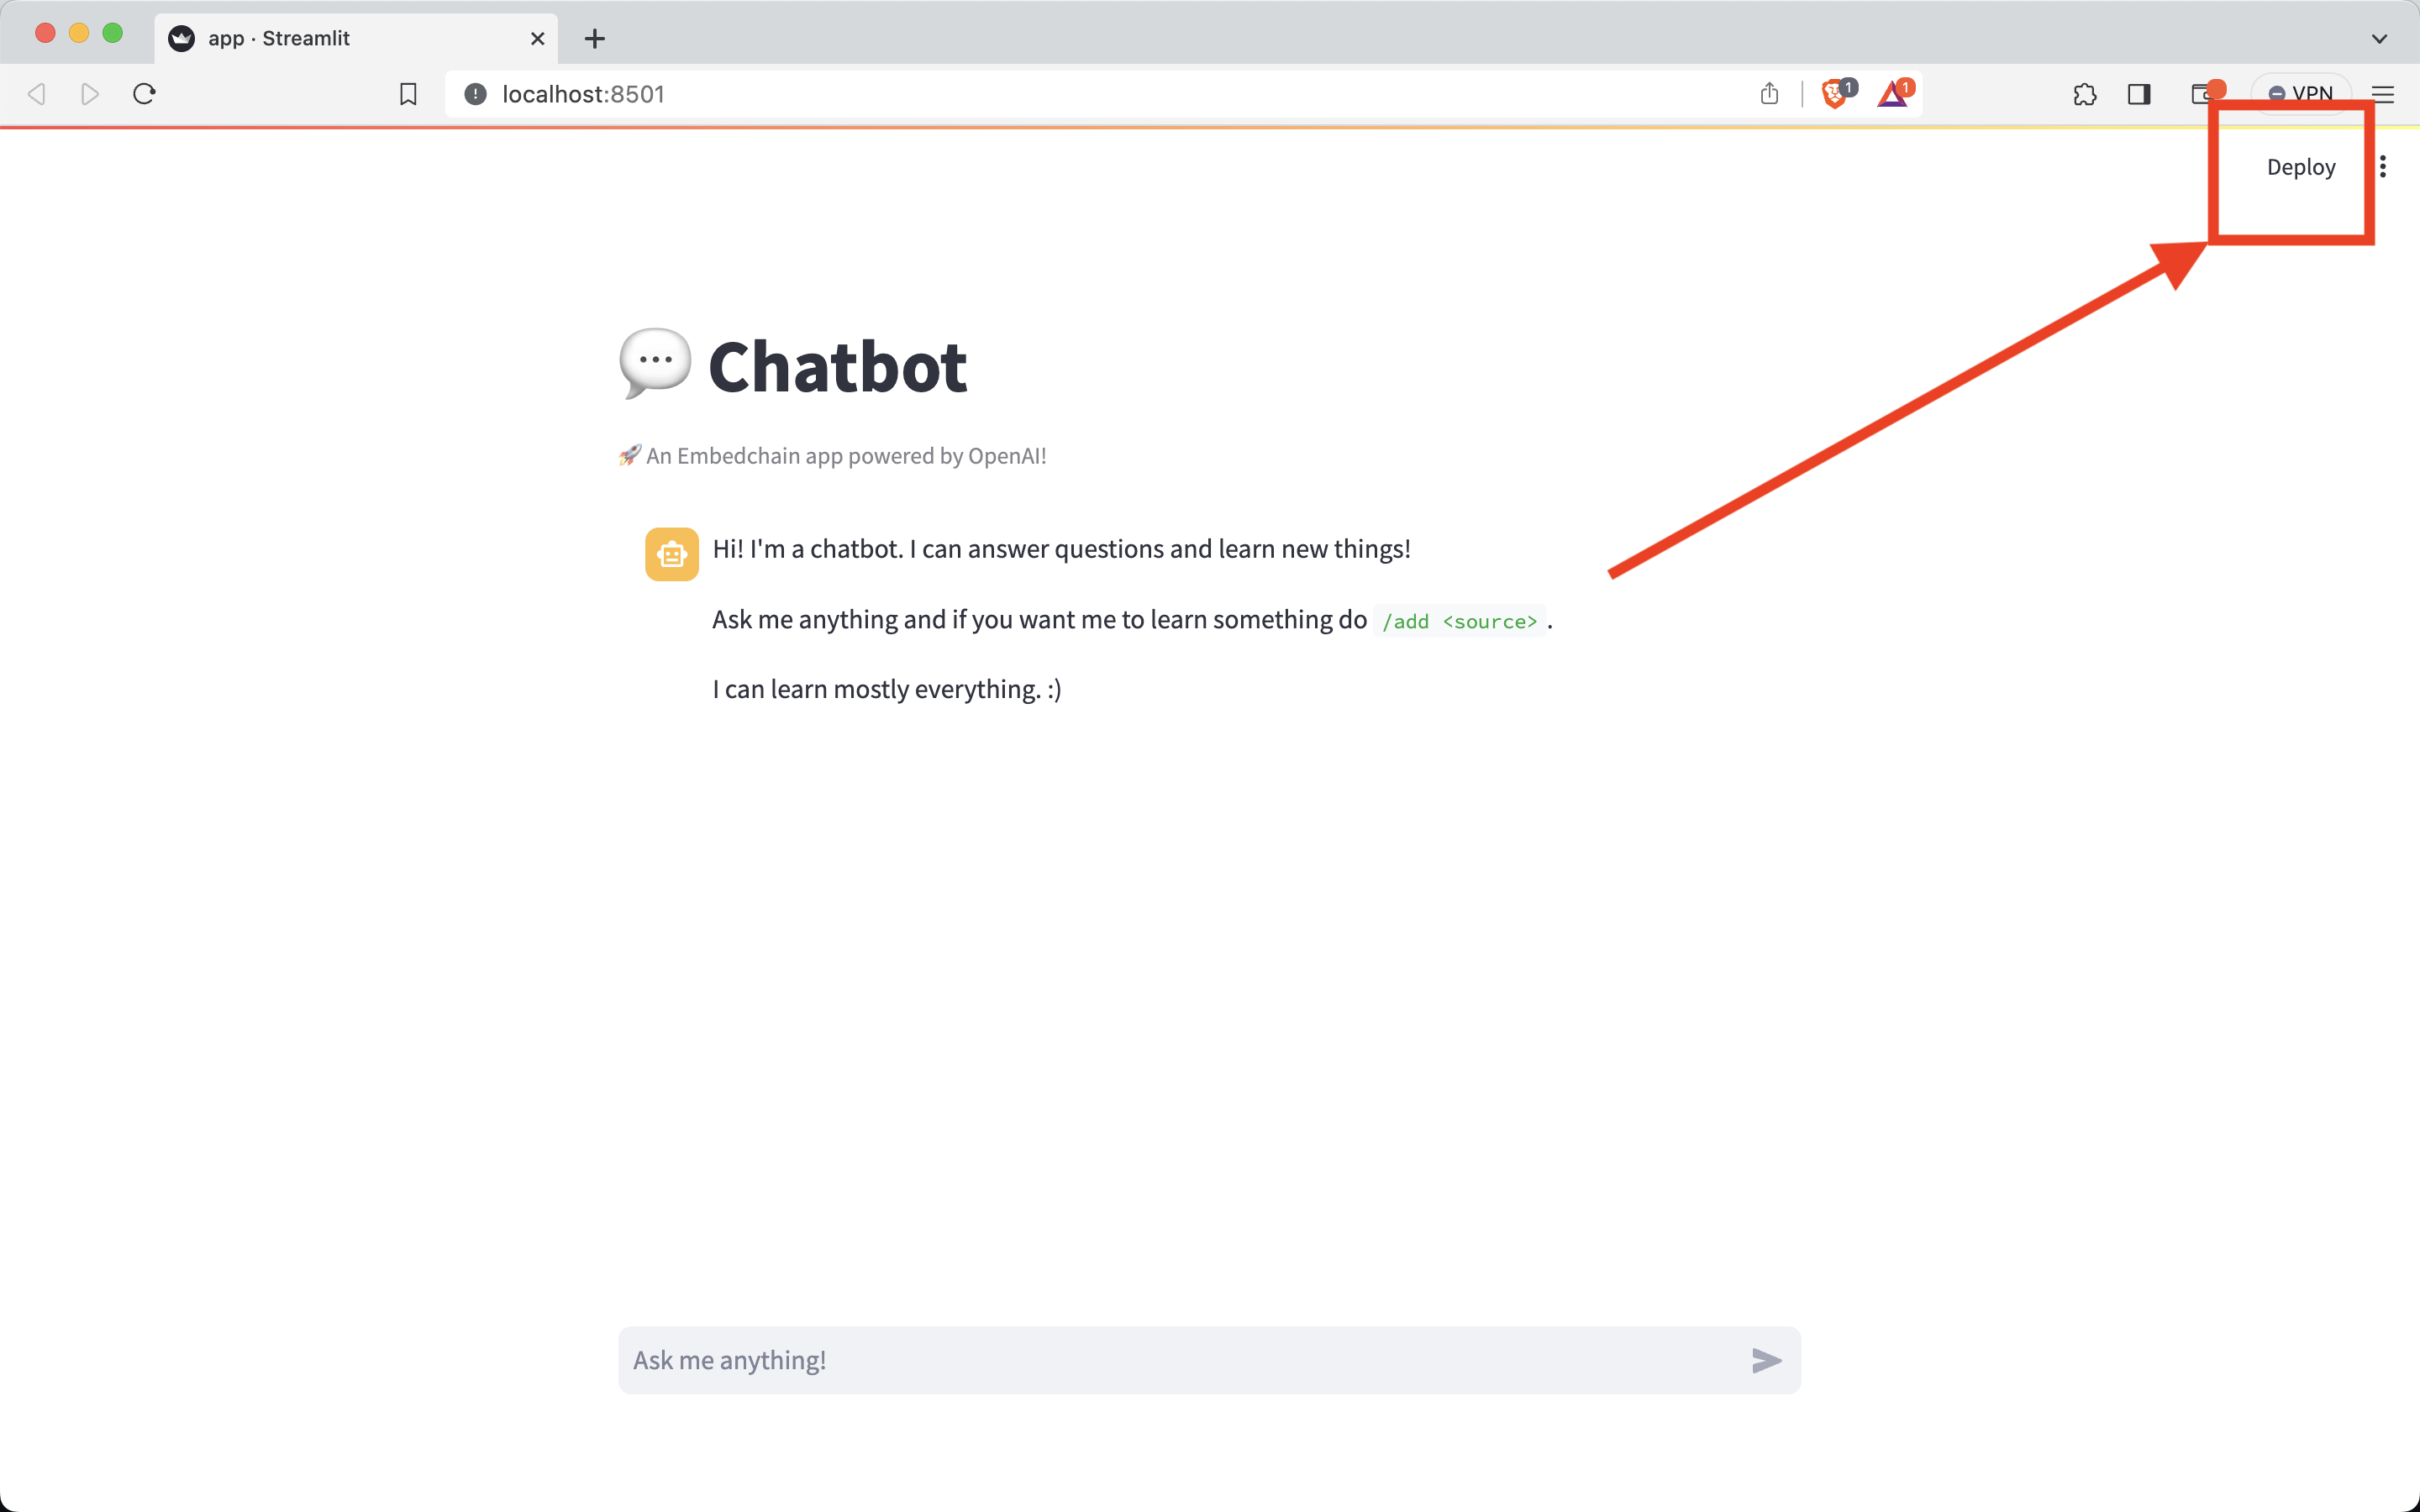
|
||||
|
||||
Use the deploy button from the streamlit website to deploy your app.
|
||||
|
||||
You can refer this [guide](https://docs.streamlit.io/streamlit-community-cloud/deploy-your-app) if you run into any problems.
|
||||
|
||||
## Seeking help?
|
||||
|
||||
If you run into issues with deployment, please feel free to reach out to us via any of the following methods:
|
||||
|
||||
<Snippet file="get-help.mdx" />
|
||||
@@ -0,0 +1,98 @@
|
||||
---
|
||||
title: 'Development'
|
||||
description: 'Learn how to preview changes locally'
|
||||
---
|
||||
|
||||
<Info>
|
||||
**Prerequisite** You should have installed Node.js (version 18.10.0 or
|
||||
higher).
|
||||
</Info>
|
||||
|
||||
Step 1. Install Mintlify on your OS:
|
||||
|
||||
<CodeGroup>
|
||||
|
||||
```bash npm
|
||||
npm i -g mintlify
|
||||
```
|
||||
|
||||
```bash yarn
|
||||
yarn global add mintlify
|
||||
```
|
||||
|
||||
</CodeGroup>
|
||||
|
||||
Step 2. Go to the docs are located (where you can find `mint.json`) and run the following command:
|
||||
|
||||
```bash
|
||||
mintlify dev
|
||||
```
|
||||
|
||||
The documentation website is now available at `http://localhost:3000`.
|
||||
|
||||
### Custom Ports
|
||||
|
||||
Mintlify uses port 3000 by default. You can use the `--port` flag to customize the port Mintlify runs on. For example, use this command to run in port 3333:
|
||||
|
||||
```bash
|
||||
mintlify dev --port 3333
|
||||
```
|
||||
|
||||
You will see an error like this if you try to run Mintlify in a port that's already taken:
|
||||
|
||||
```md
|
||||
Error: listen EADDRINUSE: address already in use :::3000
|
||||
```
|
||||
|
||||
## Mintlify Versions
|
||||
|
||||
Each CLI is linked to a specific version of Mintlify. Please update the CLI if your local website looks different than production.
|
||||
|
||||
<CodeGroup>
|
||||
|
||||
```bash npm
|
||||
npm i -g mintlify@latest
|
||||
```
|
||||
|
||||
```bash yarn
|
||||
yarn global upgrade mintlify
|
||||
```
|
||||
|
||||
</CodeGroup>
|
||||
|
||||
## Deployment
|
||||
|
||||
<Tip>
|
||||
Unlimited editors available under the [Startup
|
||||
Plan](https://mintlify.com/pricing)
|
||||
</Tip>
|
||||
|
||||
You should see the following if the deploy successfully went through:
|
||||
|
||||
<Frame>
|
||||
<img src="/images/checks-passed.png" style={{ borderRadius: '0.5rem' }} />
|
||||
</Frame>
|
||||
|
||||
## Troubleshooting
|
||||
|
||||
Here's how to solve some common problems when working with the CLI.
|
||||
|
||||
<AccordionGroup>
|
||||
<Accordion title="Mintlify is not loading">
|
||||
Update to Node v18. Run `mintlify install` and try again.
|
||||
</Accordion>
|
||||
<Accordion title="No such file or directory on Windows">
|
||||
Go to the `C:/Users/Username/.mintlify/` directory and remove the `mint`
|
||||
folder. Then Open the Git Bash in this location and run `git clone
|
||||
https://github.com/mintlify/mint.git`.
|
||||
|
||||
Repeat step 3.
|
||||
|
||||
</Accordion>
|
||||
<Accordion title="Getting an unknown error">
|
||||
Try navigating to the root of your device and delete the ~/.mintlify folder.
|
||||
Then run `mintlify dev` again.
|
||||
</Accordion>
|
||||
</AccordionGroup>
|
||||
|
||||
Curious about what changed in a CLI version? [Check out the CLI changelog.](/changelog/command-line)
|
||||
Some files were not shown because too many files have changed in this diff Show More
Reference in New Issue
Block a user